
.vibecode.run URL? This guide walks you through connecting a custom domain to your deployed Vibecode web app.
Before You Start
You’ll need:- A deployed Vibecode web app (see Deploying Your Web App if you haven’t deployed yet)
- A domain you own with access to its DNS settings (e.g. via Cloudflare, GoDaddy, Namecheap, etc.)
Step 1: Open the Domain Tab
In your deployment dashboard, click the Domain tab.
Step 2: Add Your Domain
Click the Add Custom Domain button. You’ll see a modal with two options.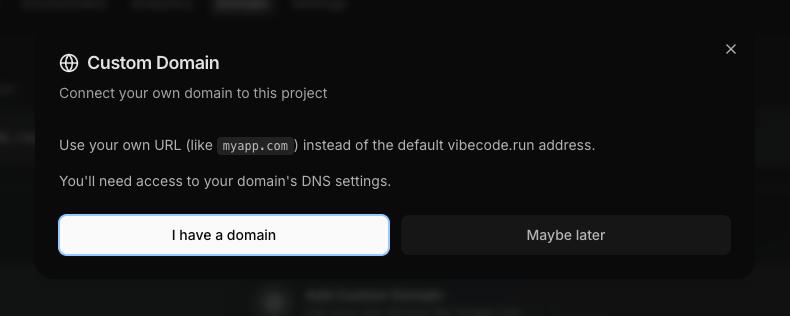
Step 3: Enter Your Domain
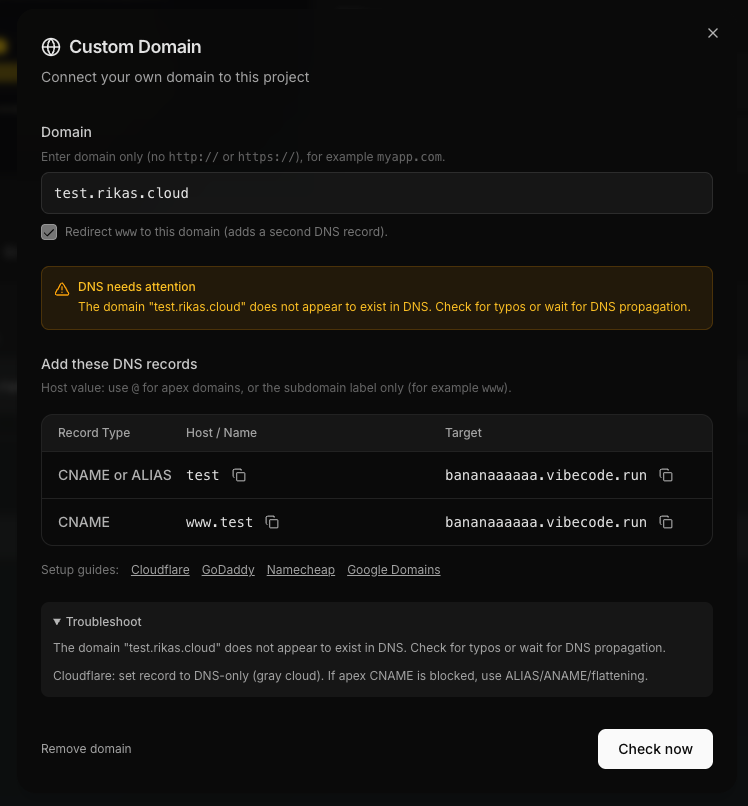
Type in your domain name, just the domain, with nohttp:// or https:// prefix.
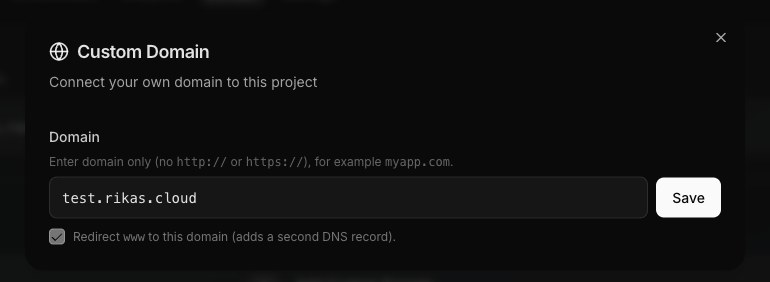
- Enter your domain (e.g.
example.com) - Optionally check “Redirect www to this domain” if you want
www.example.comto redirect to your apex domain - Click Save
Step 4: Configure DNS Records
After saving, Vibecode shows you the DNS records you need to add at your domain provider. The exact records depend on whether you’re connecting an apex domain or a subdomain.- Apex domain (e.g. example.com)
- Subdomain (e.g. app.example.com)
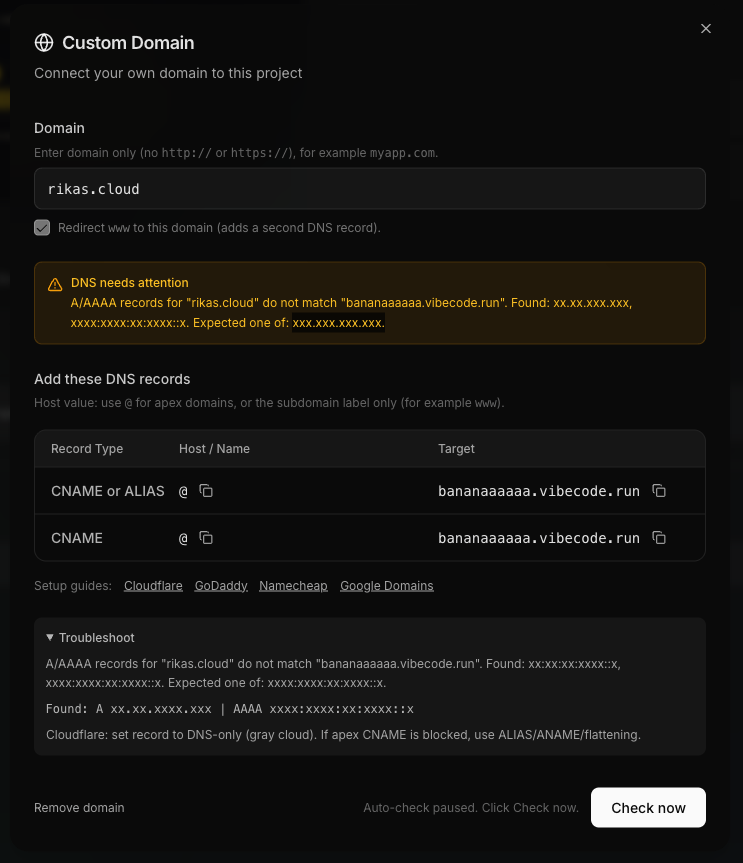
| Type | Name | Target |
|---|---|---|
| CNAME or ALIAS | @ | <your-project>.vibecode.run |
| CNAME | www | <your-project>.vibecode.run |
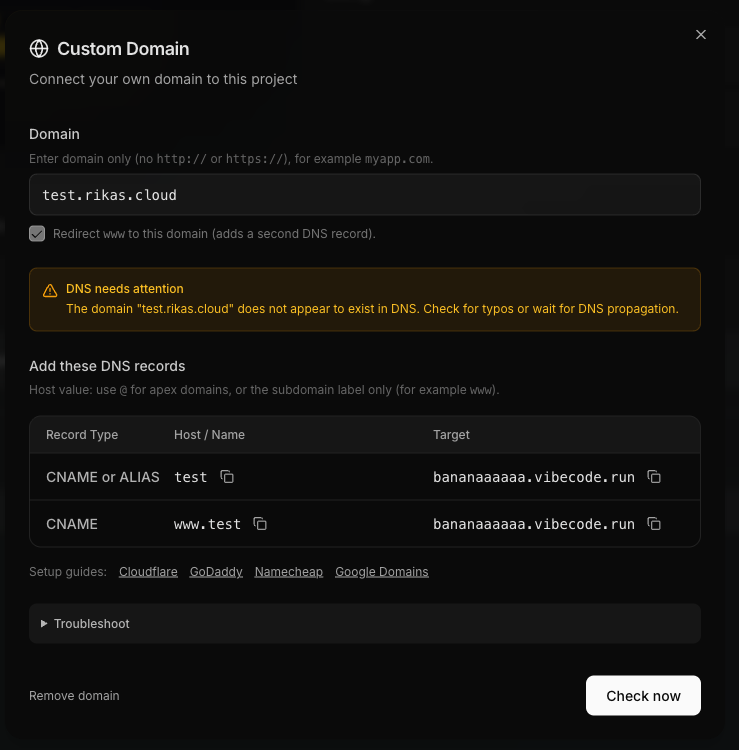
The
www record only appears if you enabled the www redirect in the previous step.Step 5: Add Records at Your DNS Provider
Go to your DNS provider’s dashboard and add the records from the previous step. Here are direct links to guides for popular providers:Cloudflare
Create DNS records on Cloudflare
GoDaddy
Add a CNAME record on GoDaddy
Namecheap
Create a CNAME record on Namecheap
Google Domains
Manage DNS records on Google Domains
Hostinger
Manage CNAME records on Hostinger
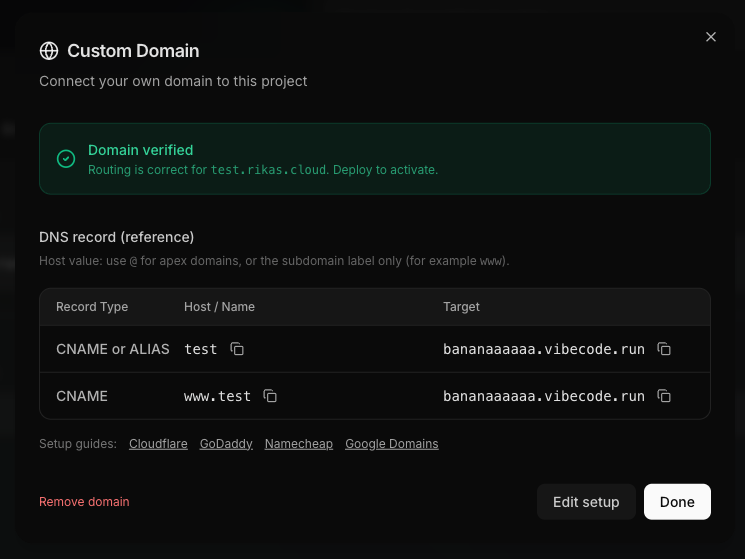
Step 6: Verify Your Domain
Once you’ve added the DNS records, go back to the Domain tab in Vibecode and click Check now.DNS changes can take a while to propagate. If verification fails, wait a bit and try again.
Troubleshooting
Cloudflare proxy conflict
Cloudflare proxy conflict
If you’re using Cloudflare, make sure the DNS record is set to DNS-only mode rather than Proxied.
A or AAAA record conflict
A or AAAA record conflict
If you already have A or AAAA records pointing your domain somewhere else, they can conflict with the CNAME record. Remove the old records first.
DNS propagation delay
DNS propagation delay
DNS changes do not take effect instantly. Wait a bit and try the verification again.
Need to start over?
Need to start over?
You can click Remove domain in the Domain tab to disconnect your custom domain and start over.
Still stuck? Reach out via live support chat in the app, or join our Discord community for help.