
Learn how to integrate Google Sign-In with your Vibecode app using Better Auth.
Before You Start
You’ll need the following:- Google Account (for Google Cloud)
- Vibecode Account and a project with the agent and deploy available
- Database — you must have database enabled before you start
Step 1: Create a Google Cloud Project
- Go to Google Cloud Console
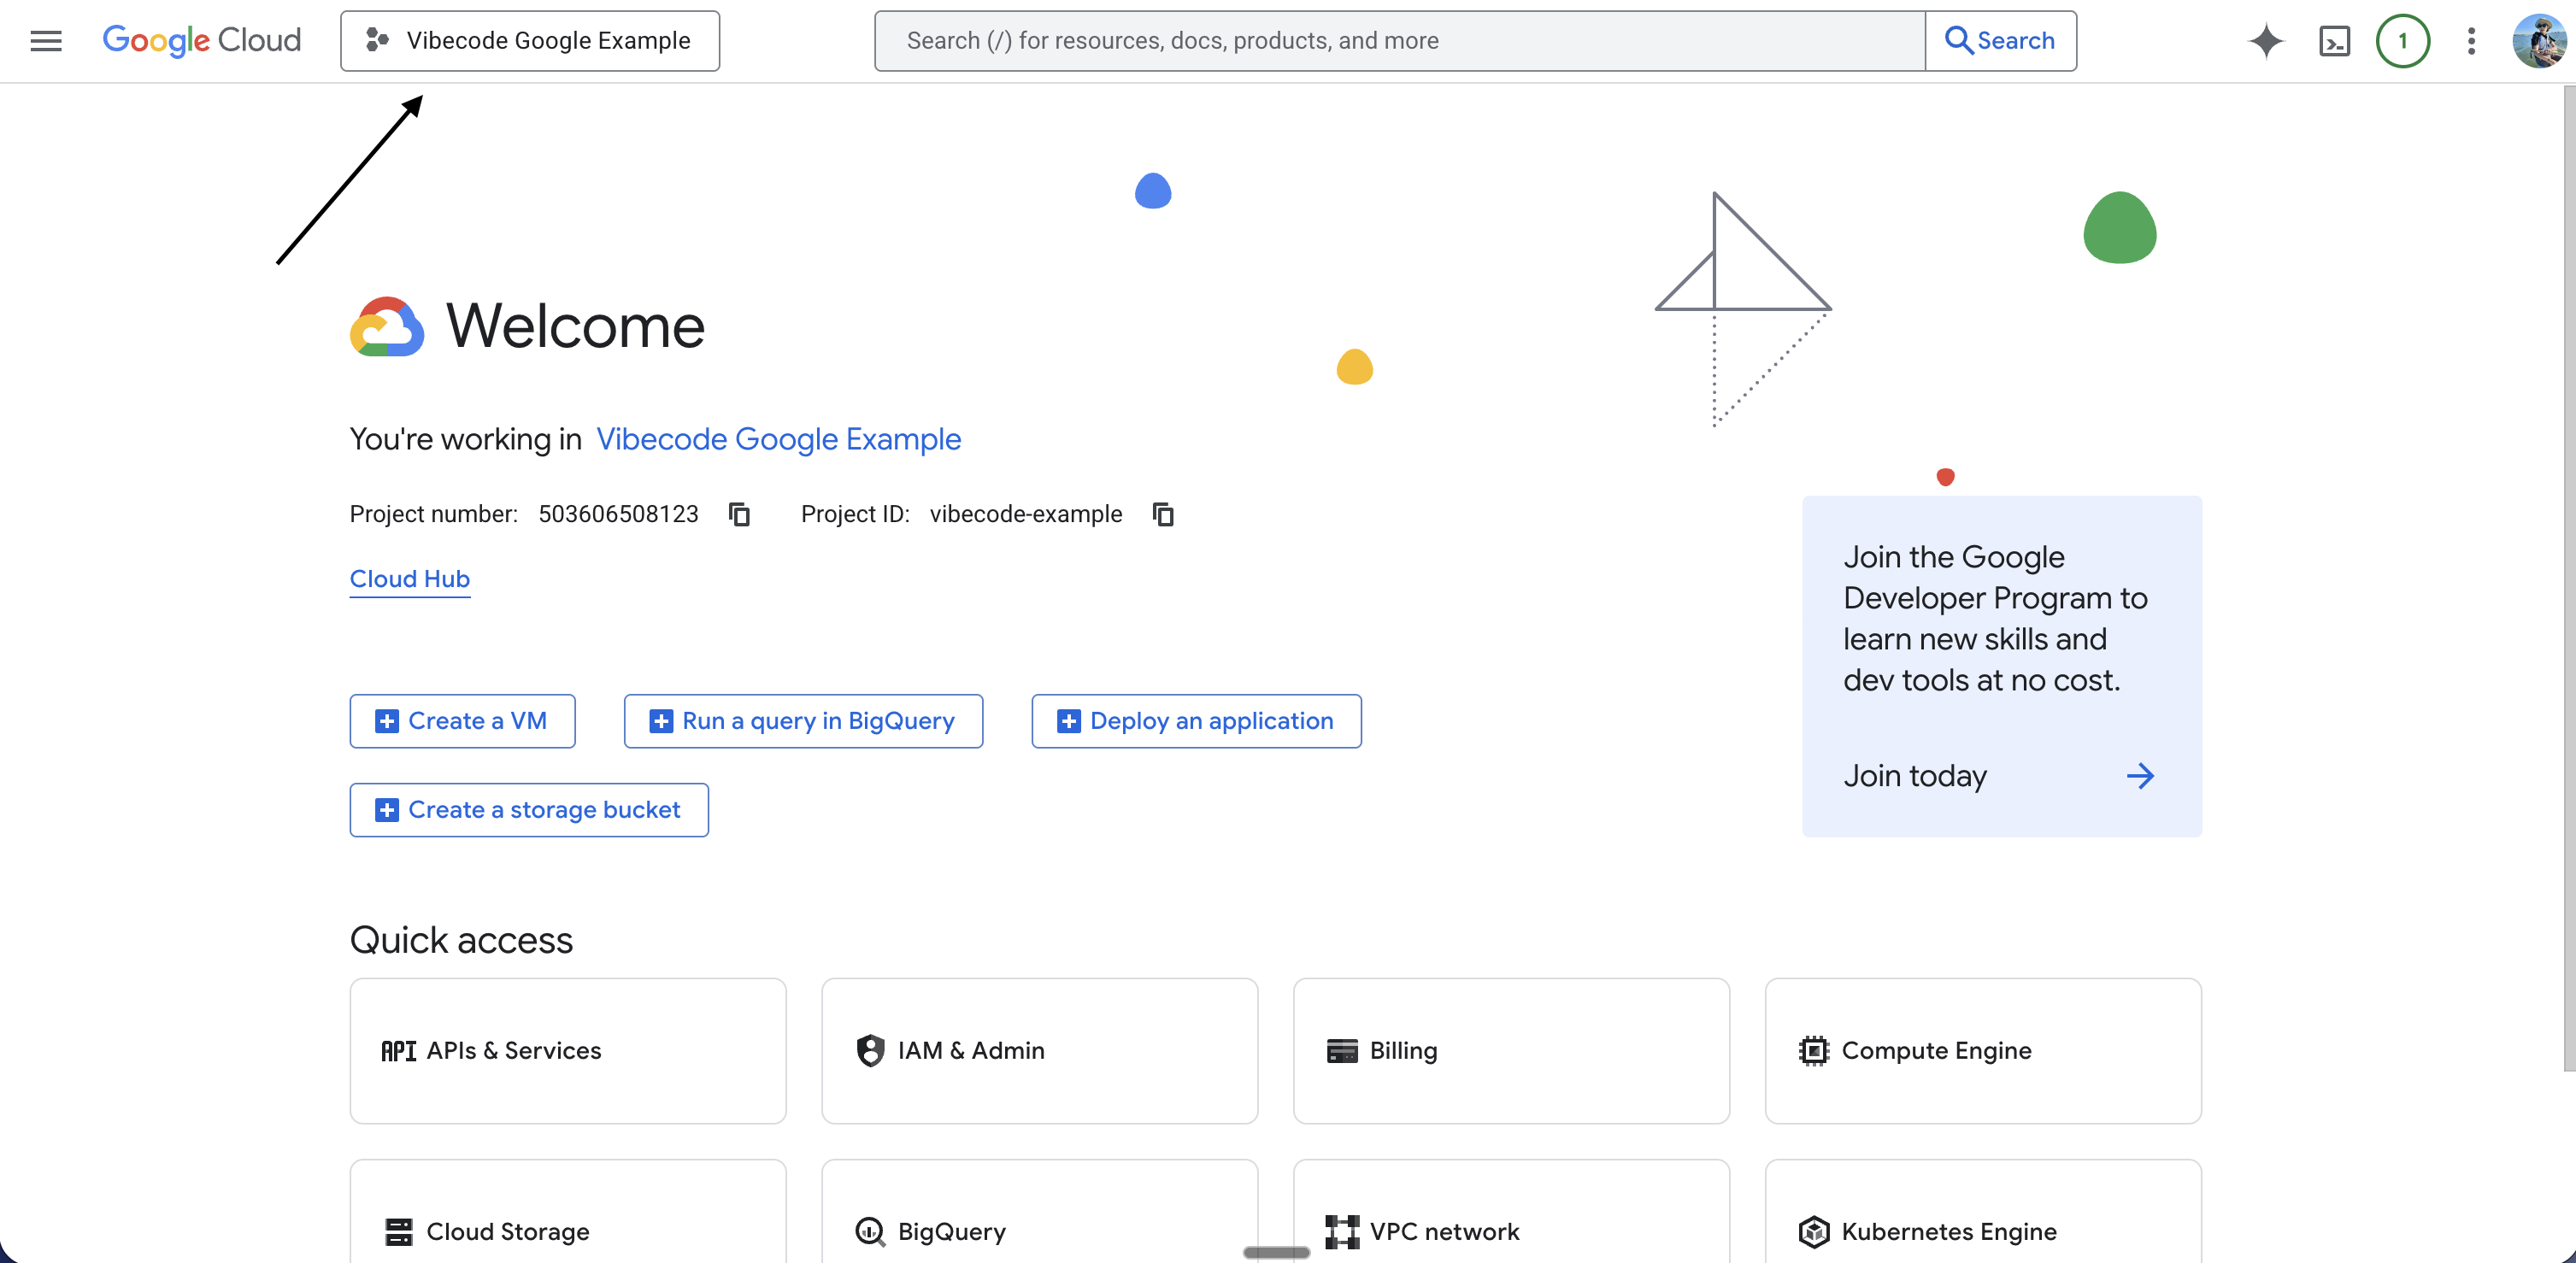
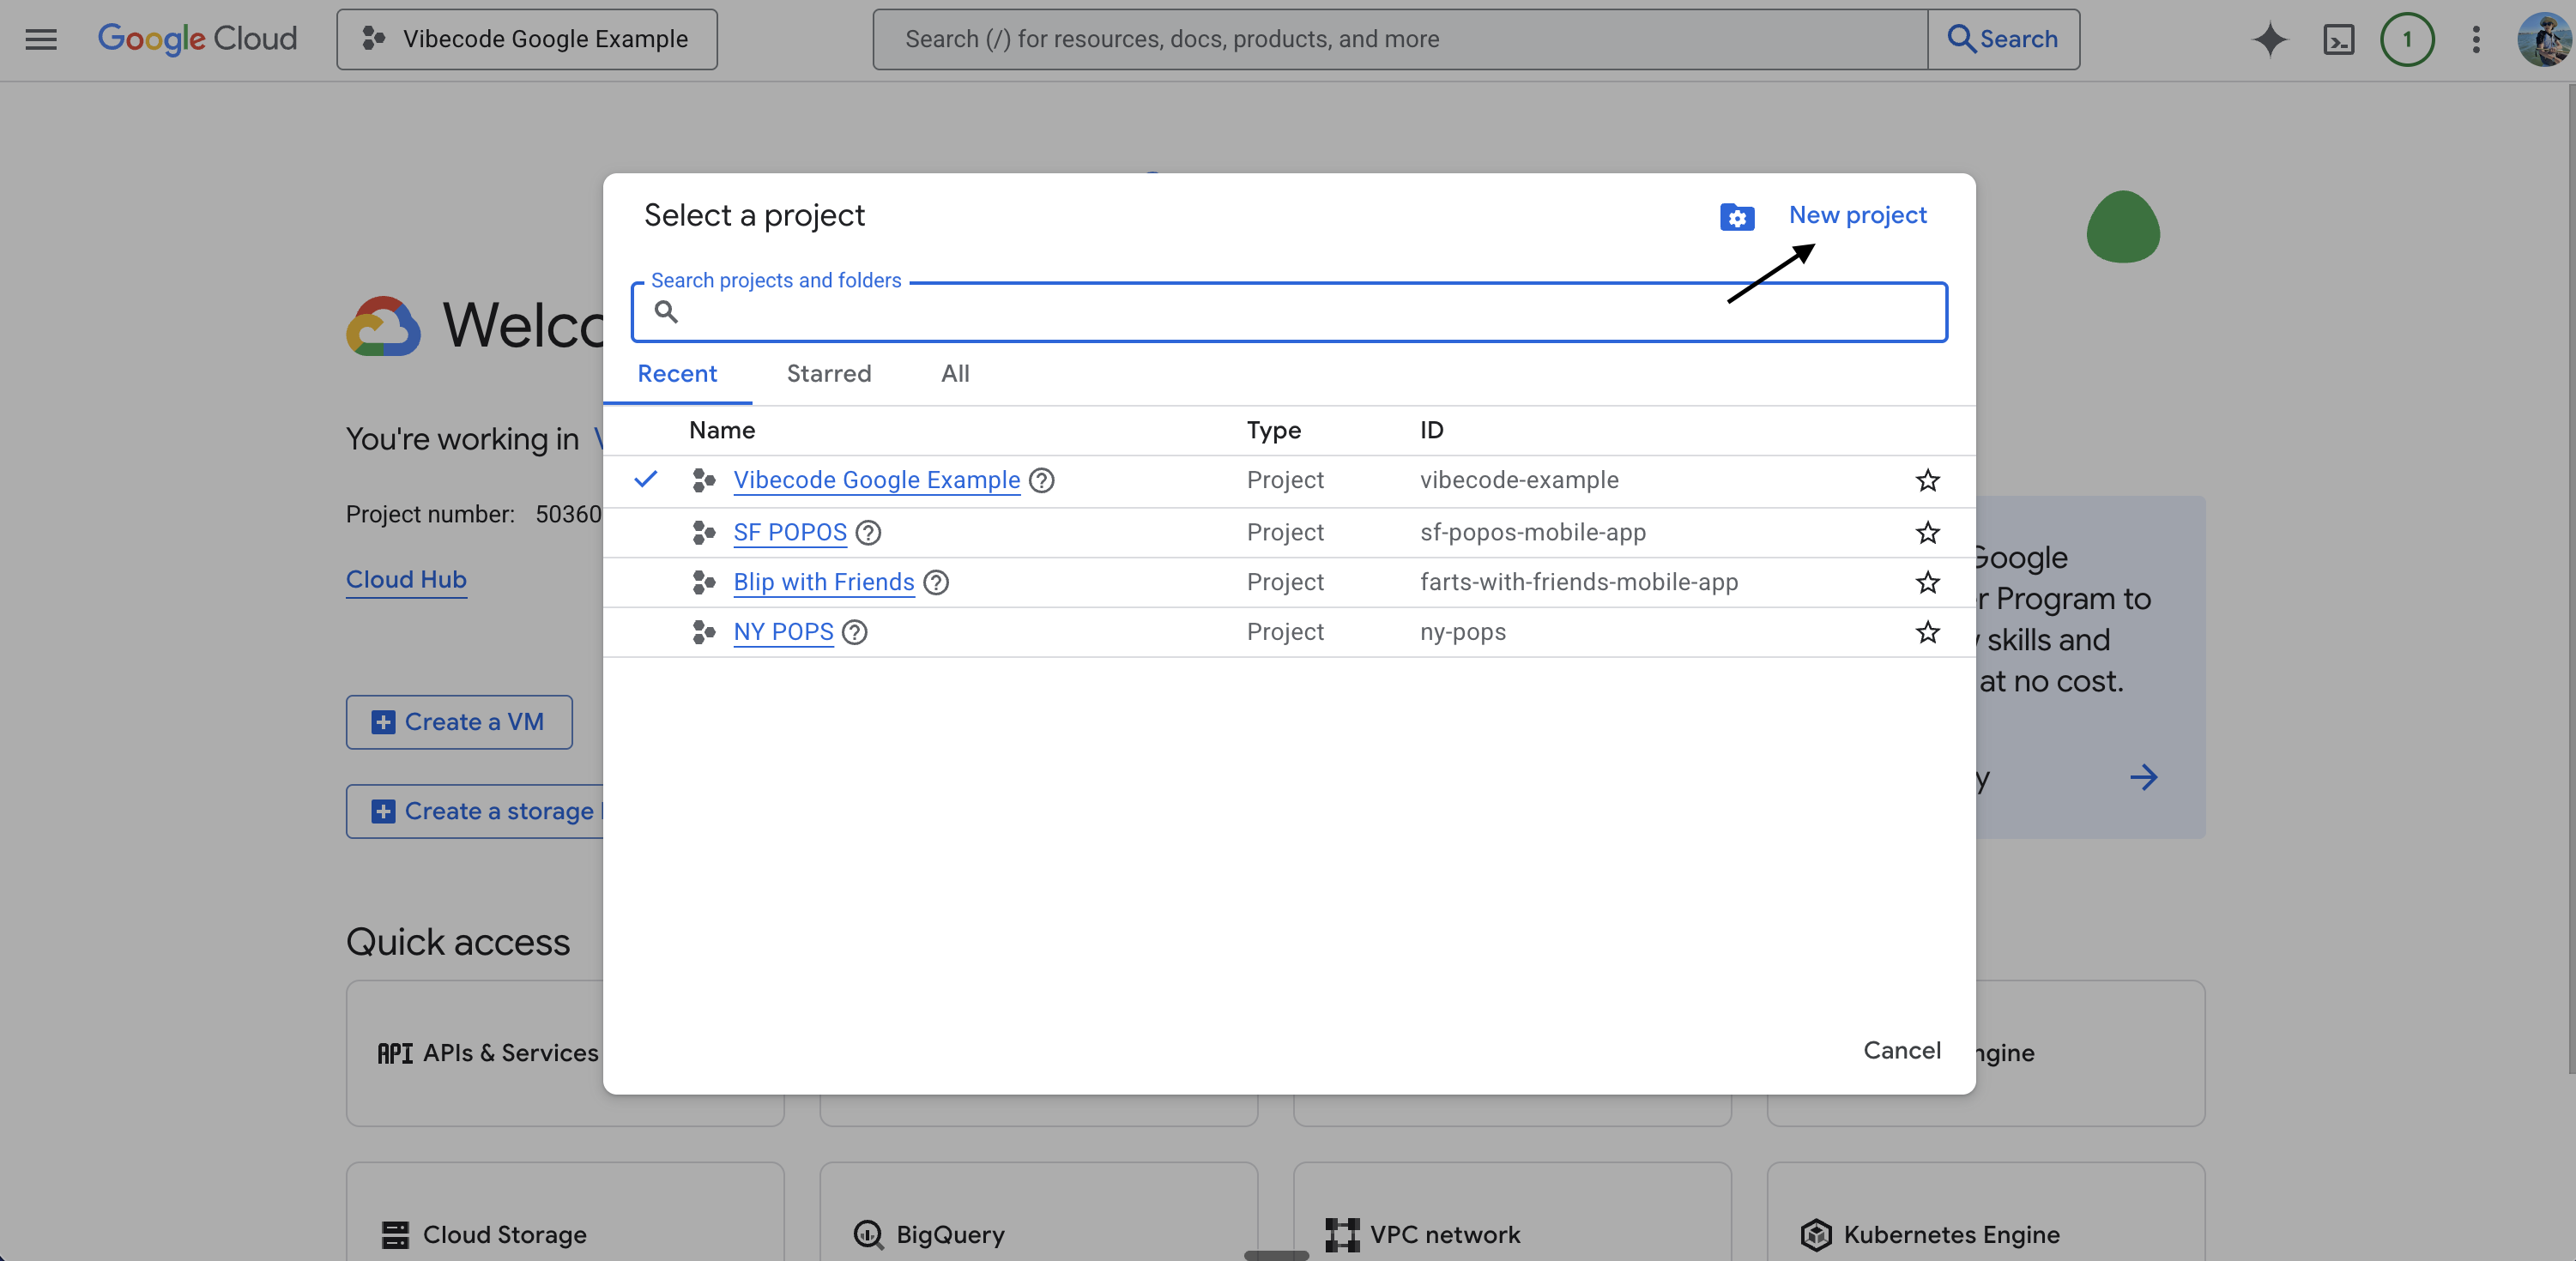
- At the top of the page, click Select a project (or the project dropdown)
- Click New project
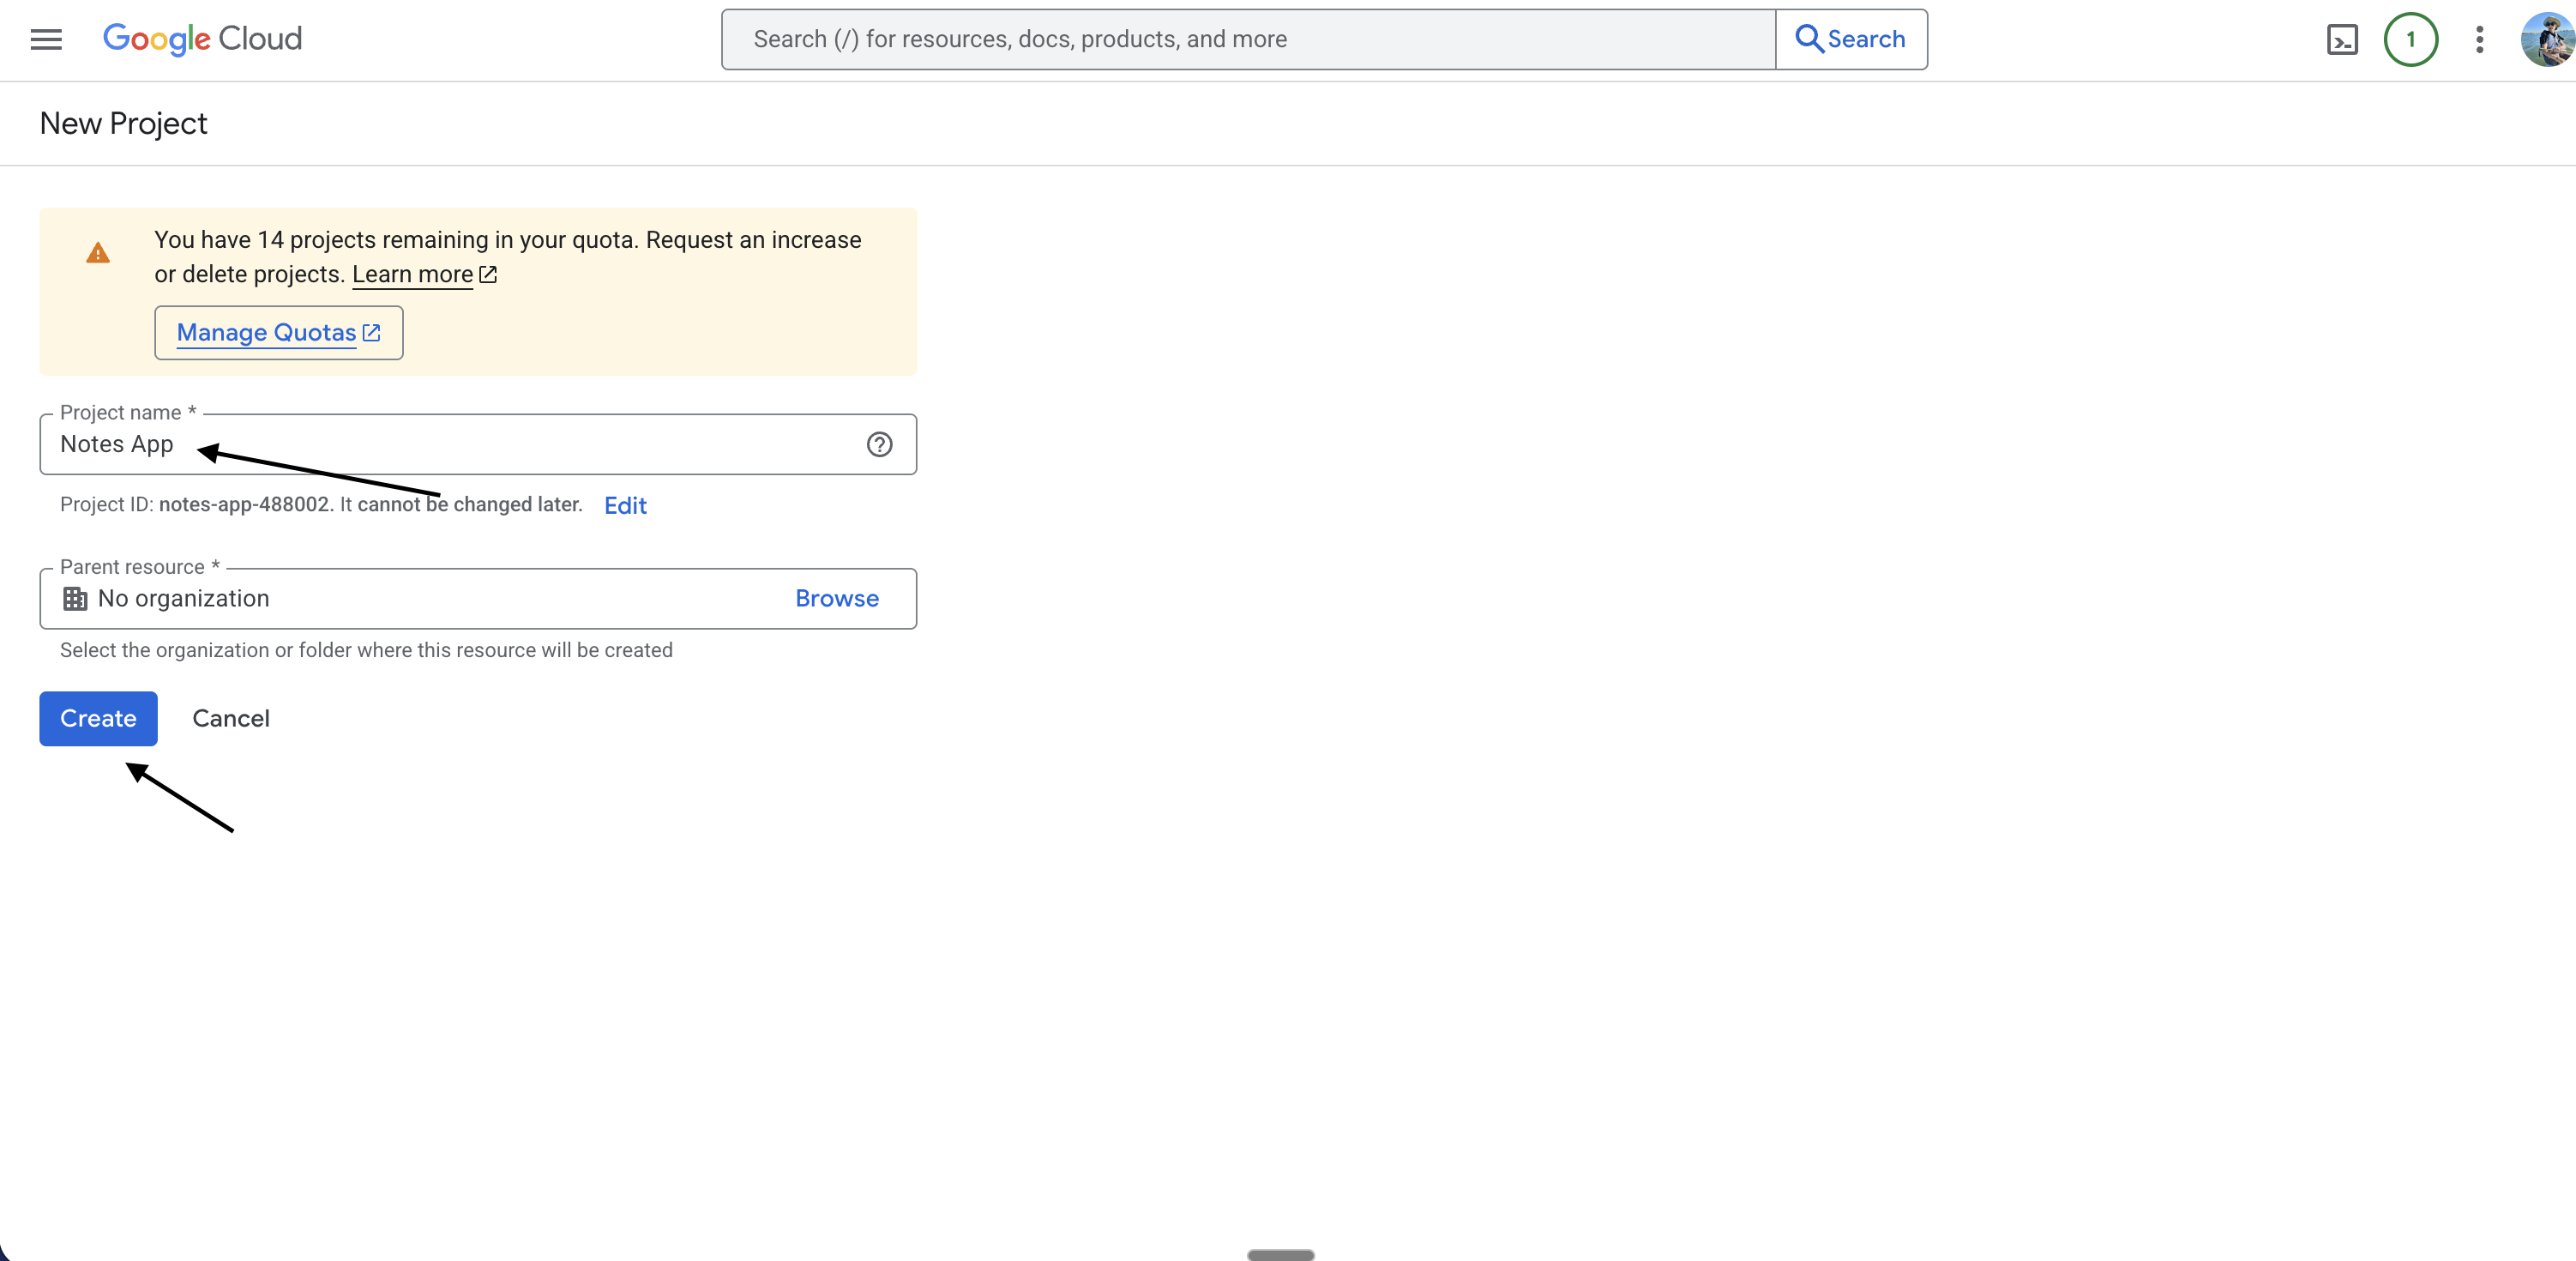
- Name your project (e.g. “My App”)
- Click Create
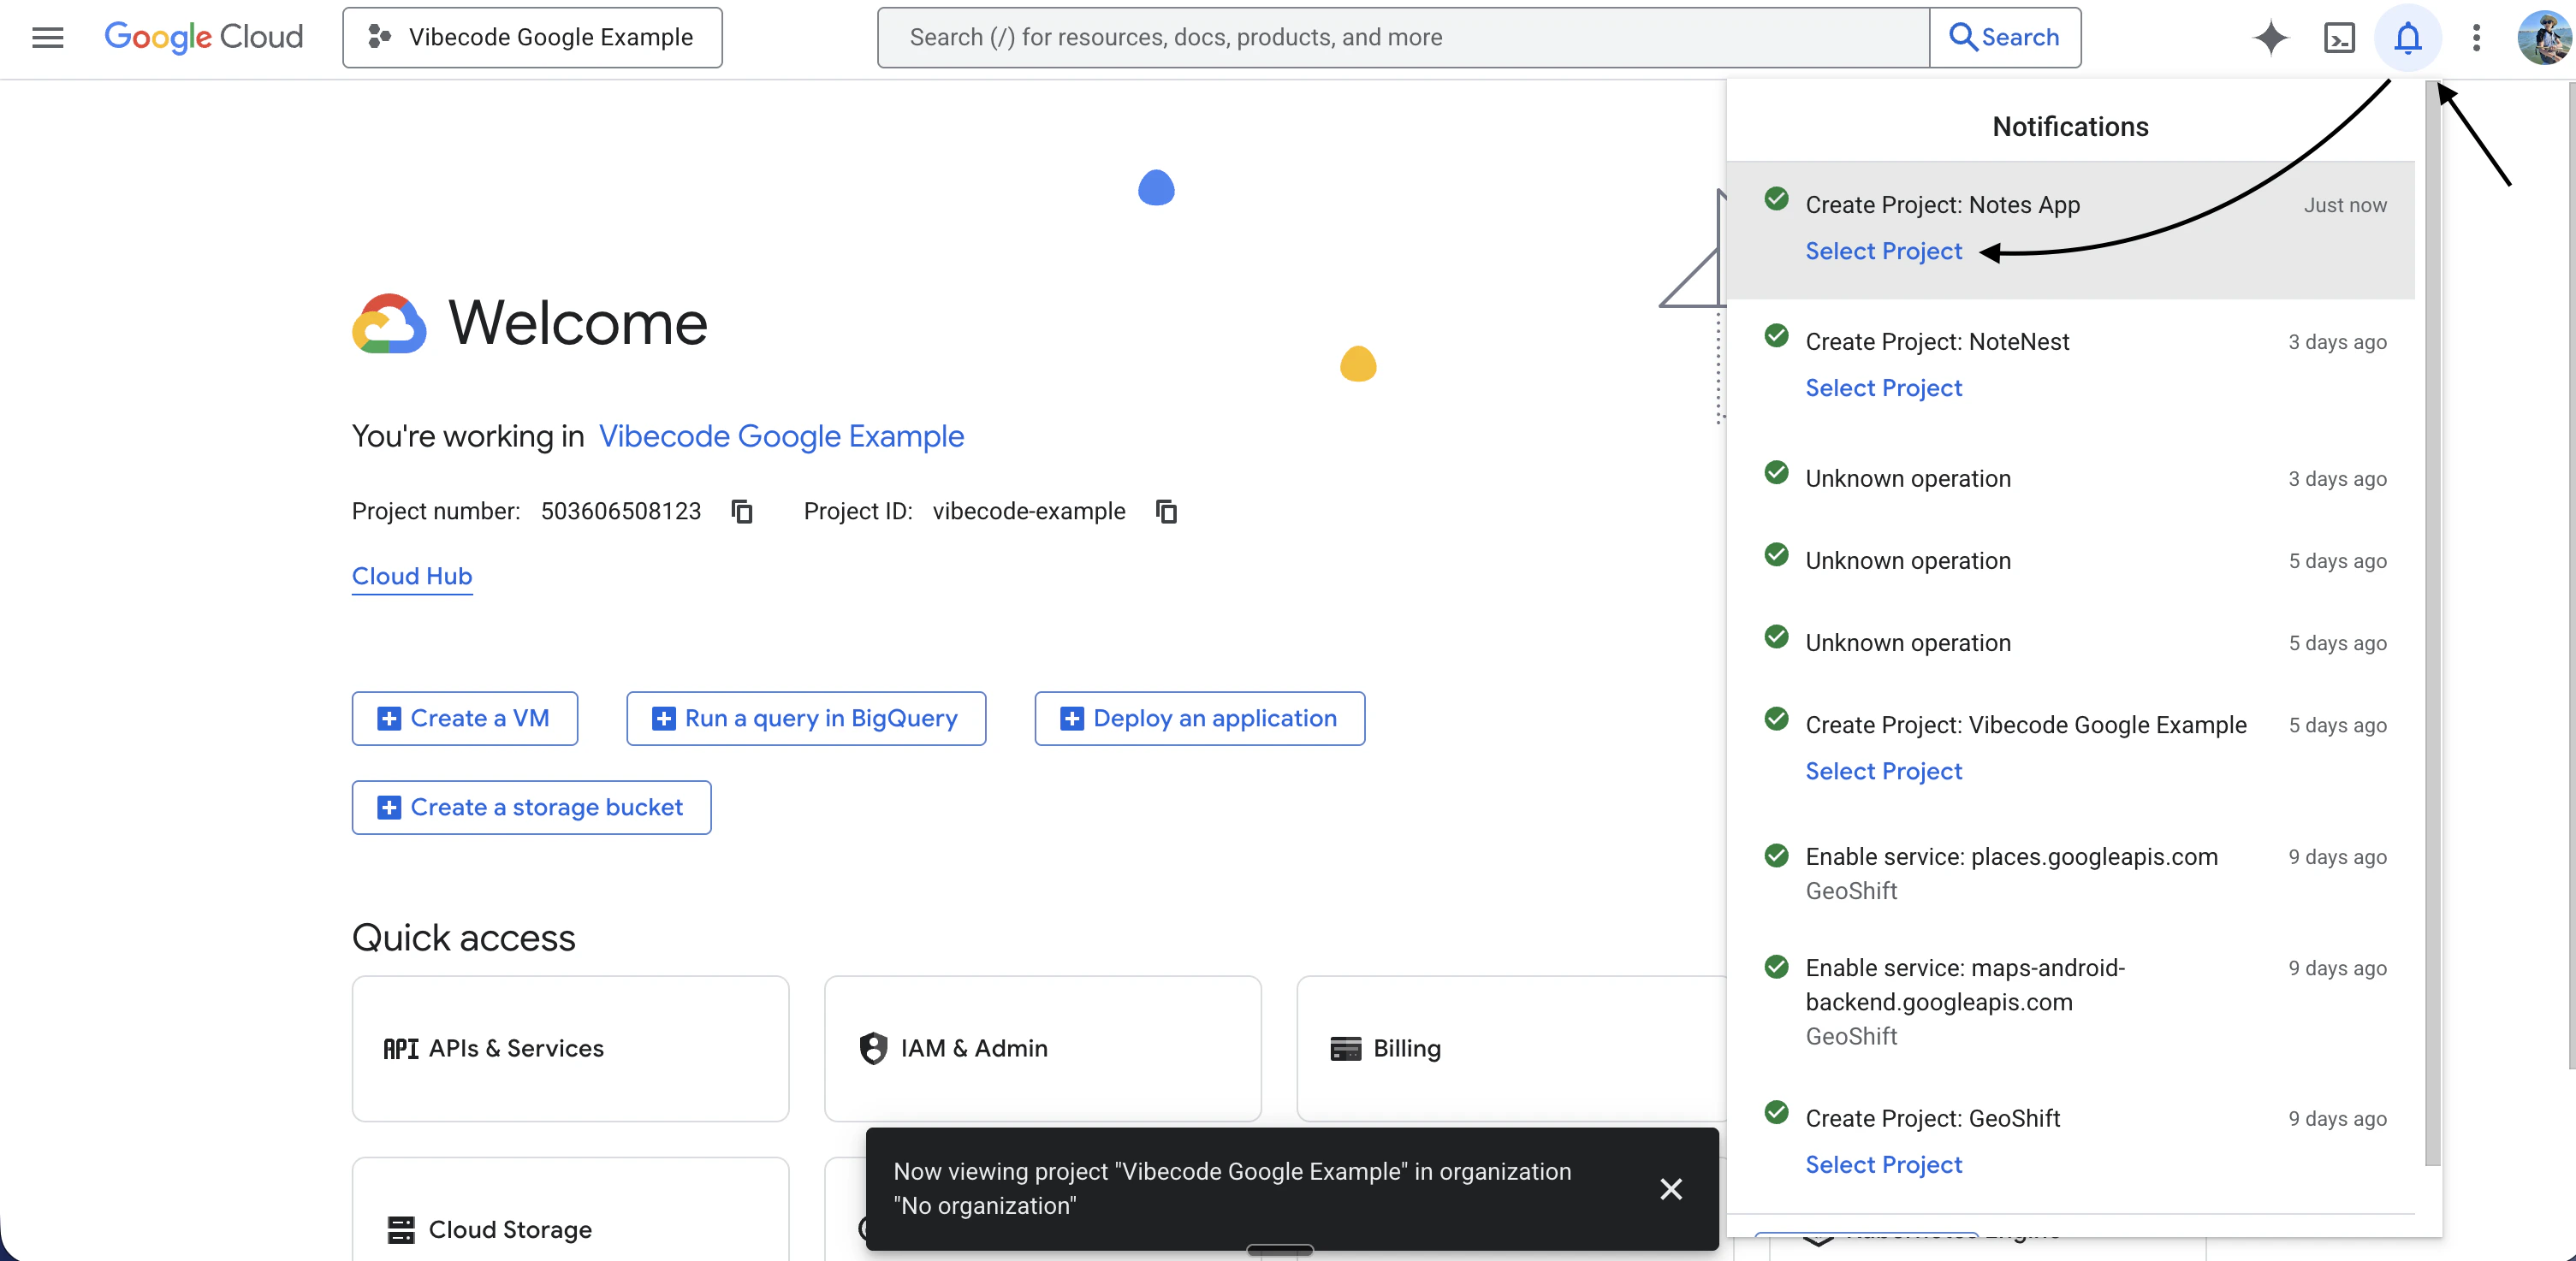
- Check your notifications (bell icon) — when the project is ready, click Select project
- You should now be viewing your project
Step 2: Go to Credentials
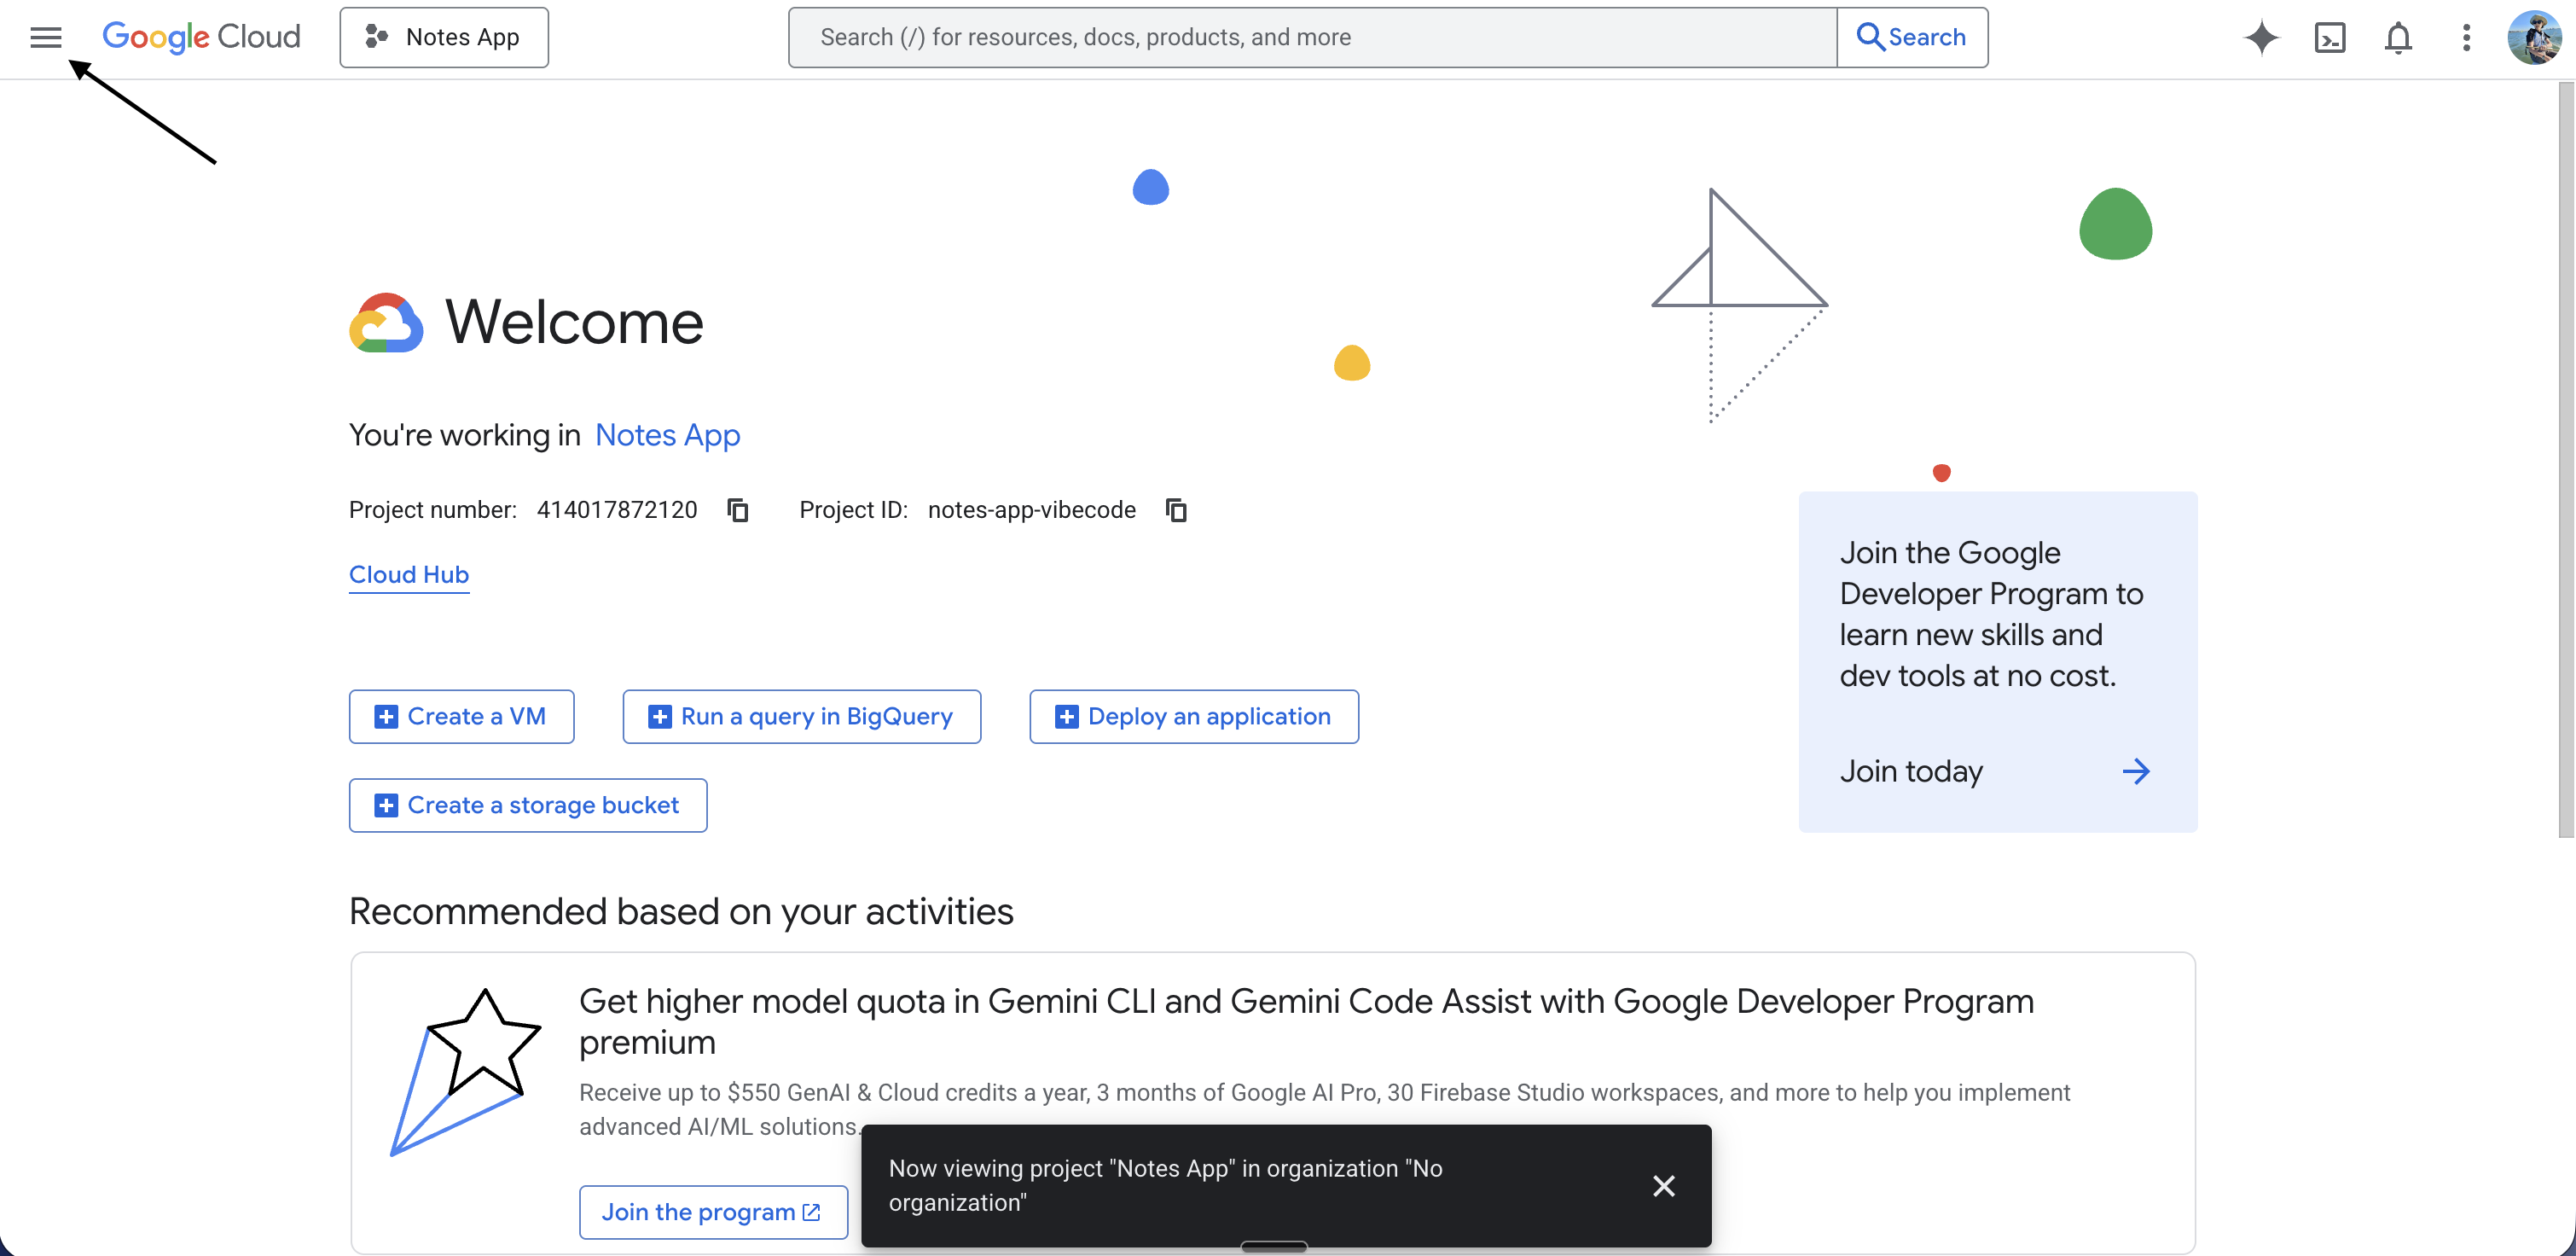
- In the top left corner, click the hamburger menu (three horizontal lines)
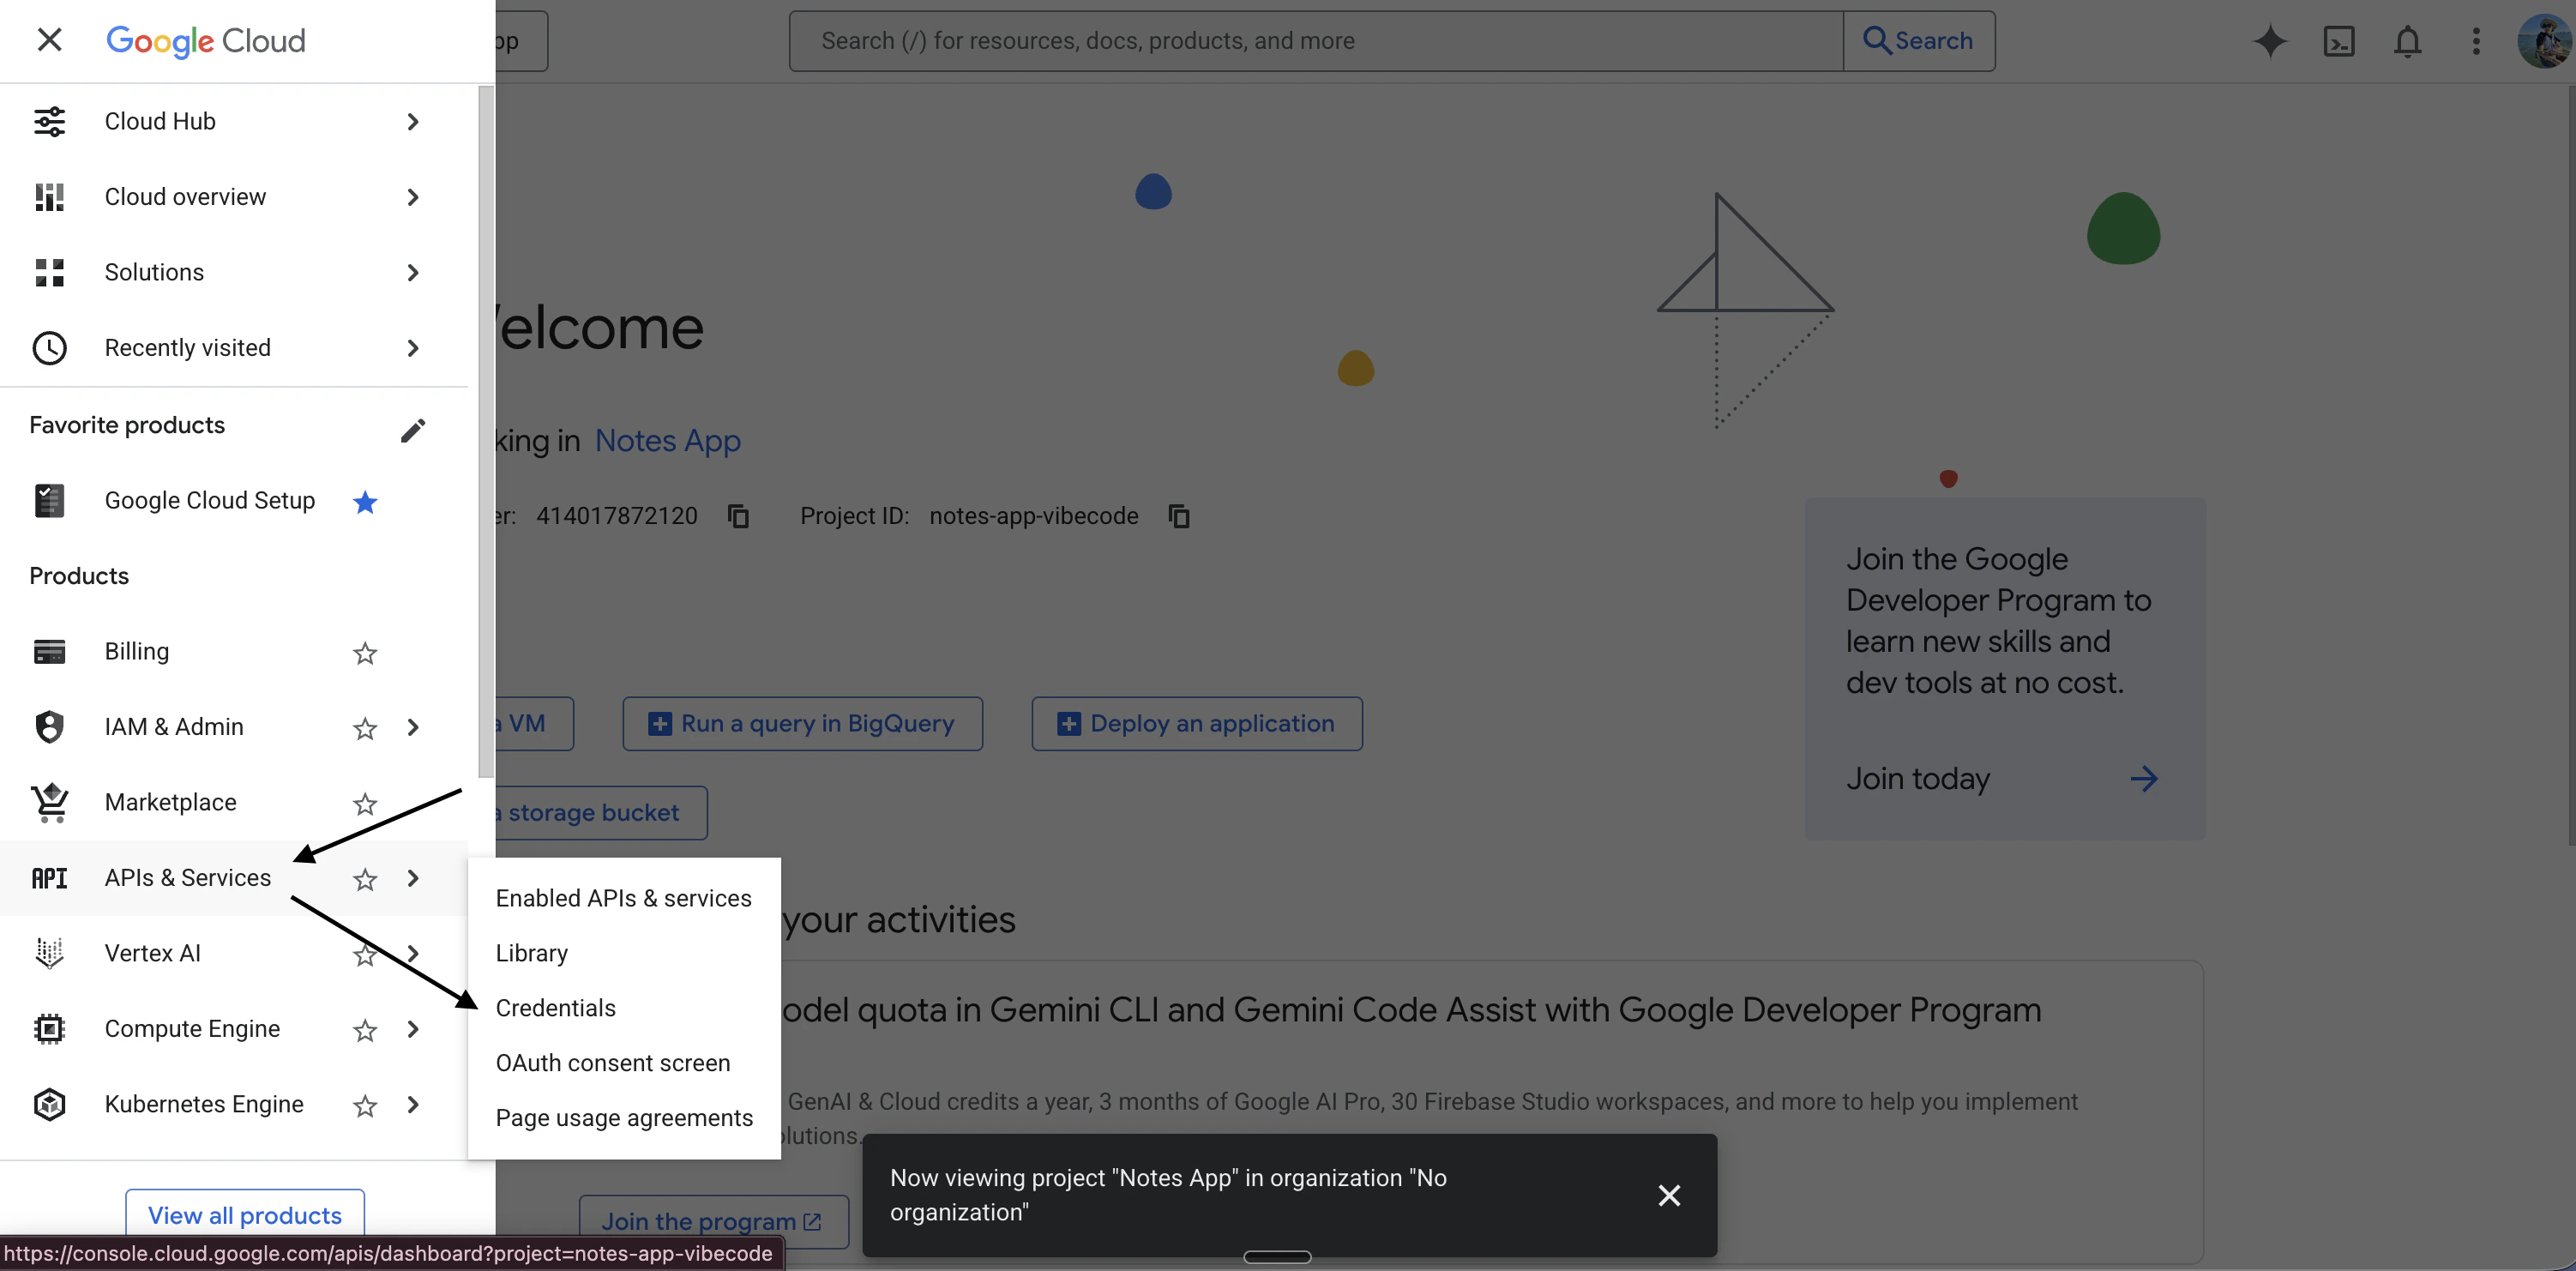
- Scroll down to APIs & Services
- Click Credentials
Step 3: Configure the OAuth Consent Screen
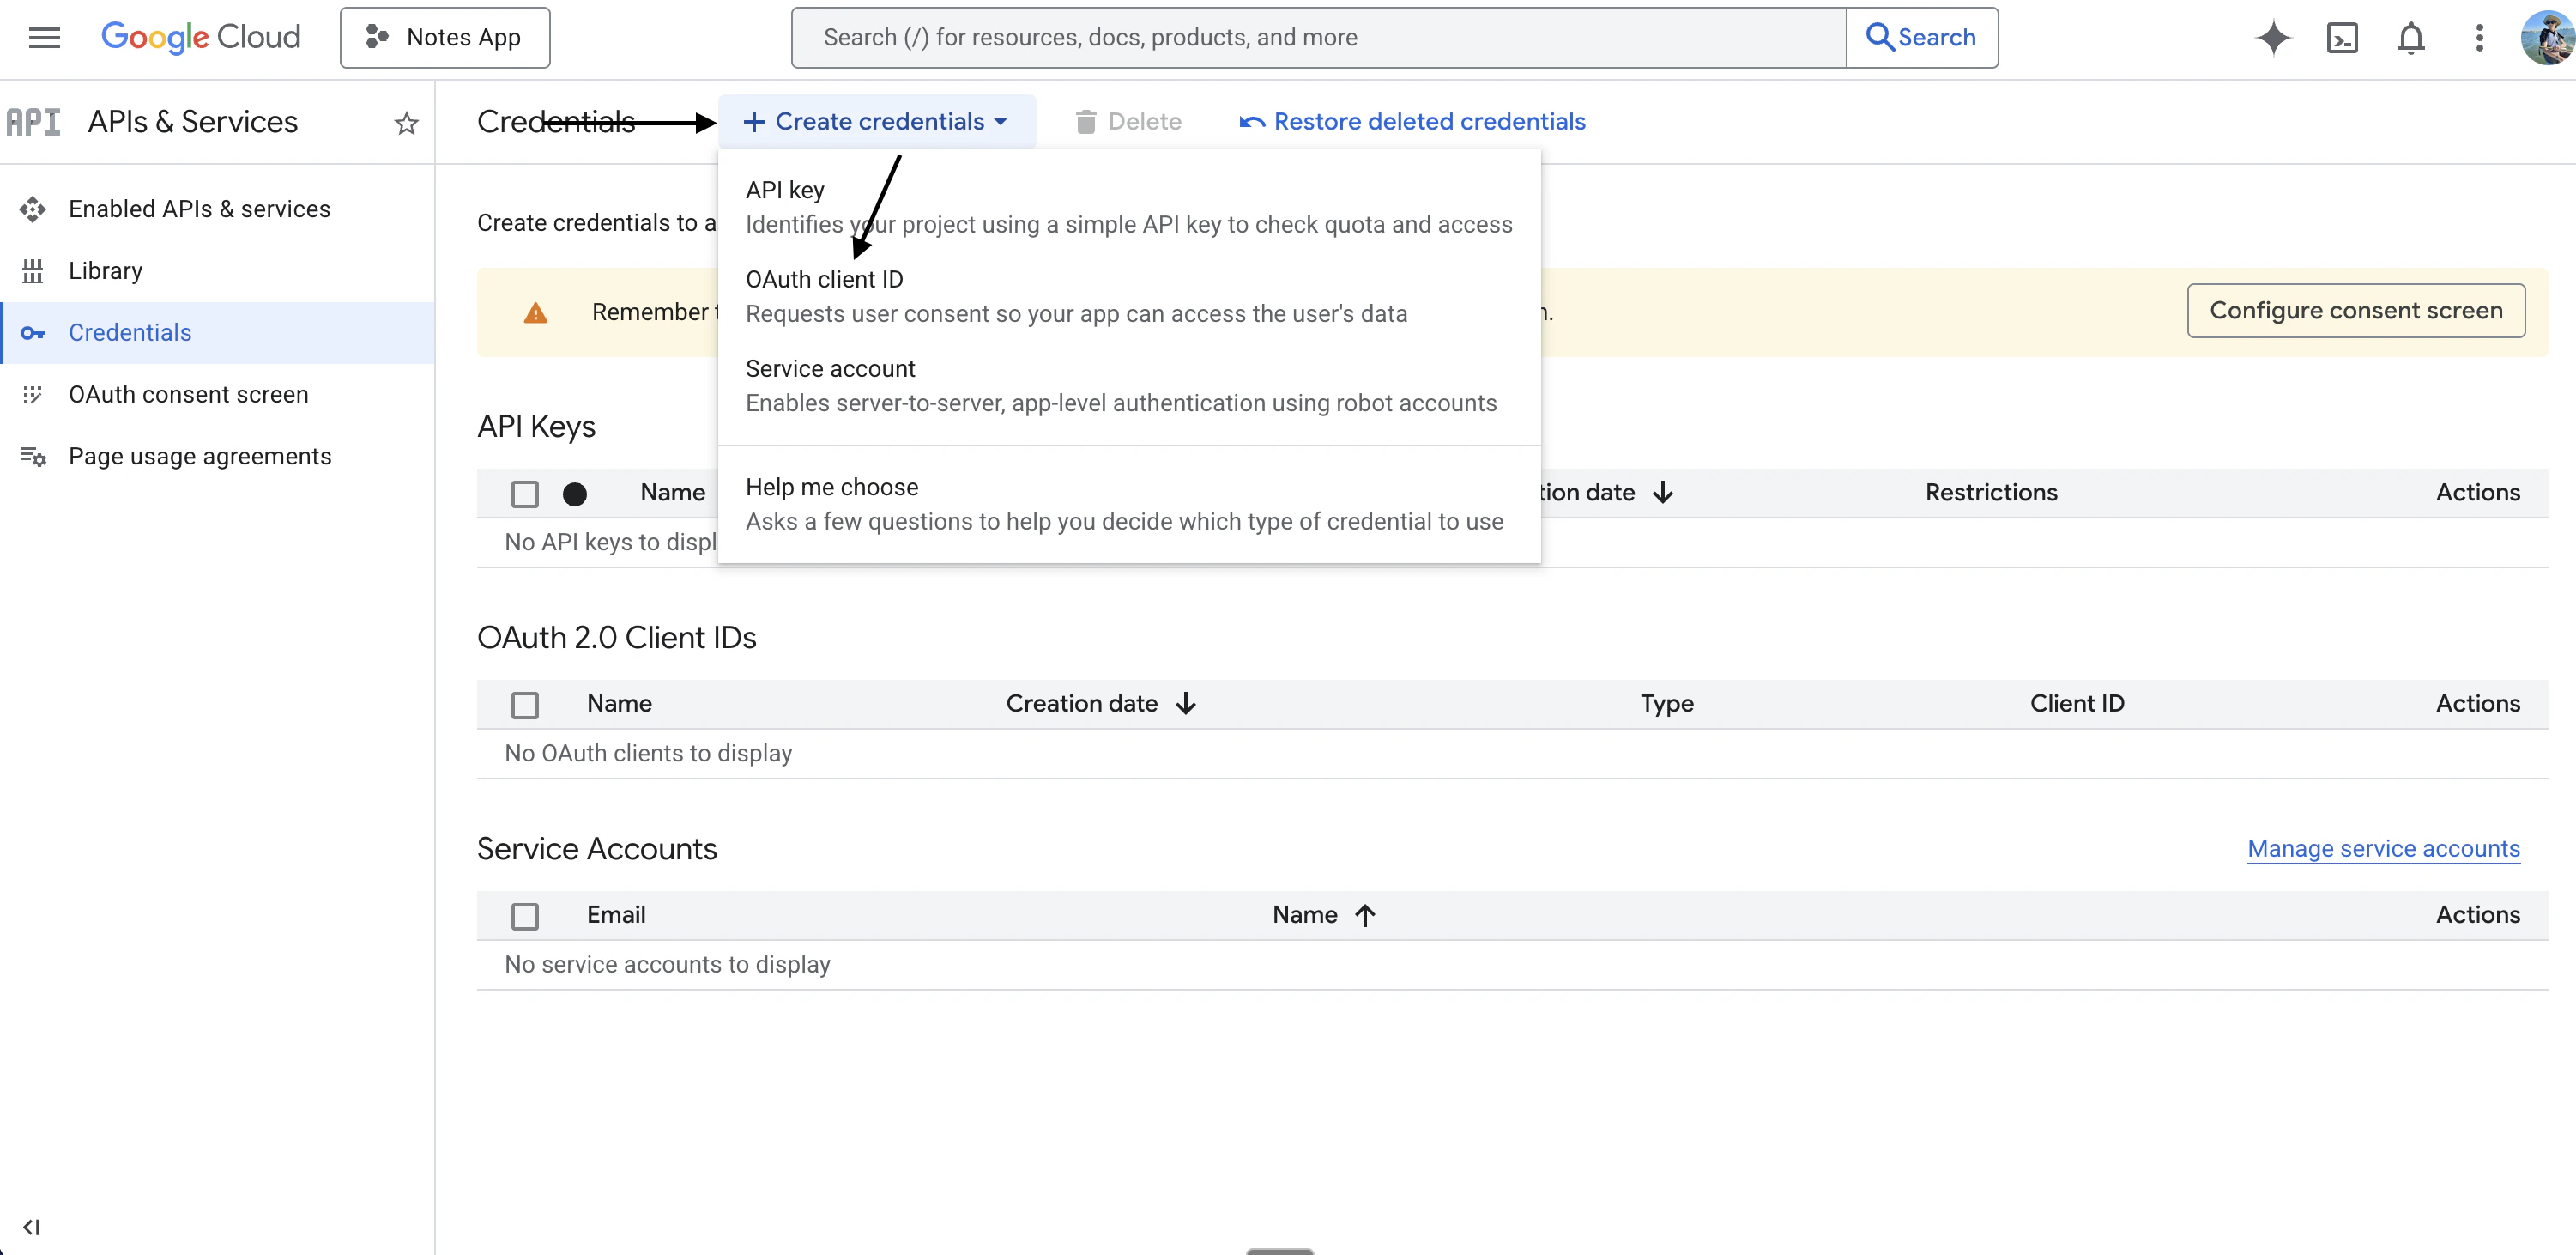
- Click Create credentials
- Click OAuth client ID
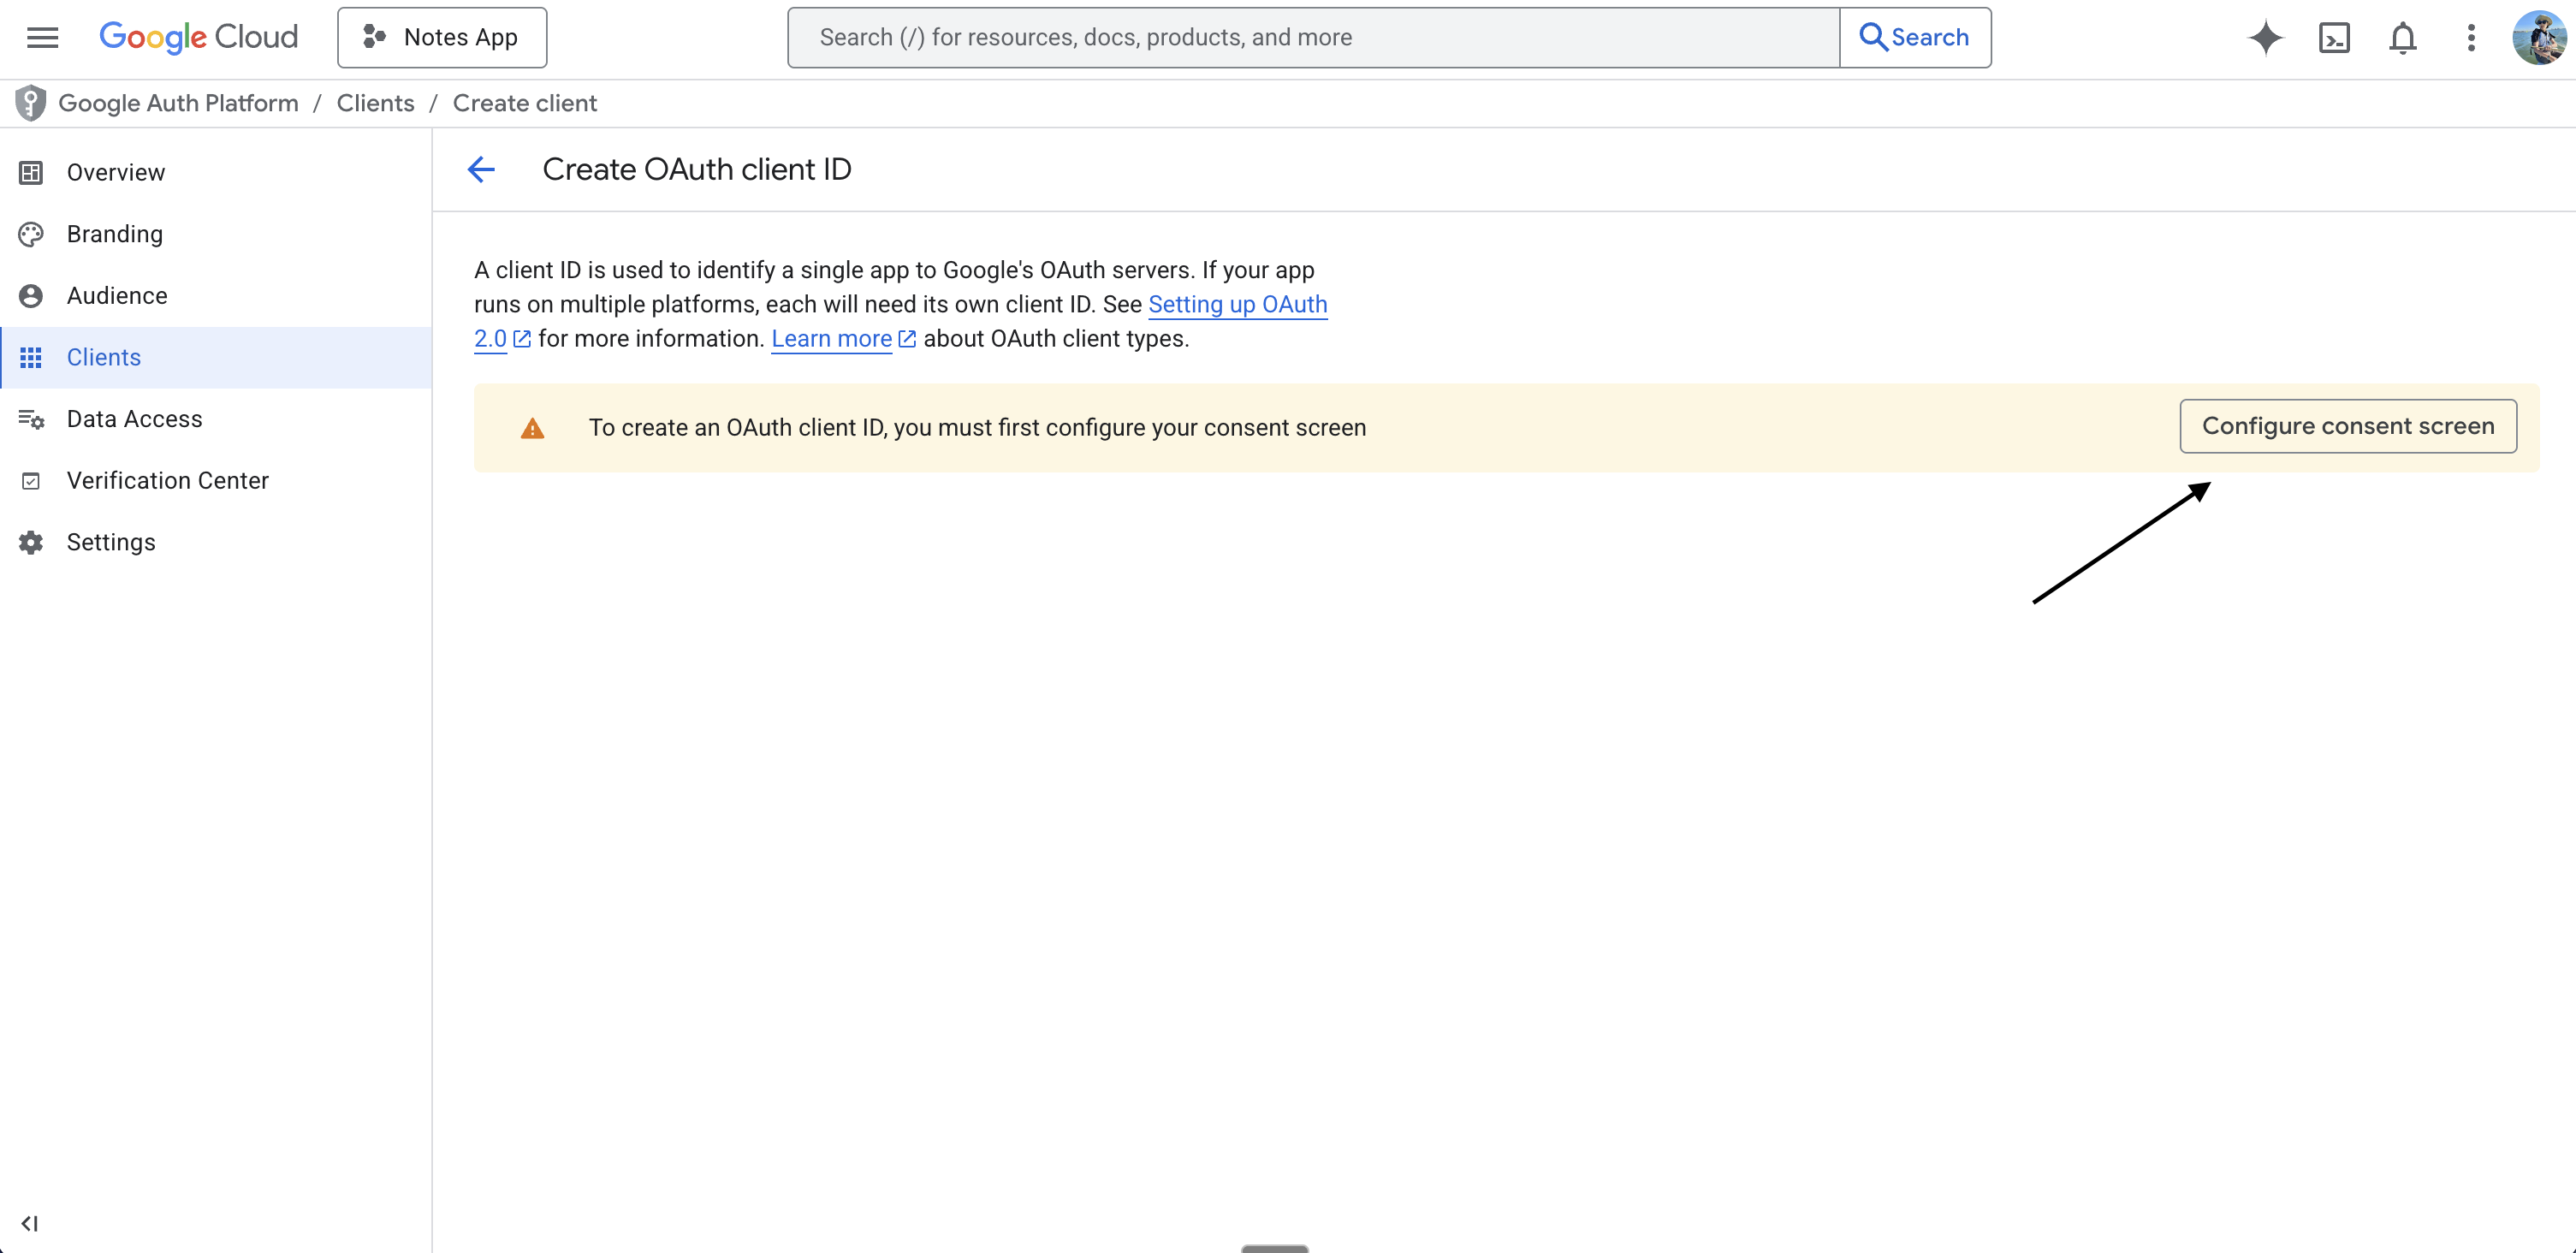
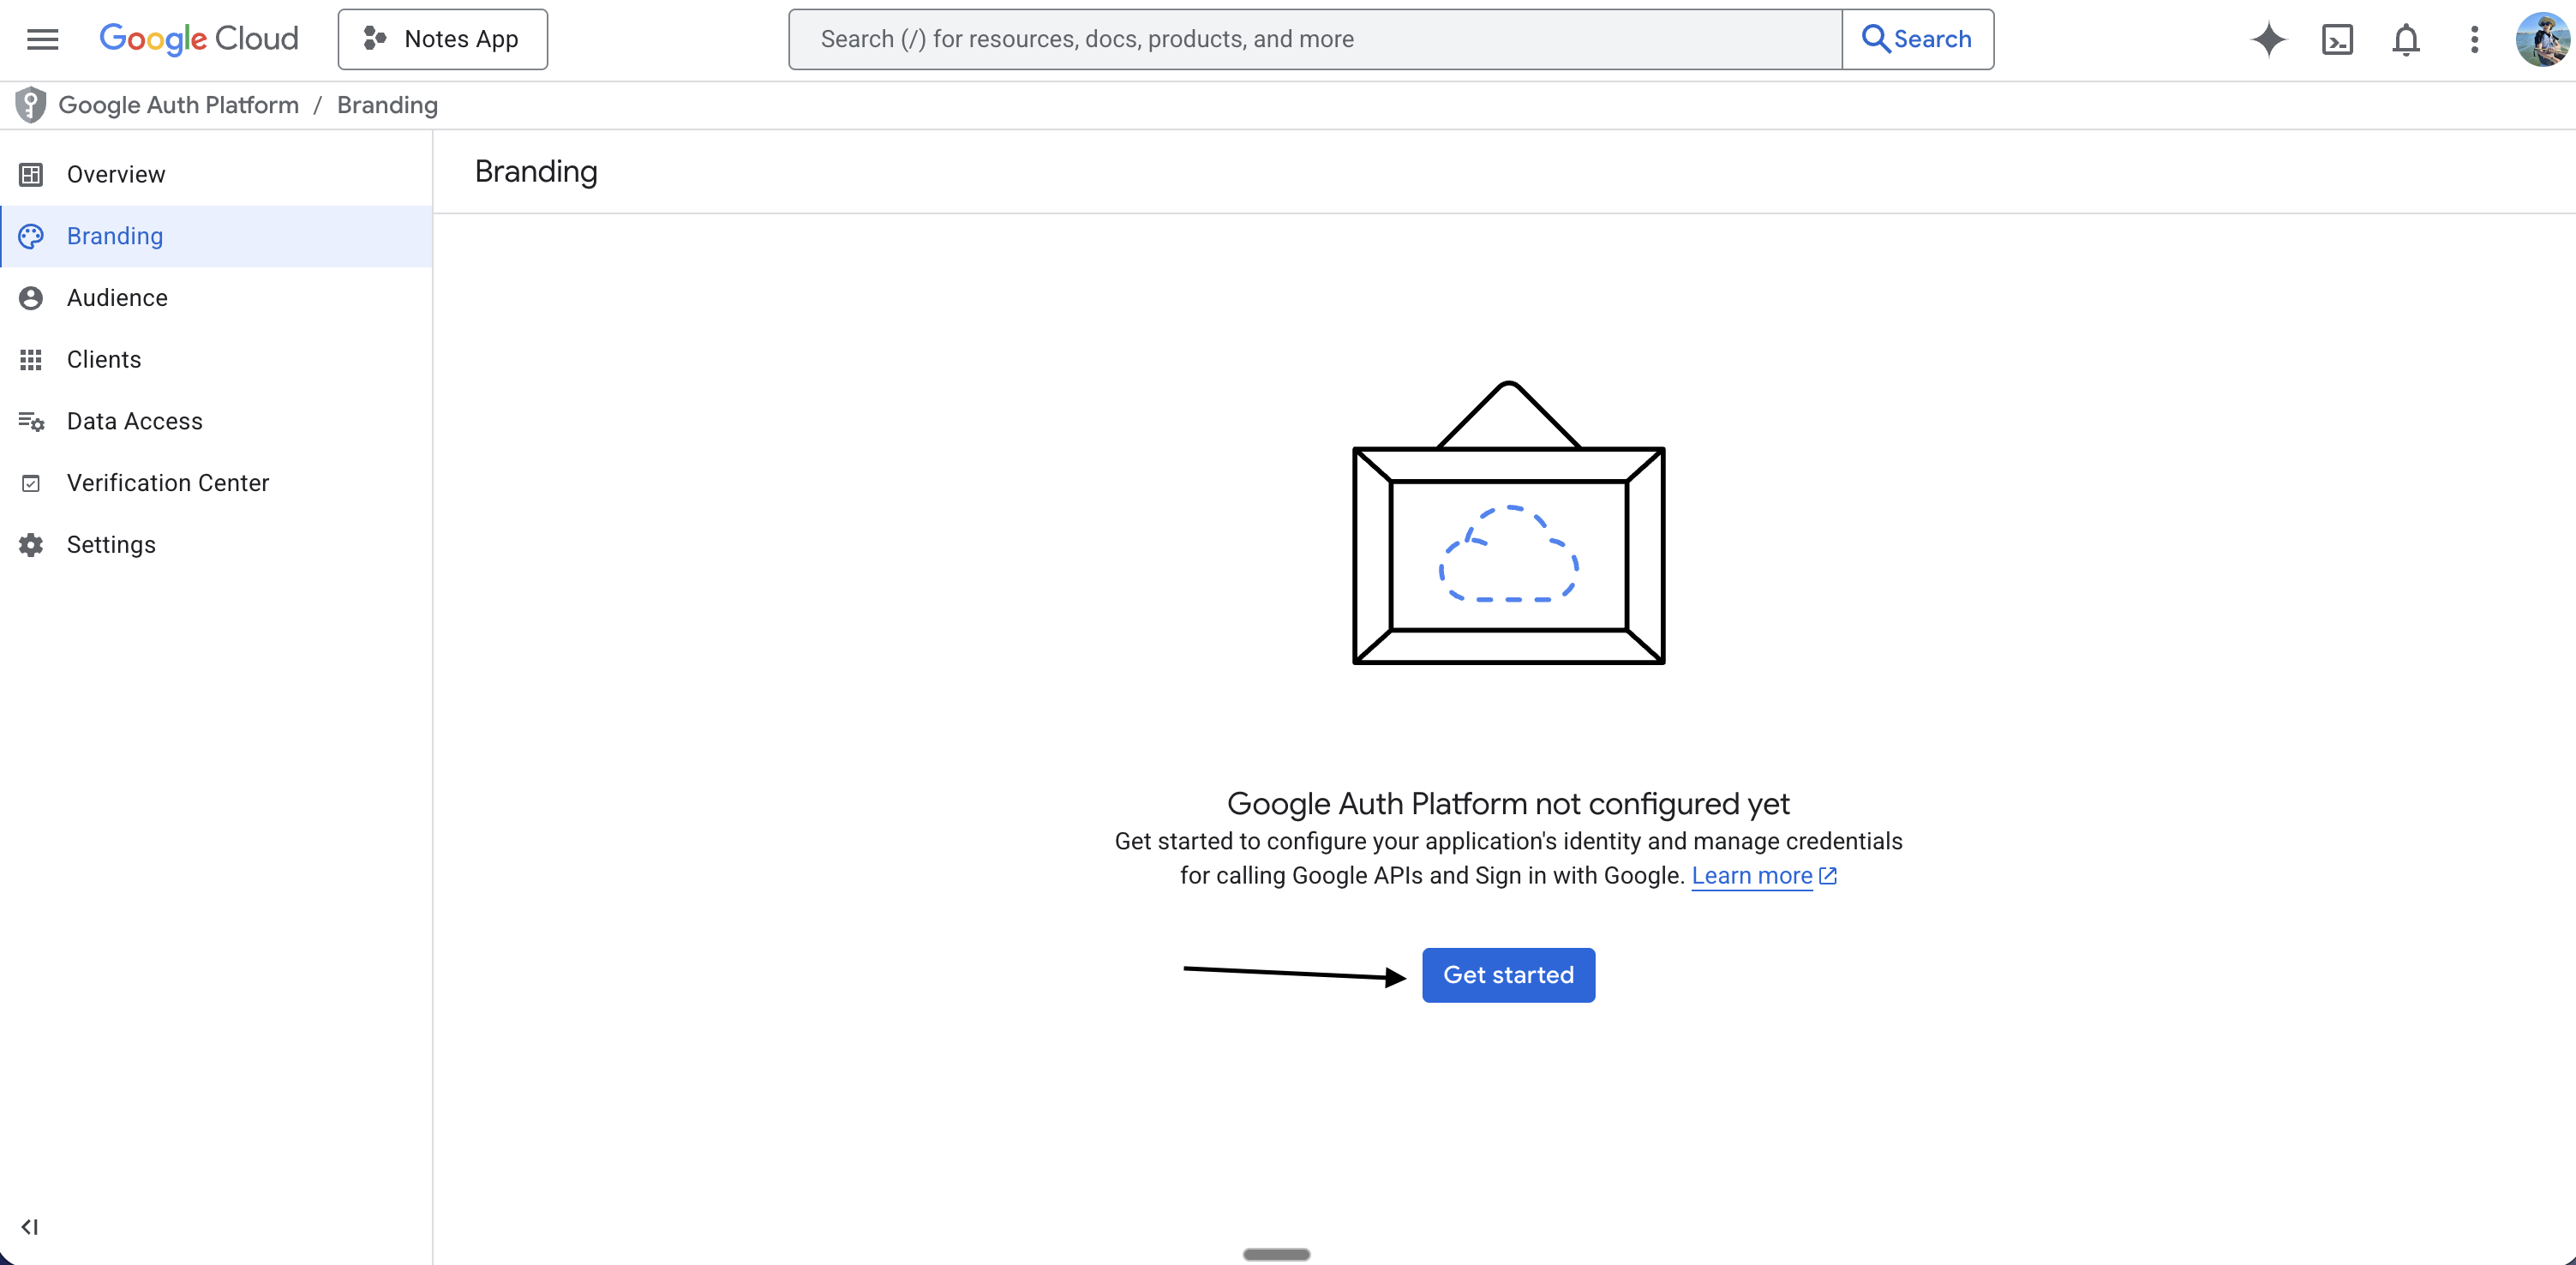
- If you see a message that you need to configure the consent screen, click Configure consent screen
- Click Get started
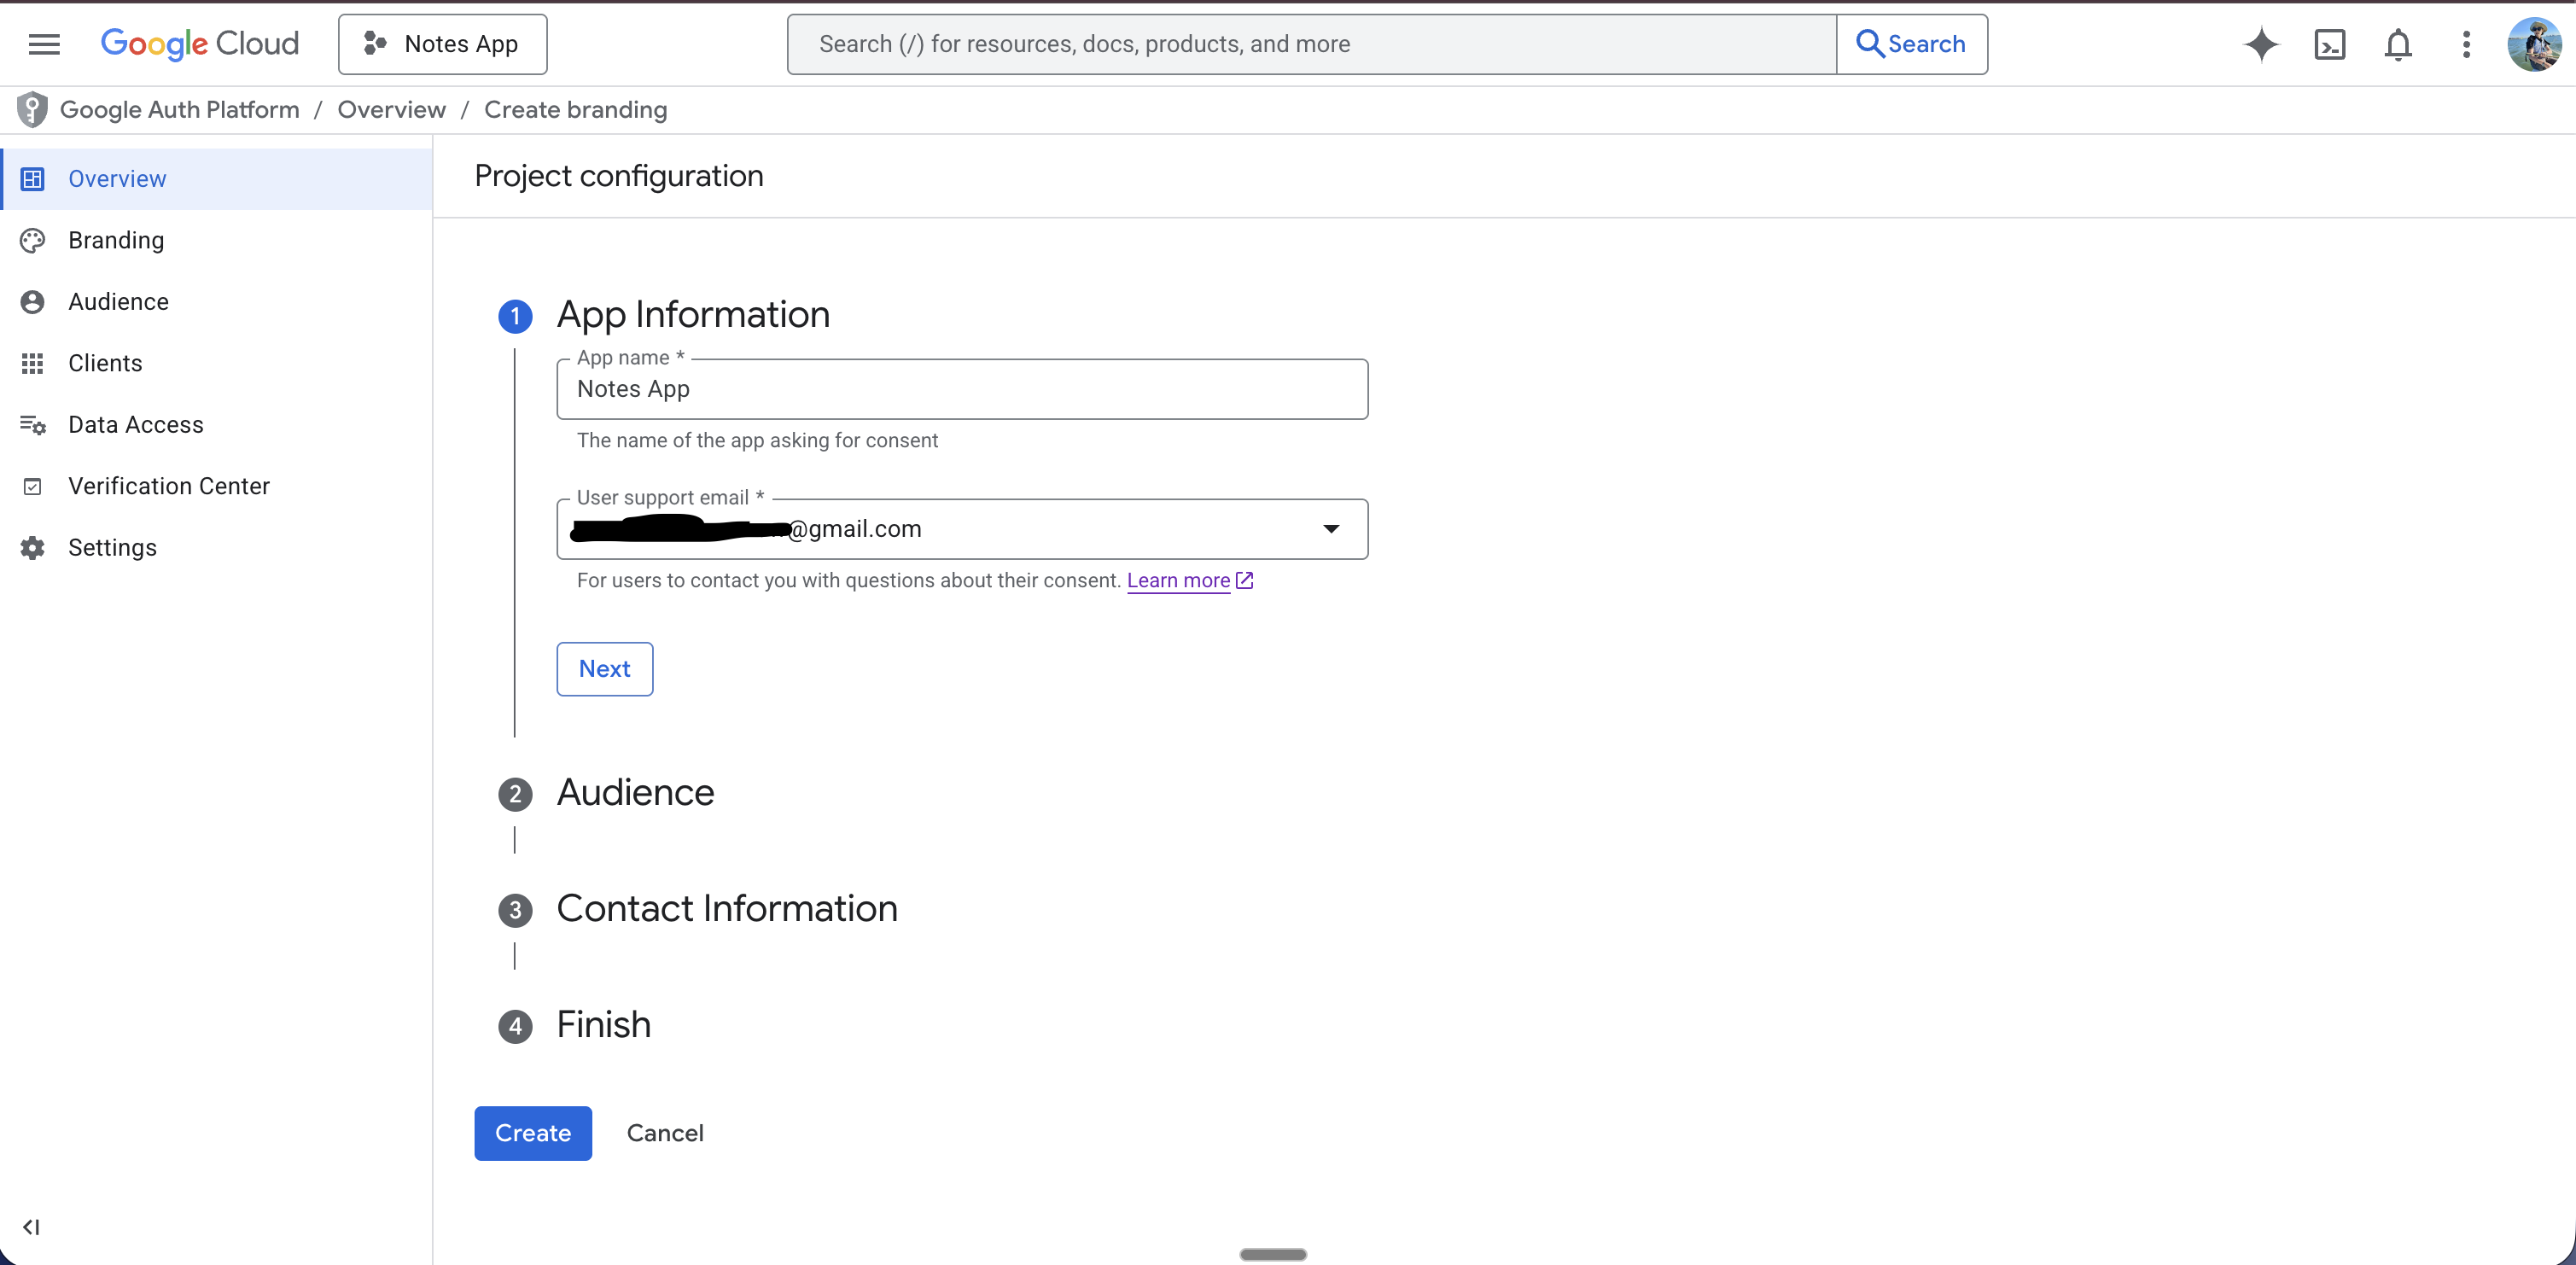
Step 4: Fill In Your App Information
- Fill in:
- App name — name users will see when signing in with Google
- User support email — your email
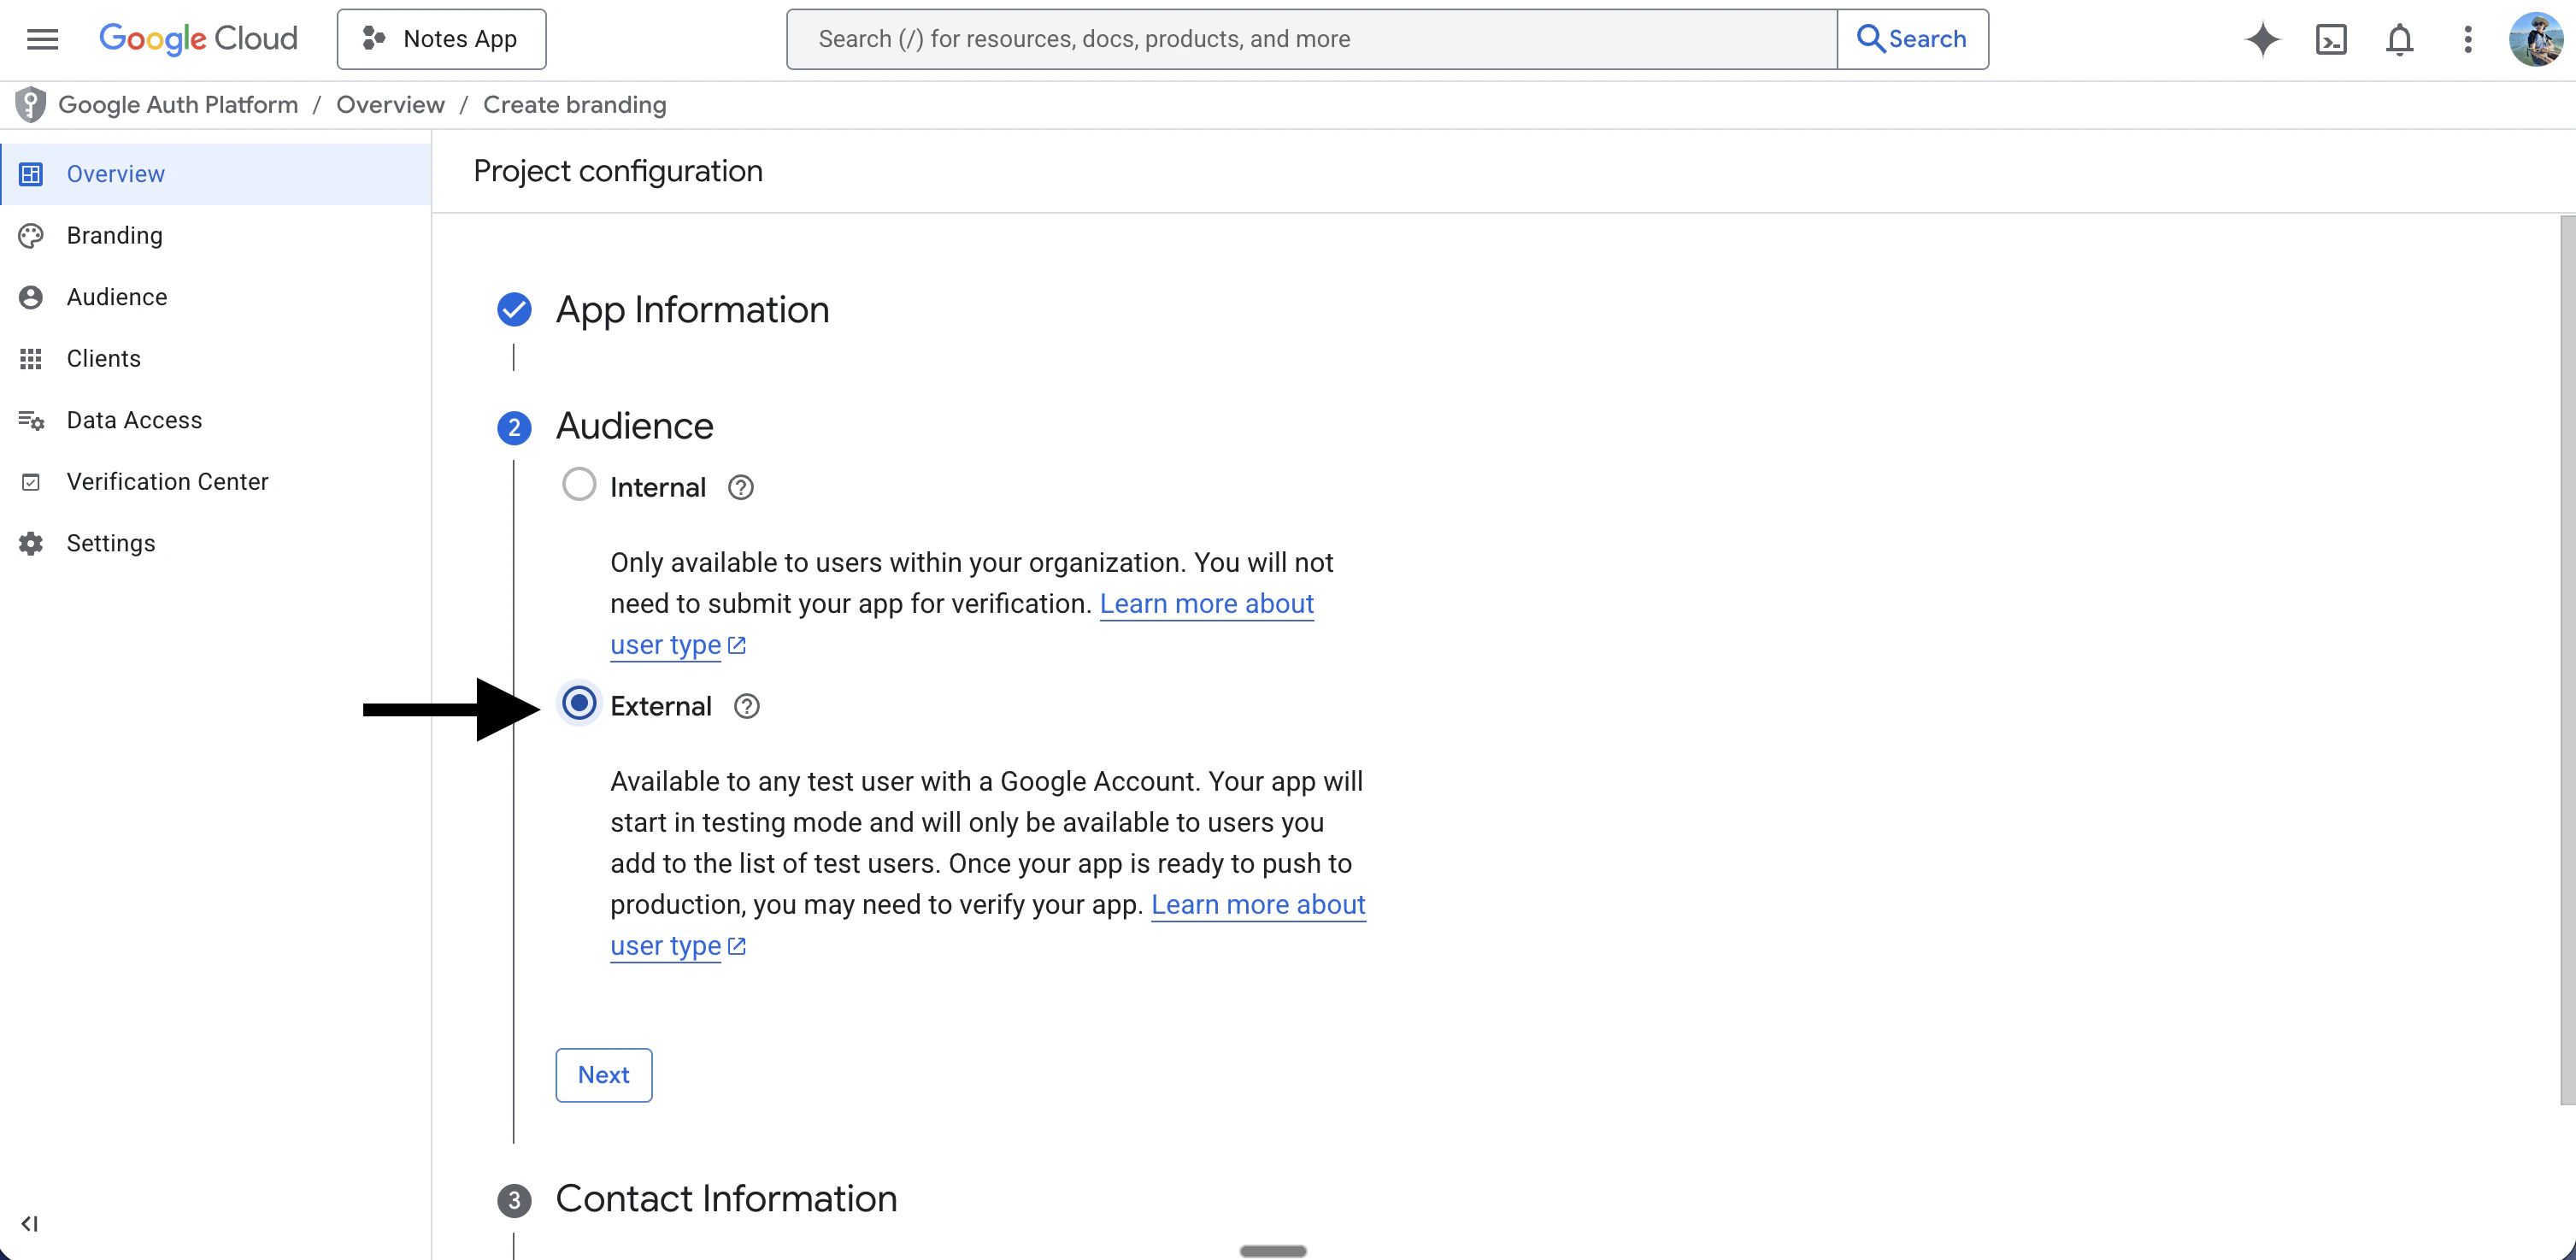
- For User type / Audience, select External
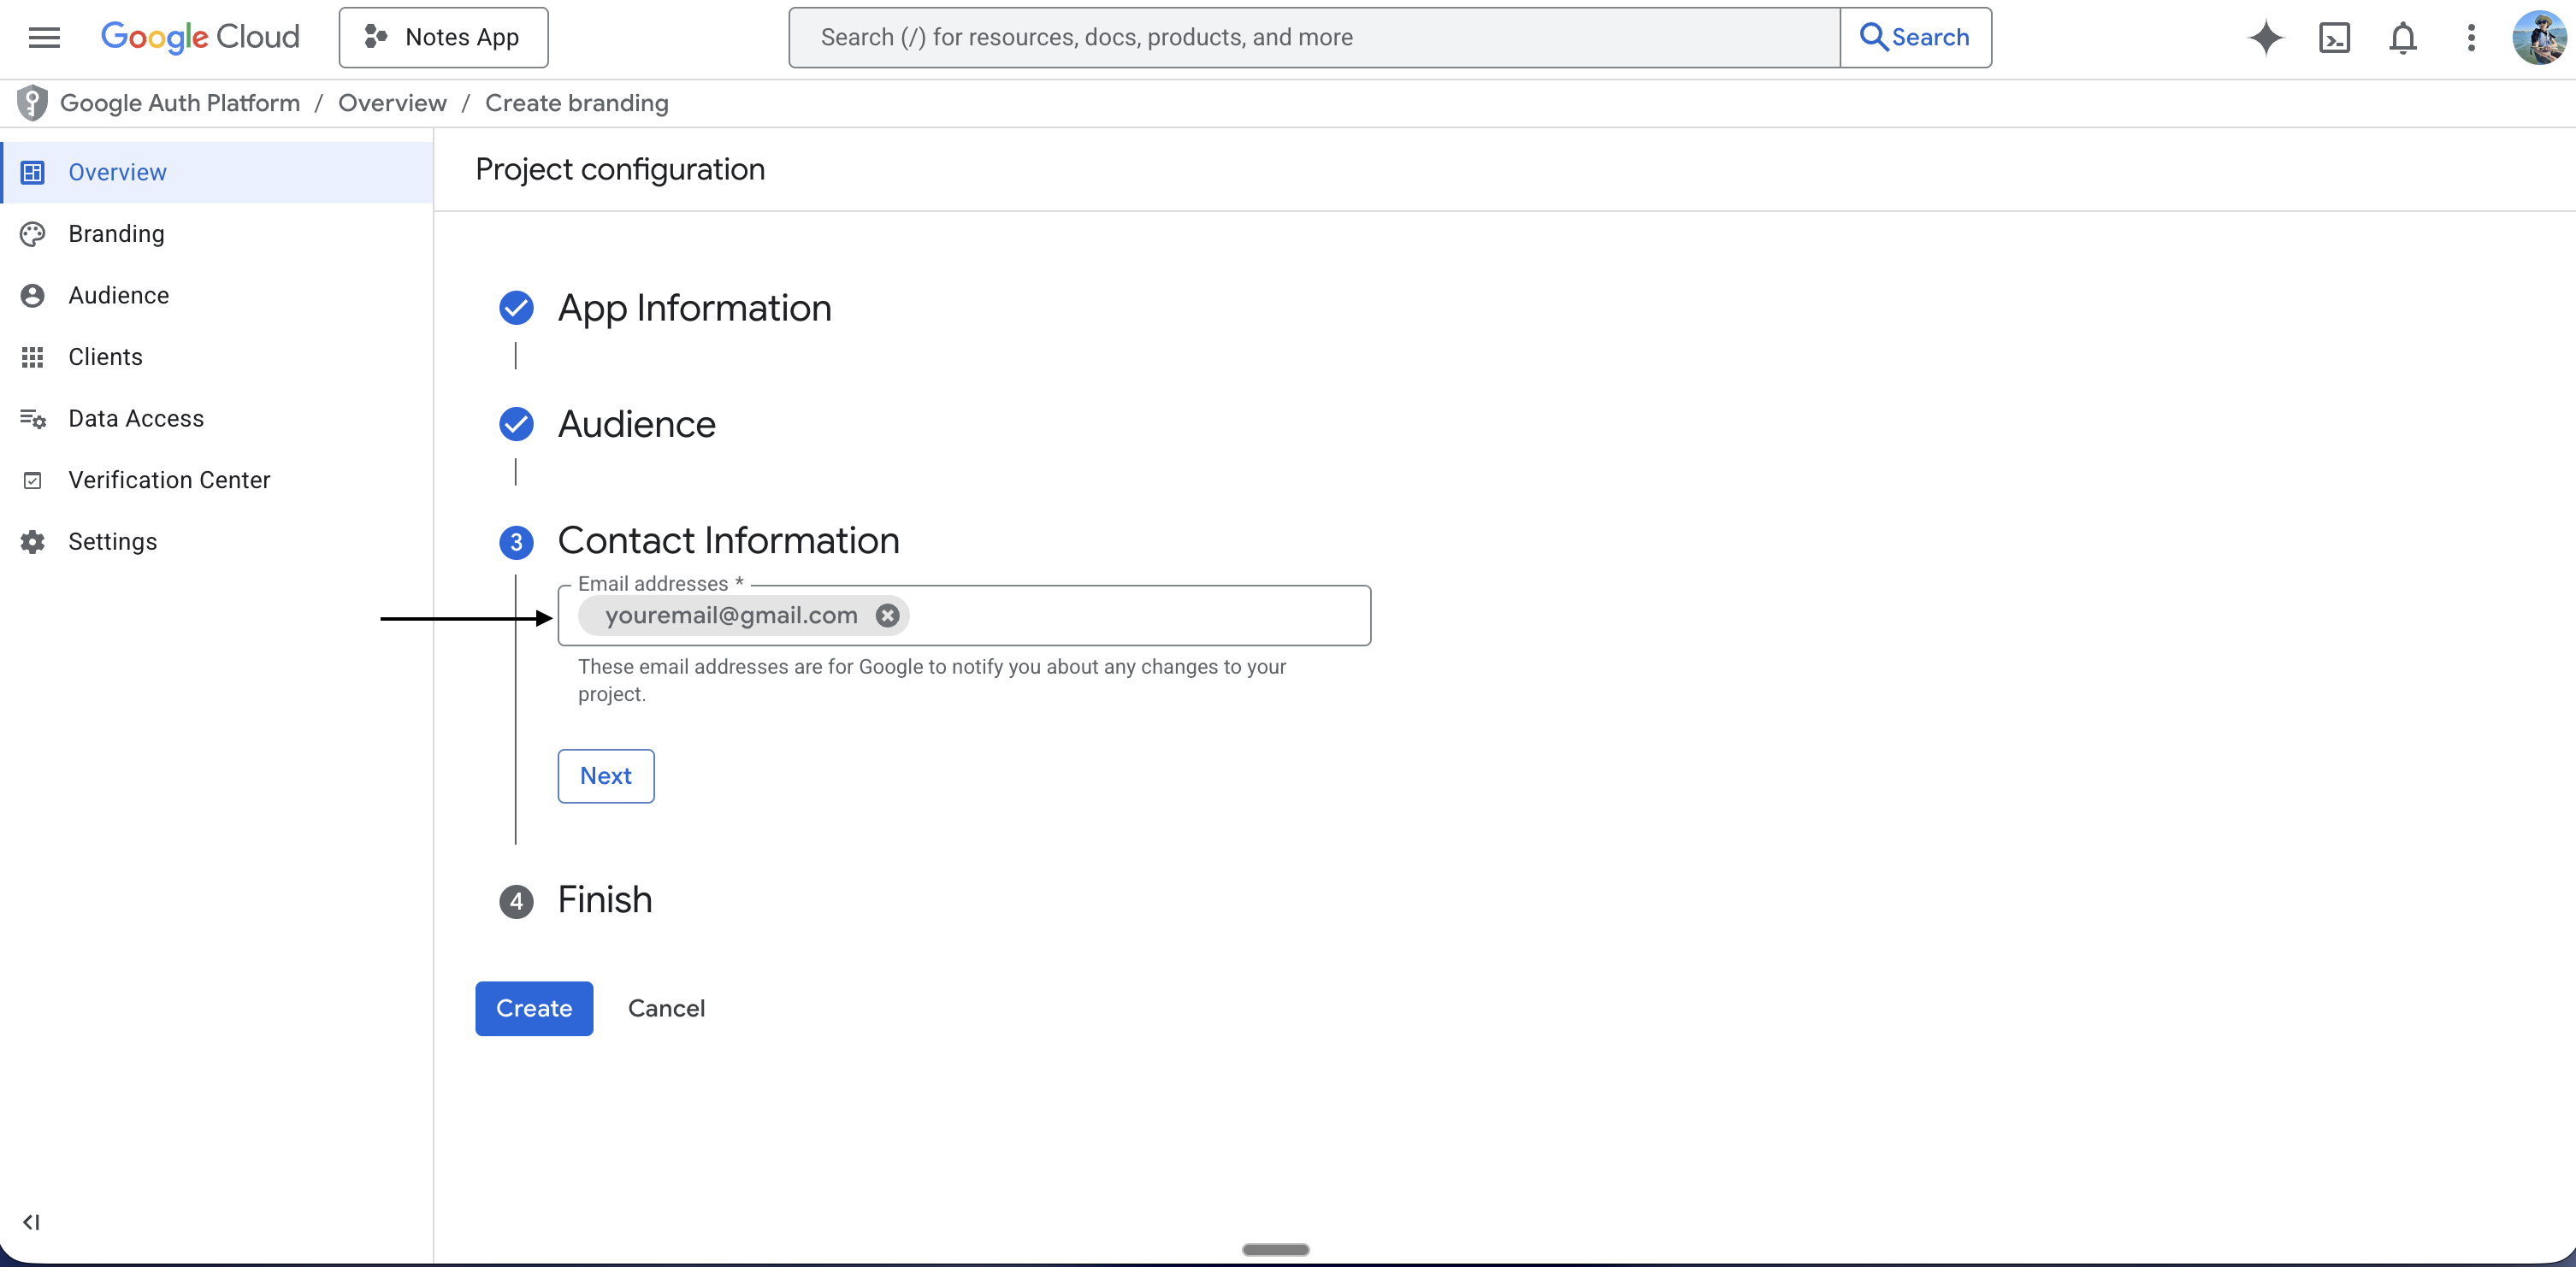
- Developer contact information — your email
- Agree to the terms and conditions if shown
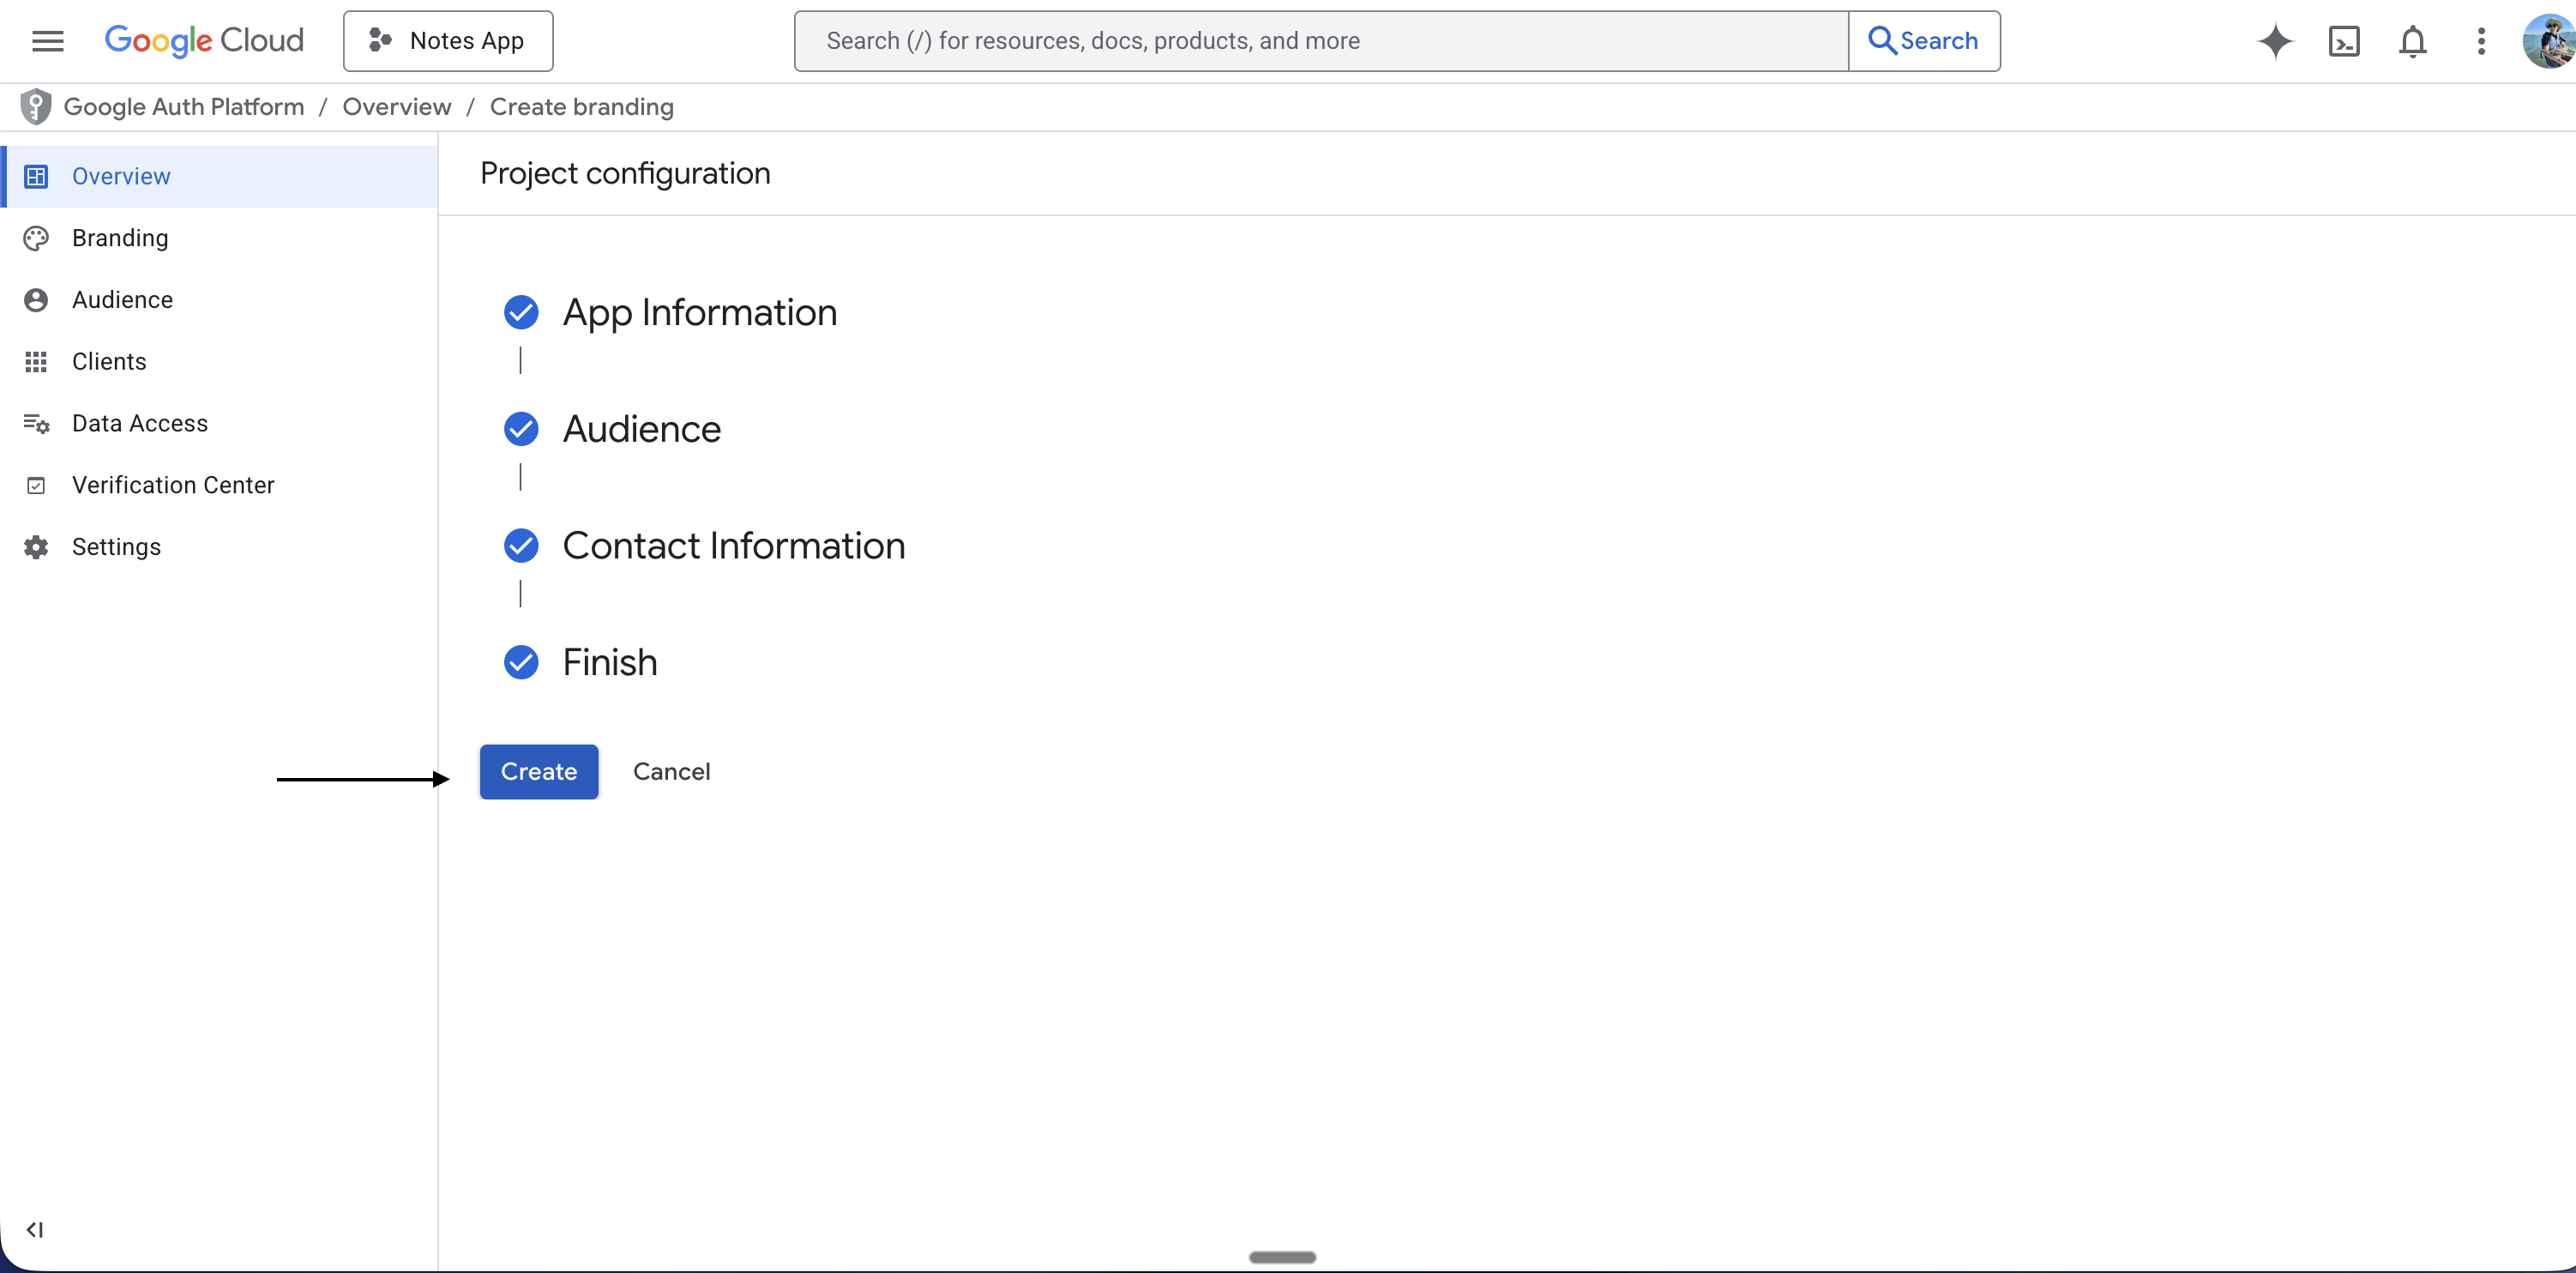
- Click Create (or Save and Continue)
Step 5: Deploy Your App and Copy the Backend URL
Do this before creating the OAuth client so you can paste the real URL into Google Cloud once.- Open the Vibecode app and your project
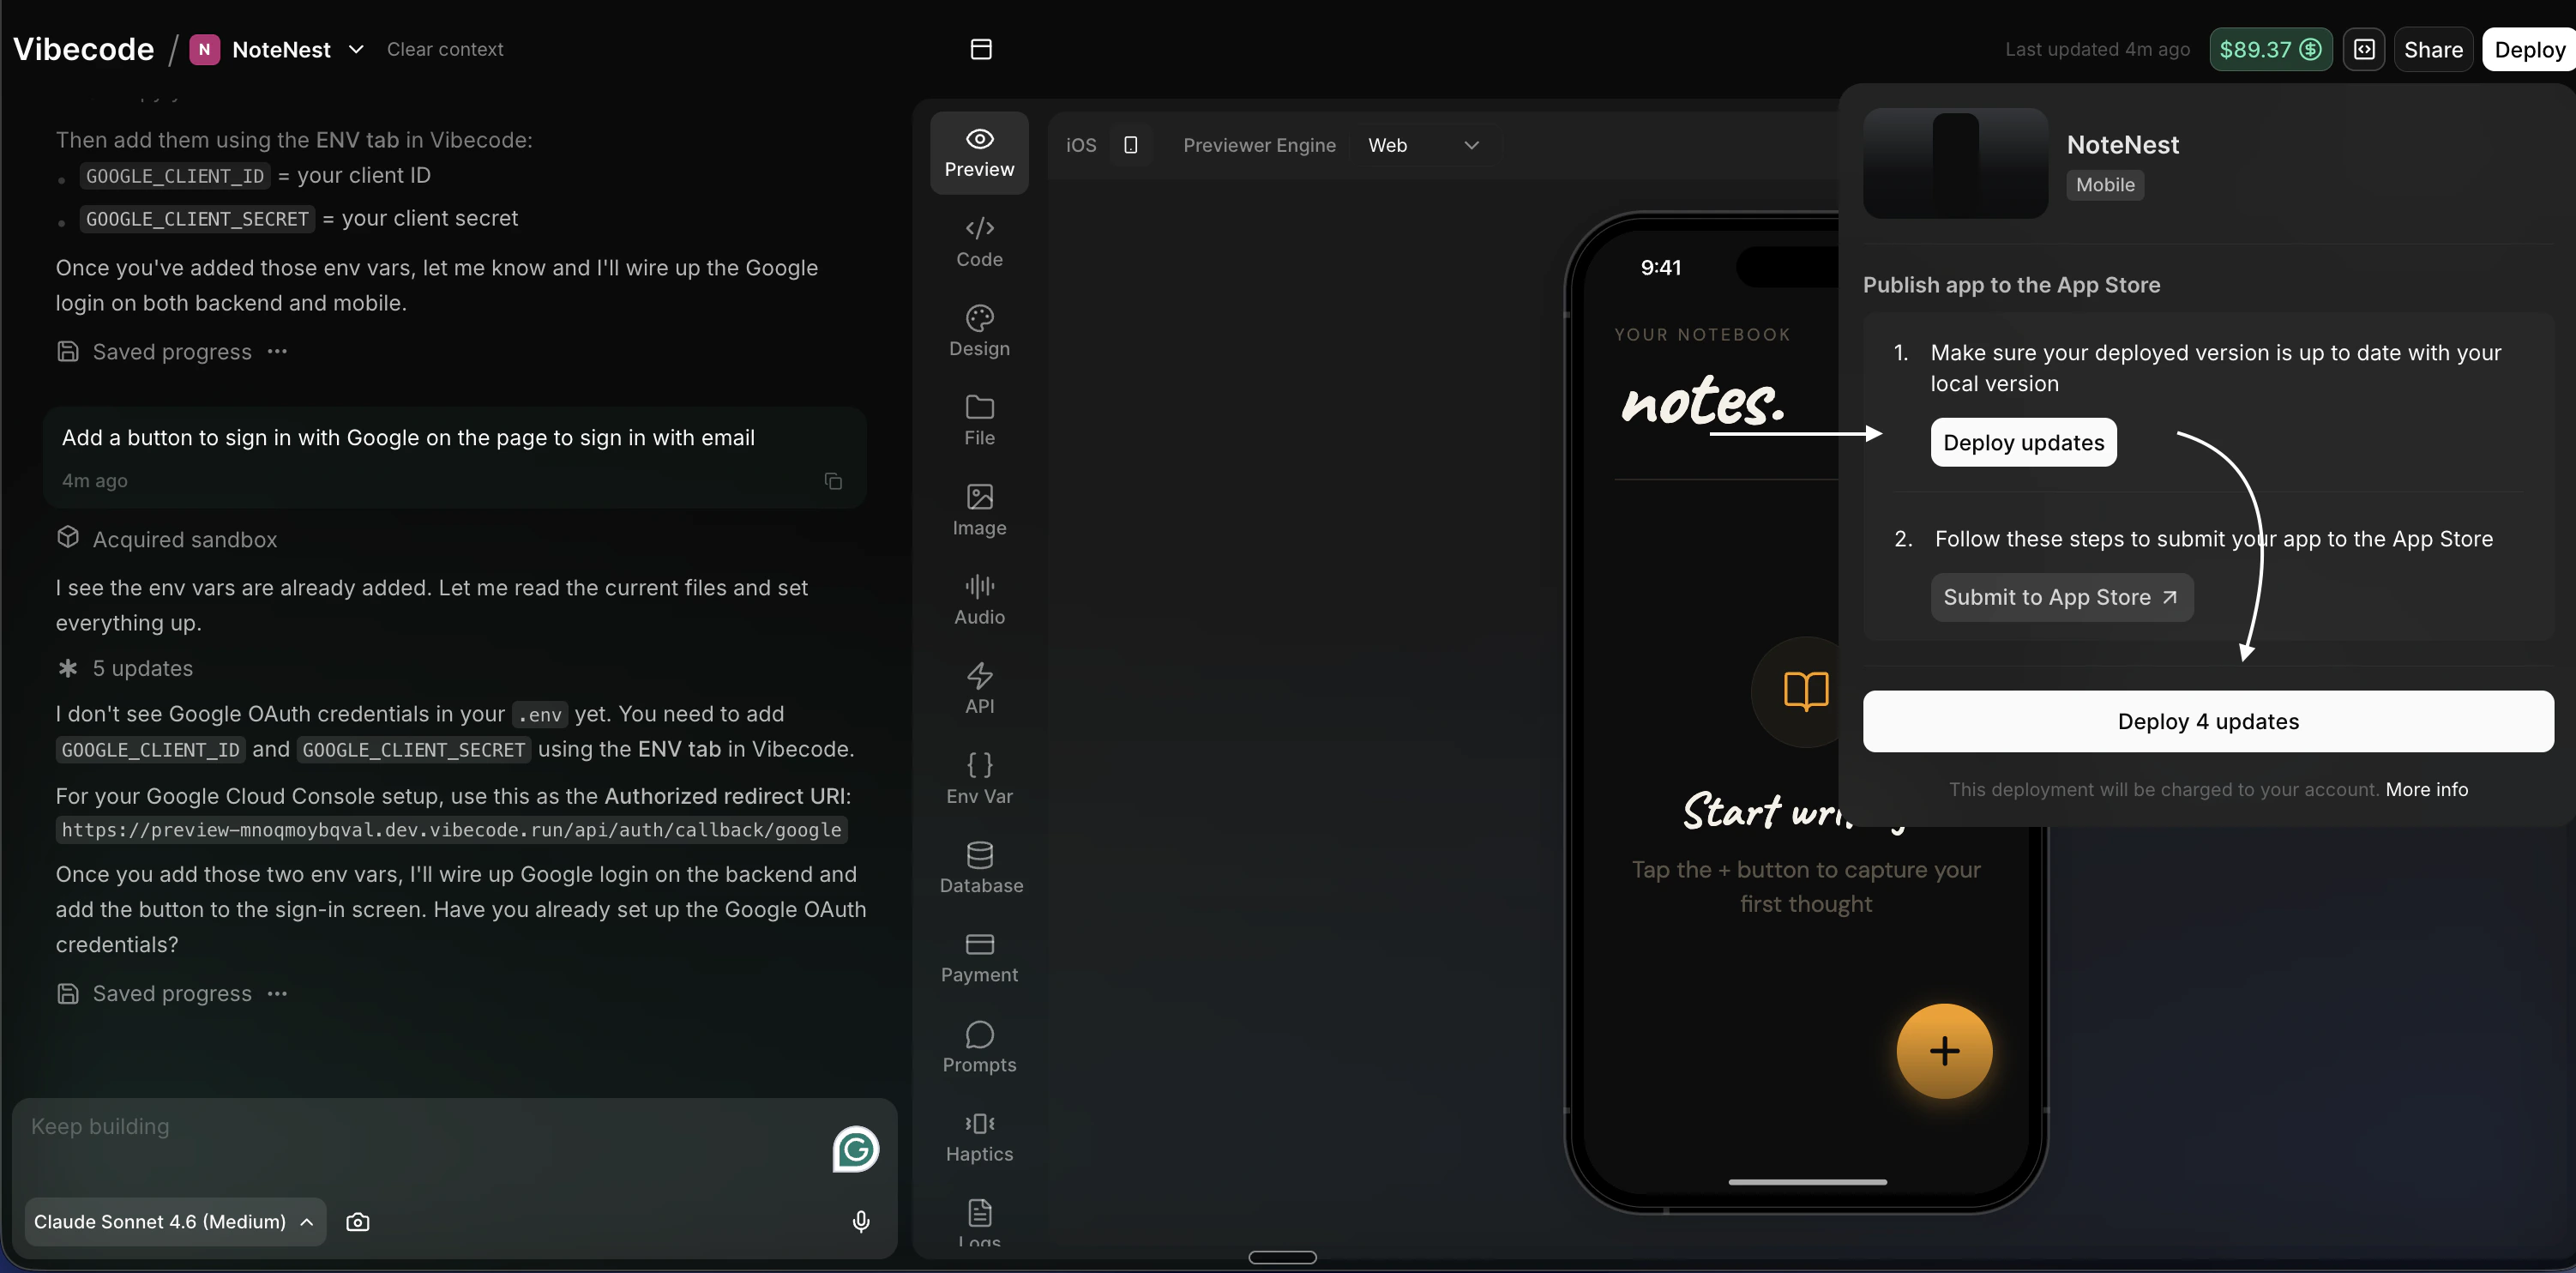
- In the top right corner, click Deploy
- Click Deploy Updates
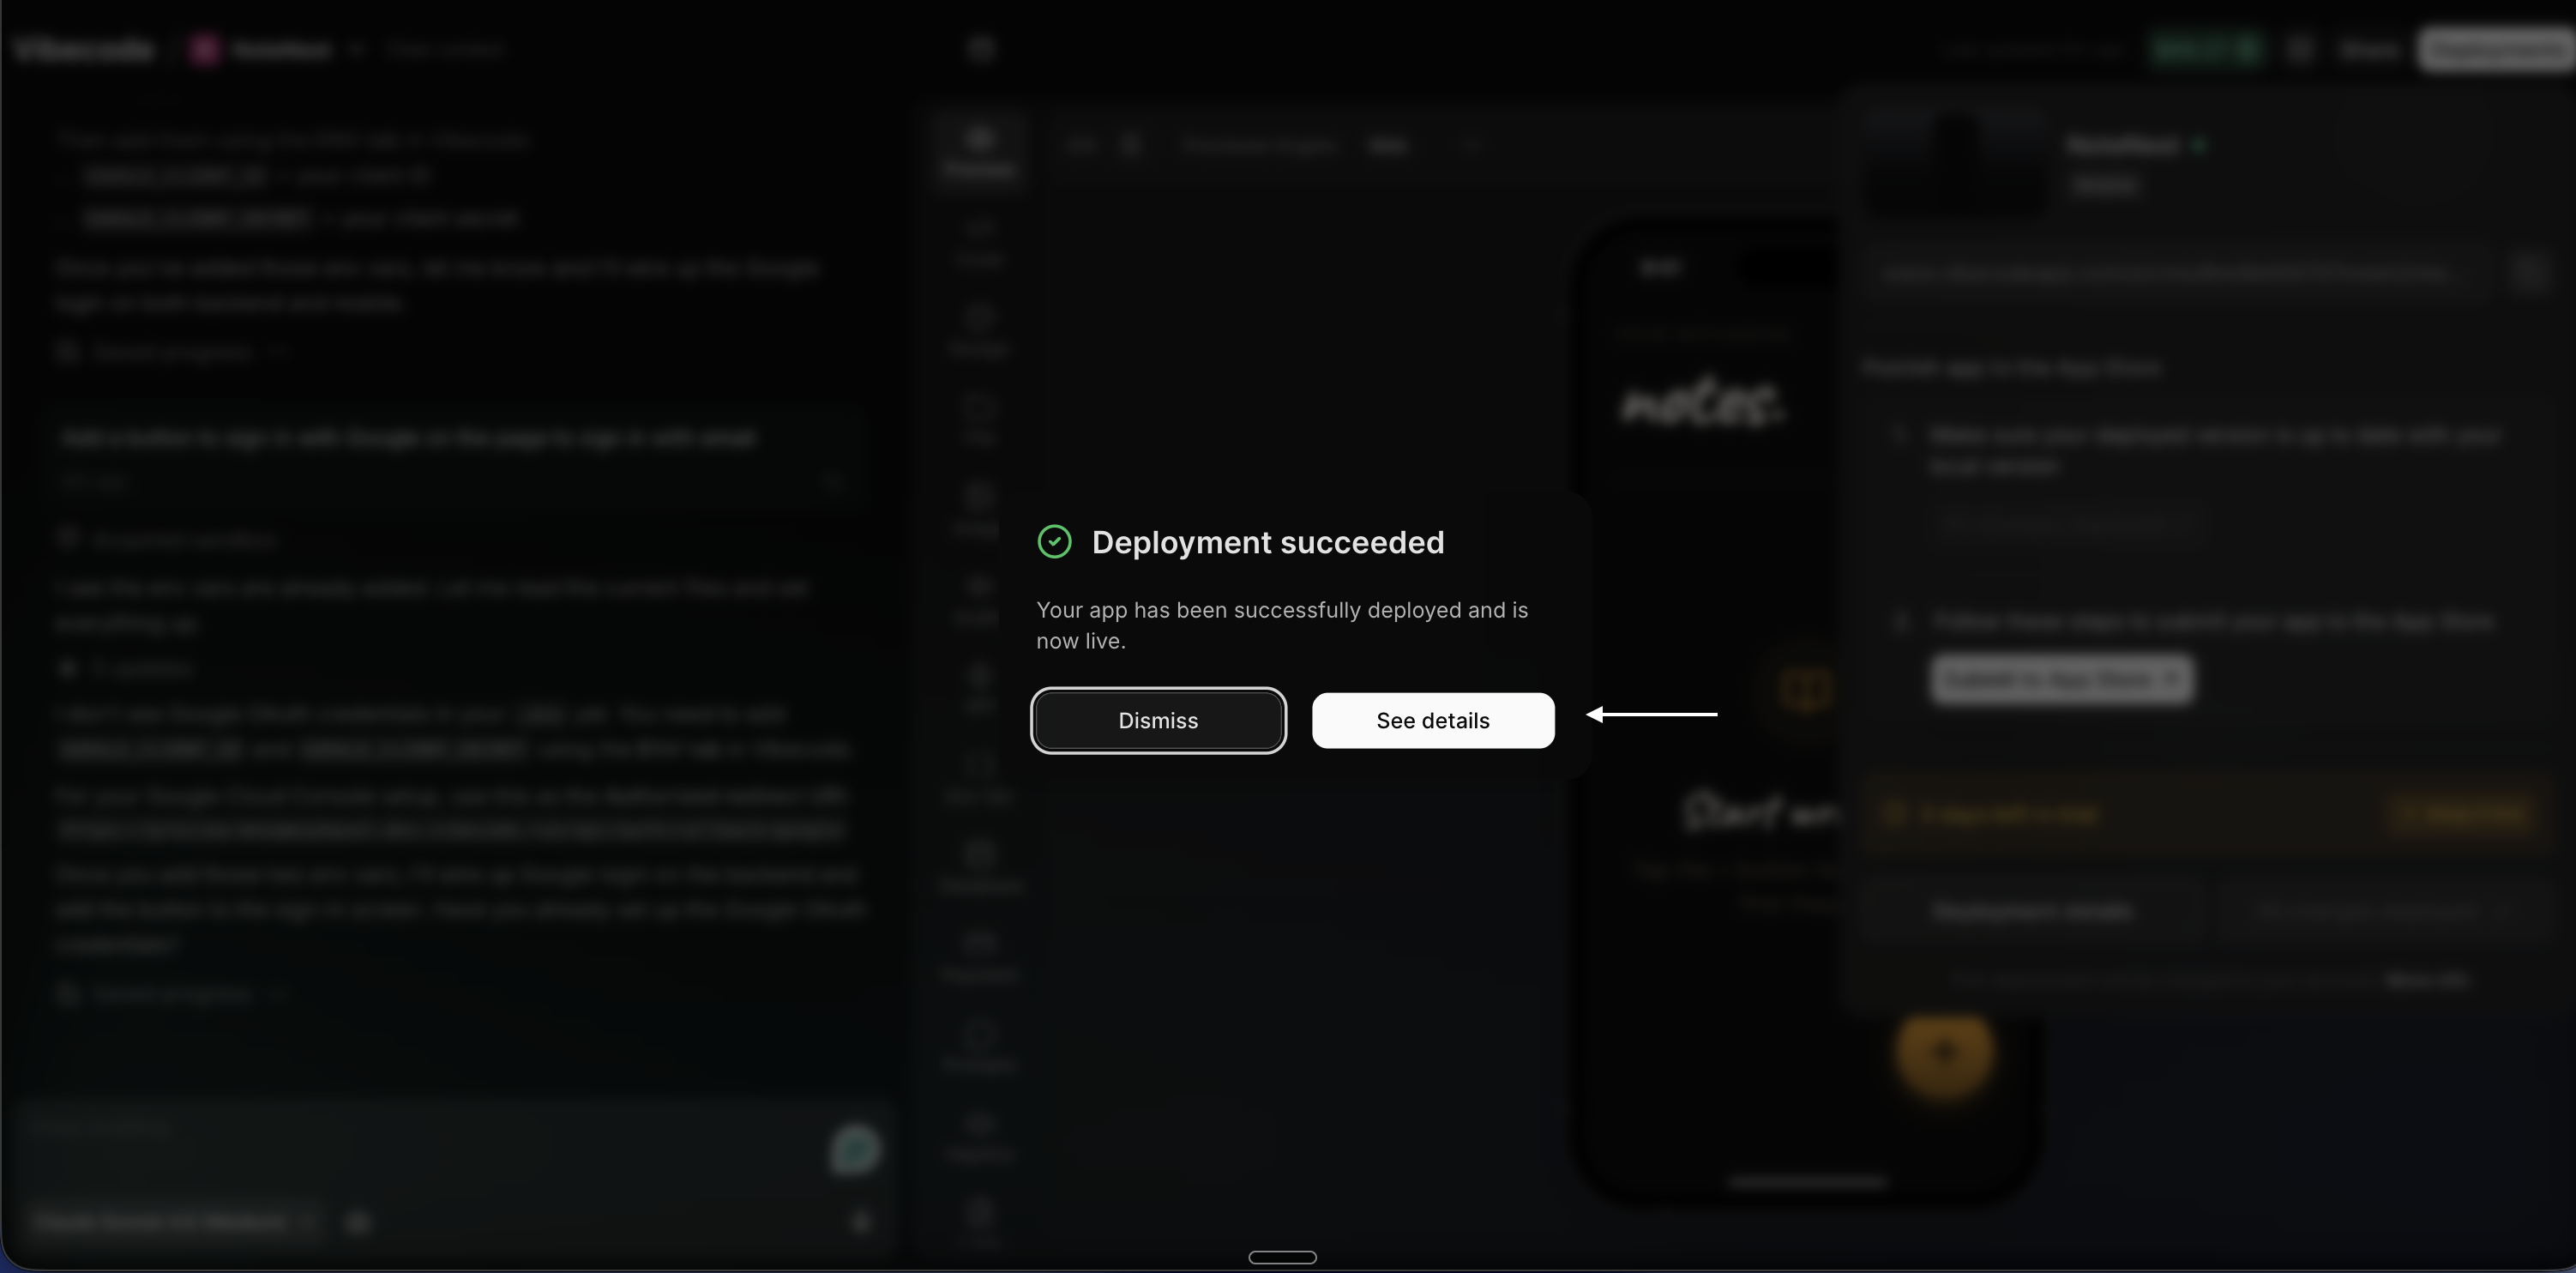
- Wait for the deploy to finish — it may take a few minutes
- When it’s done, click See details
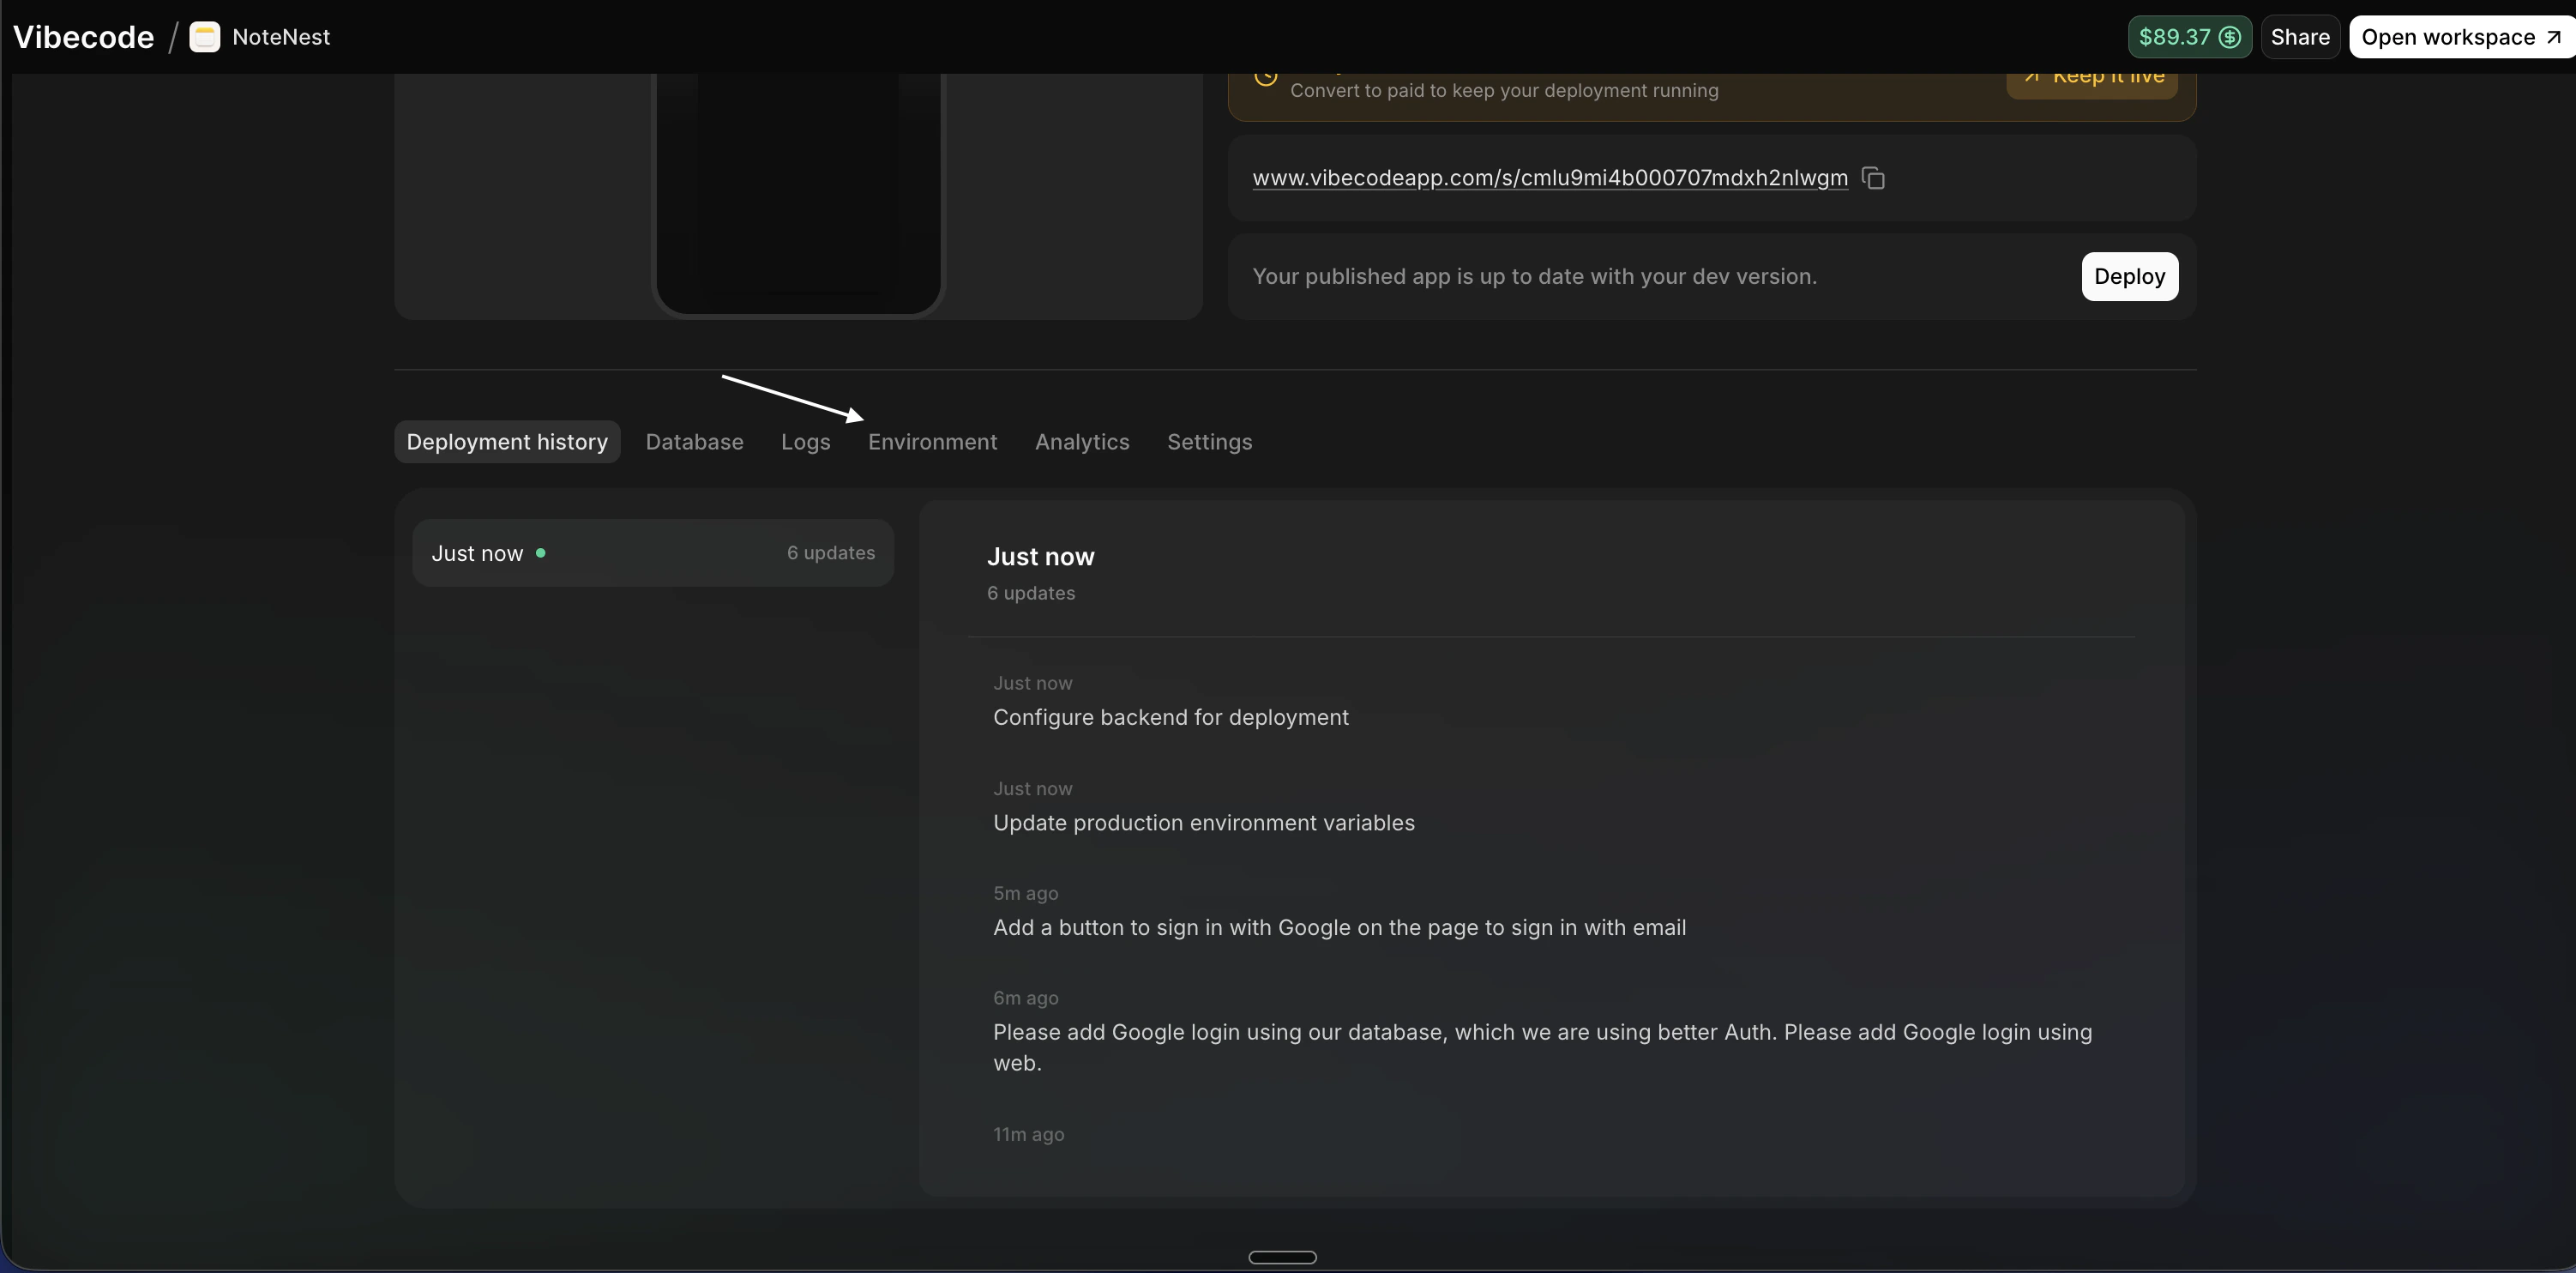
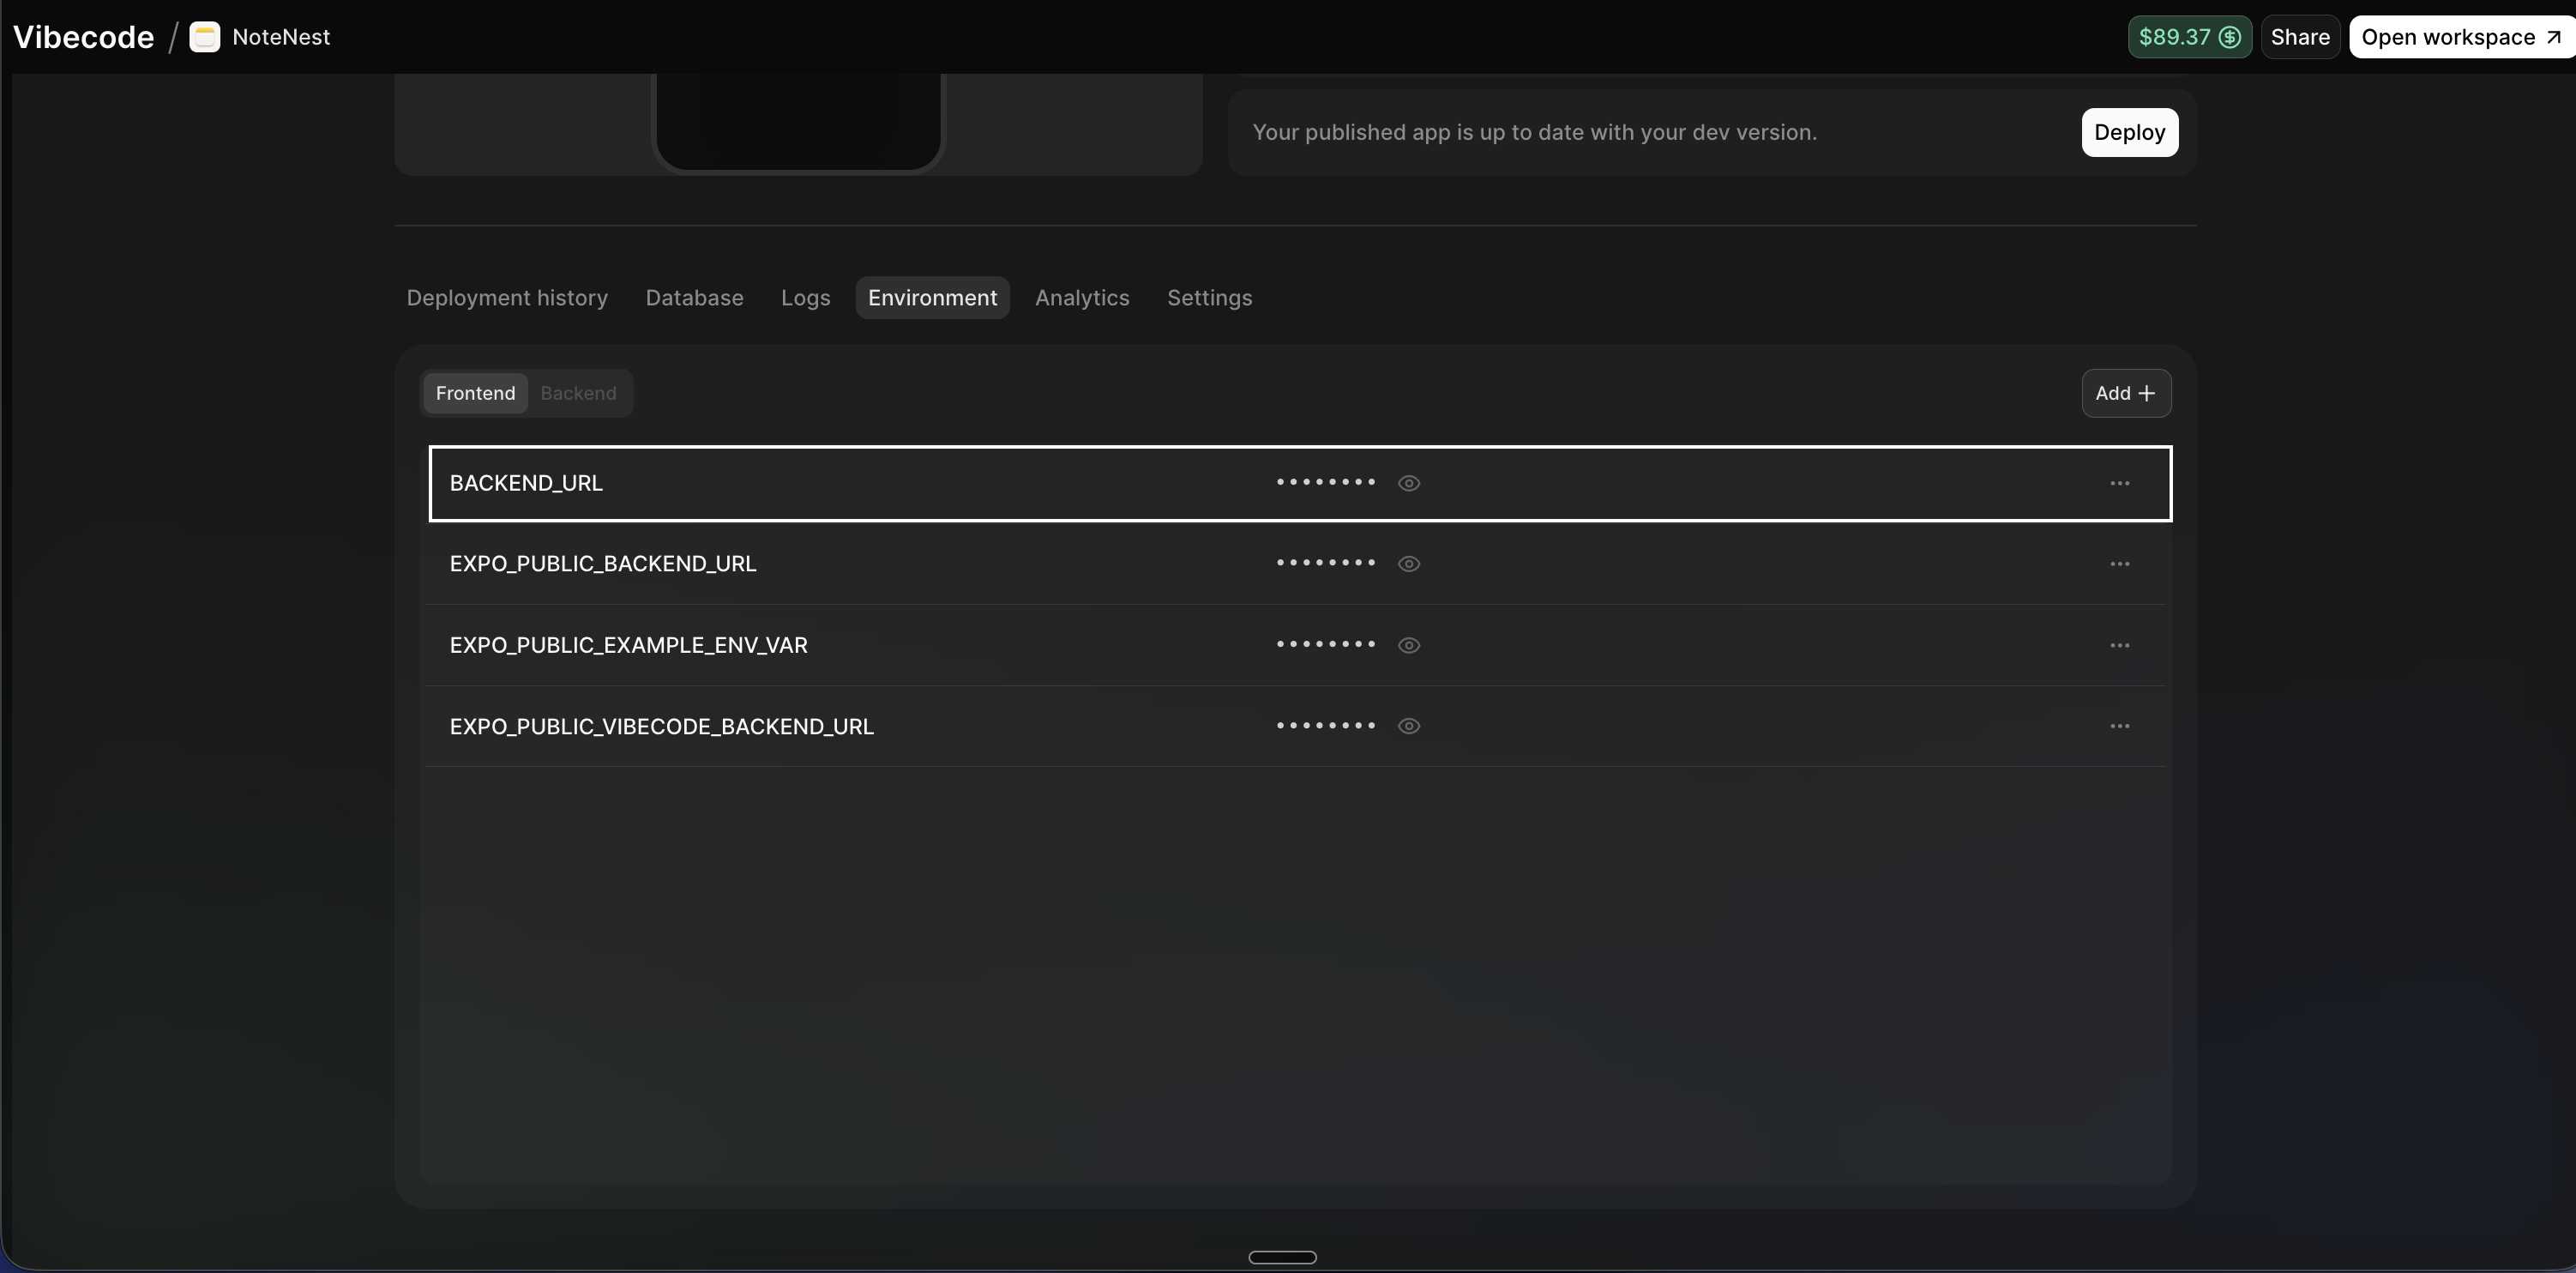
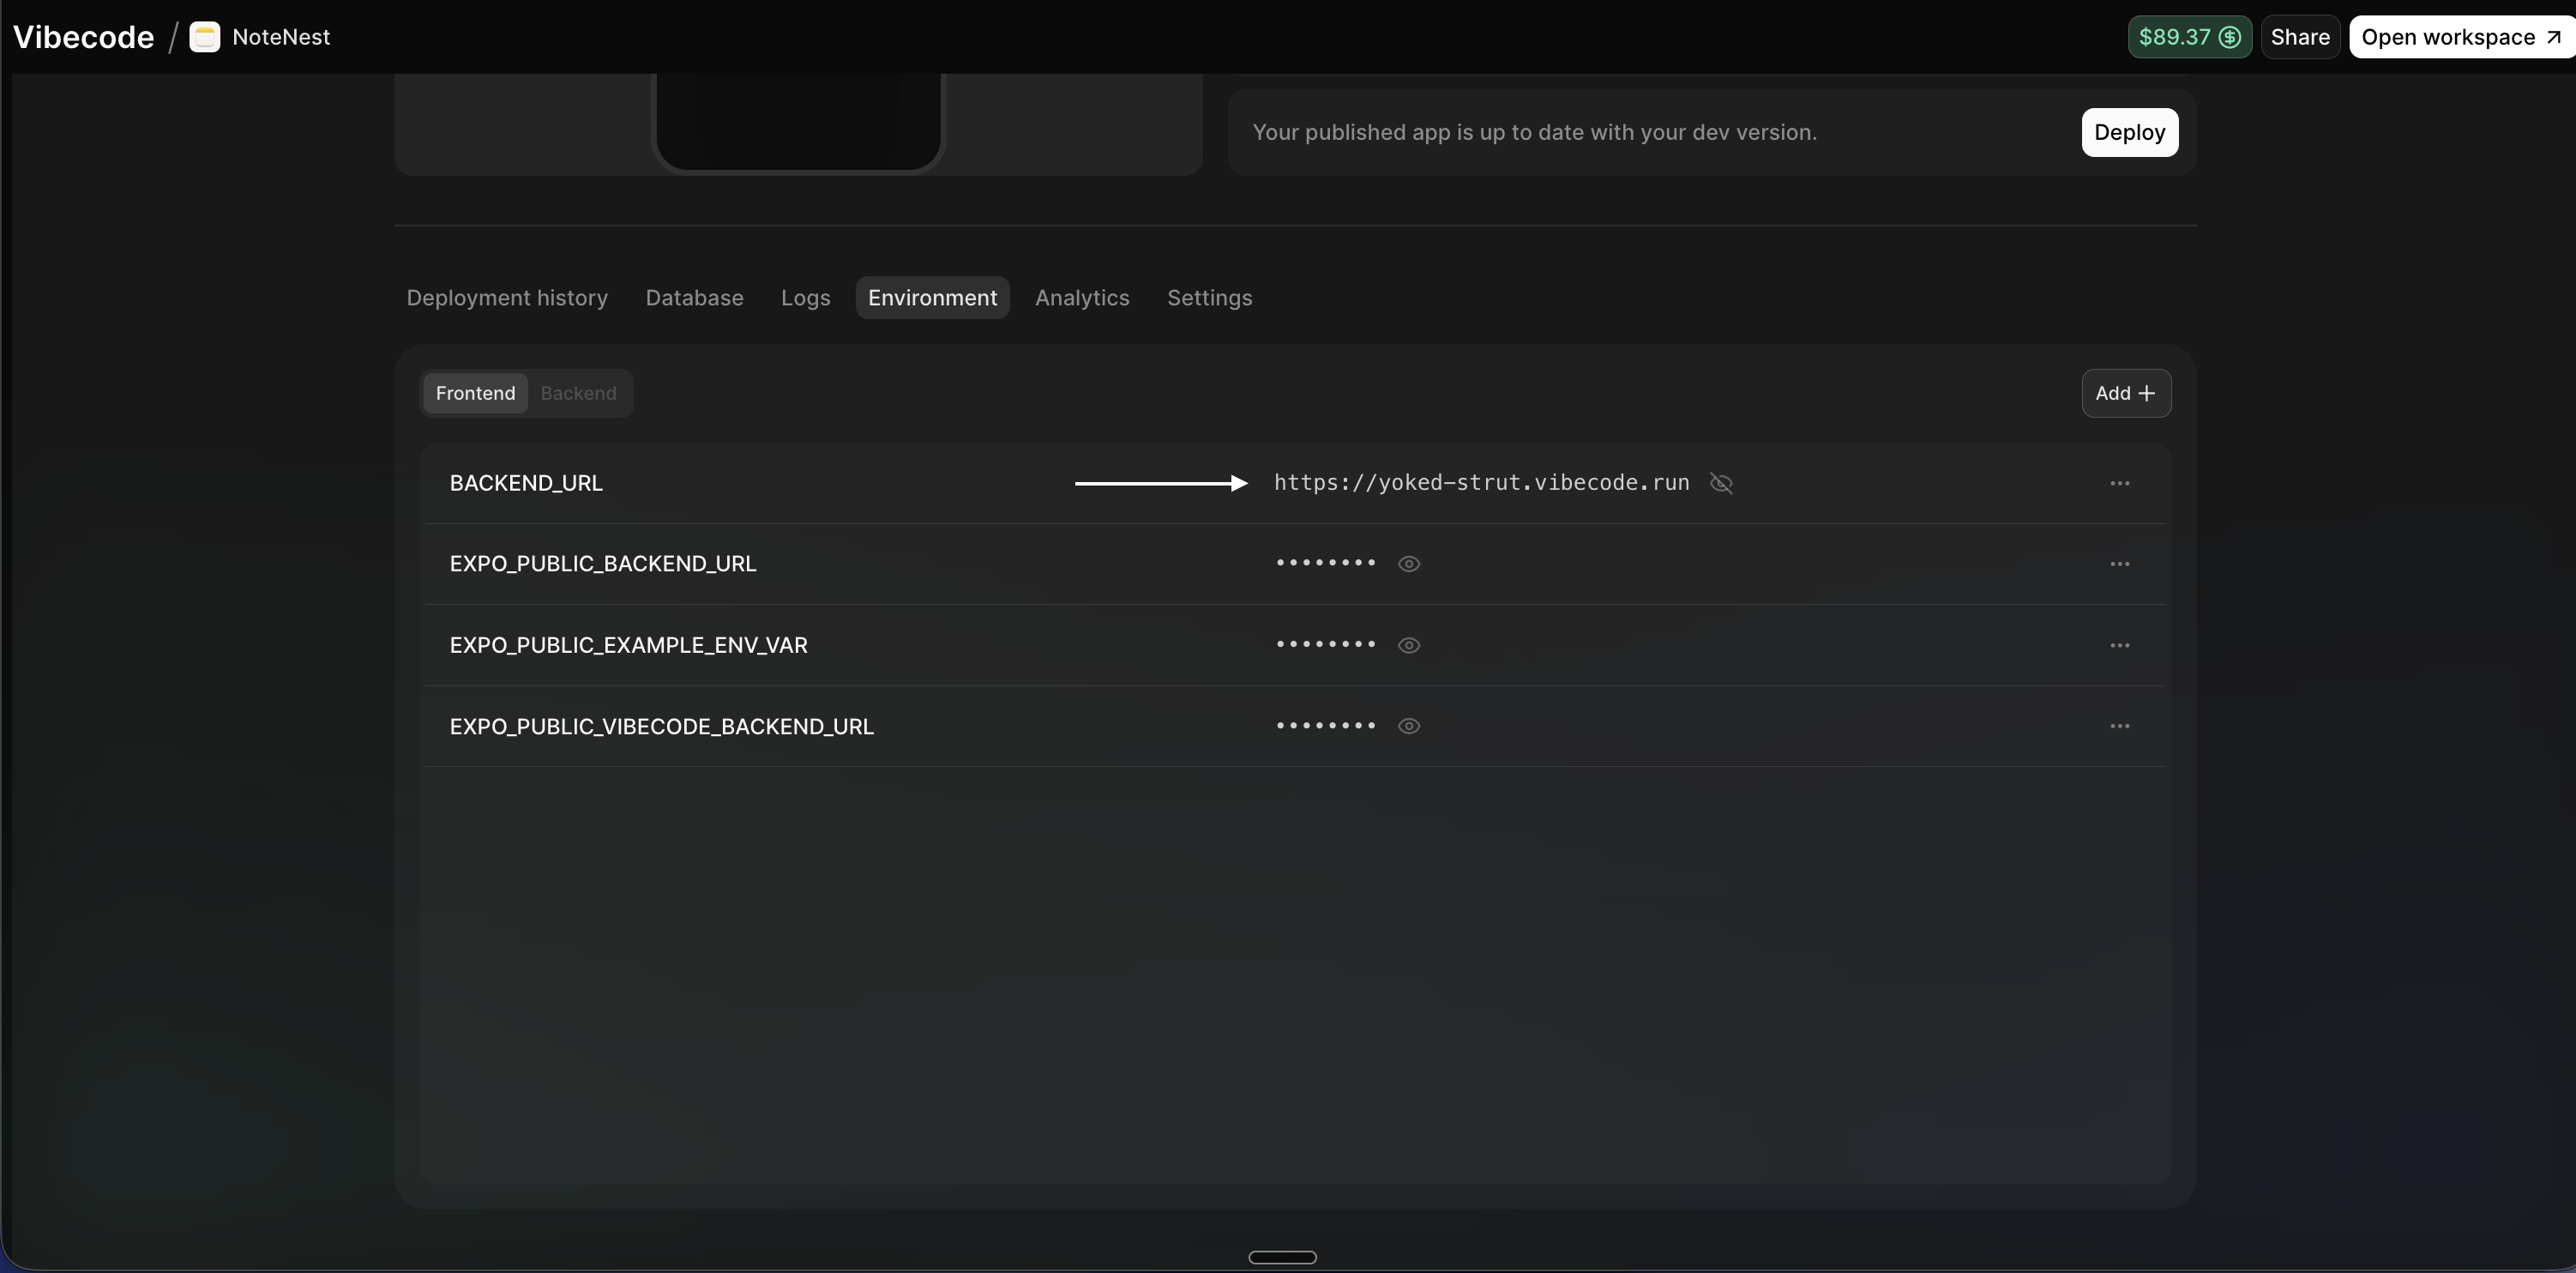
- Go to the Environment tab (or ENV)
- Find BACKEND_URL (the URL that looks like
something.vibecode.run) - Copy that URL — you will paste it into Google Cloud in the next step. Do not add a trailing slash.
Step 6: Create the OAuth Client (Web Application)
- Go back to Google Cloud Console
- Go to APIs & Services → Credentials (hamburger menu if needed)
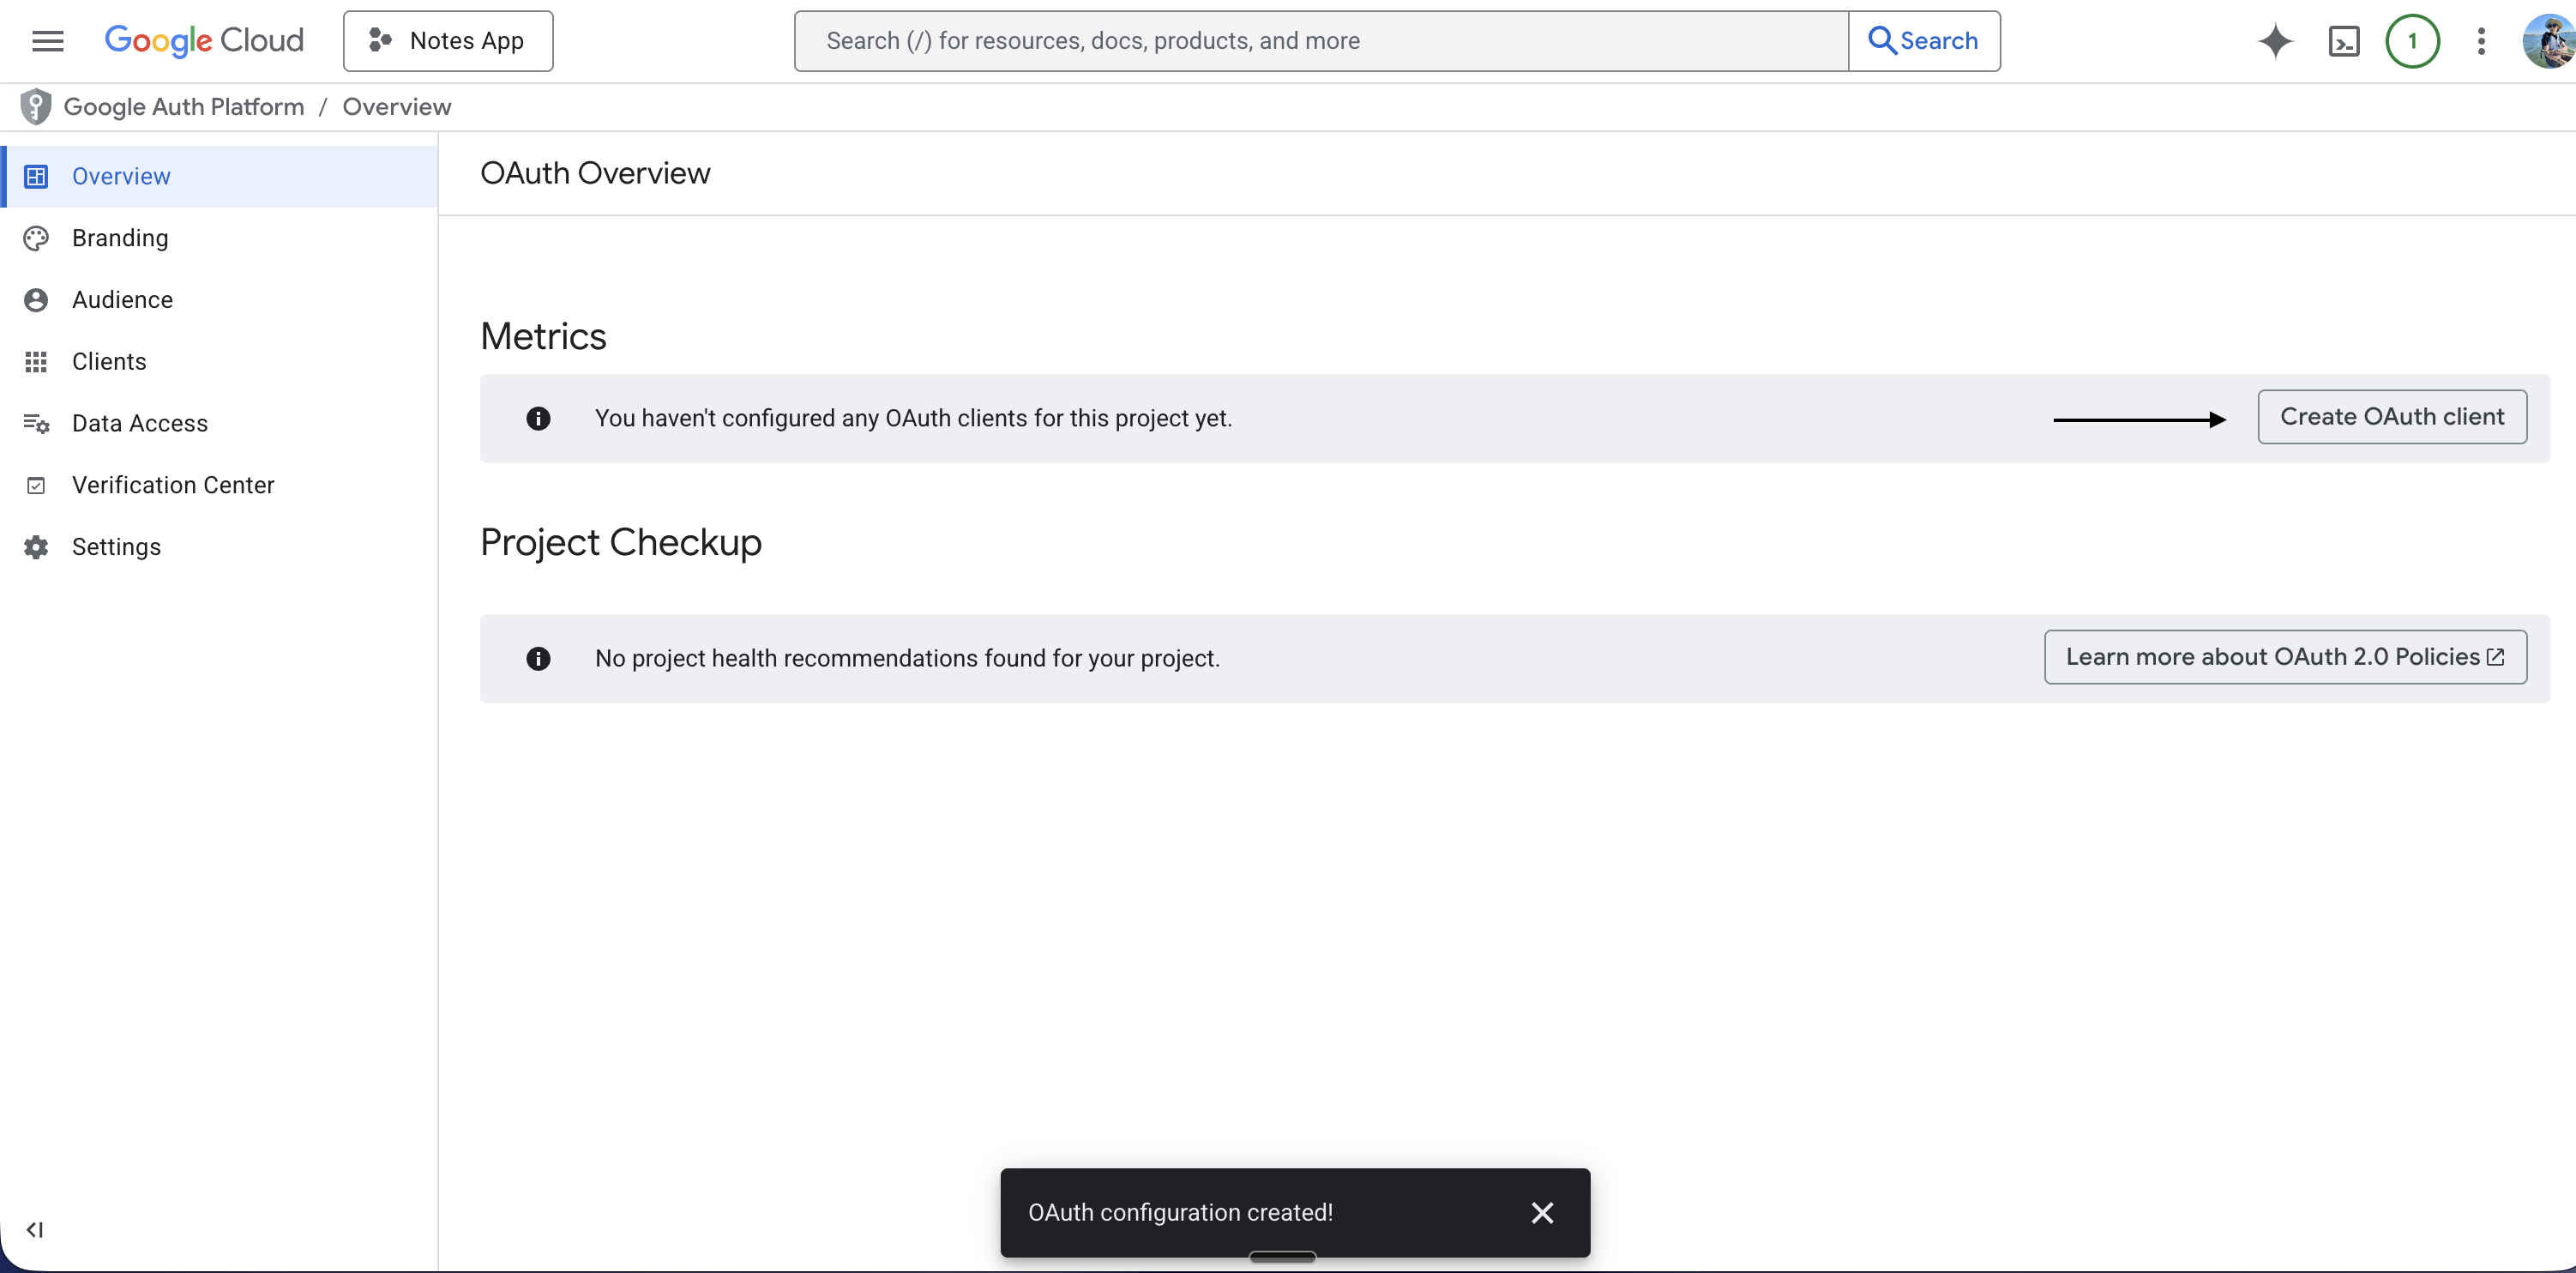
- Click Create credentials
- Click OAuth client ID
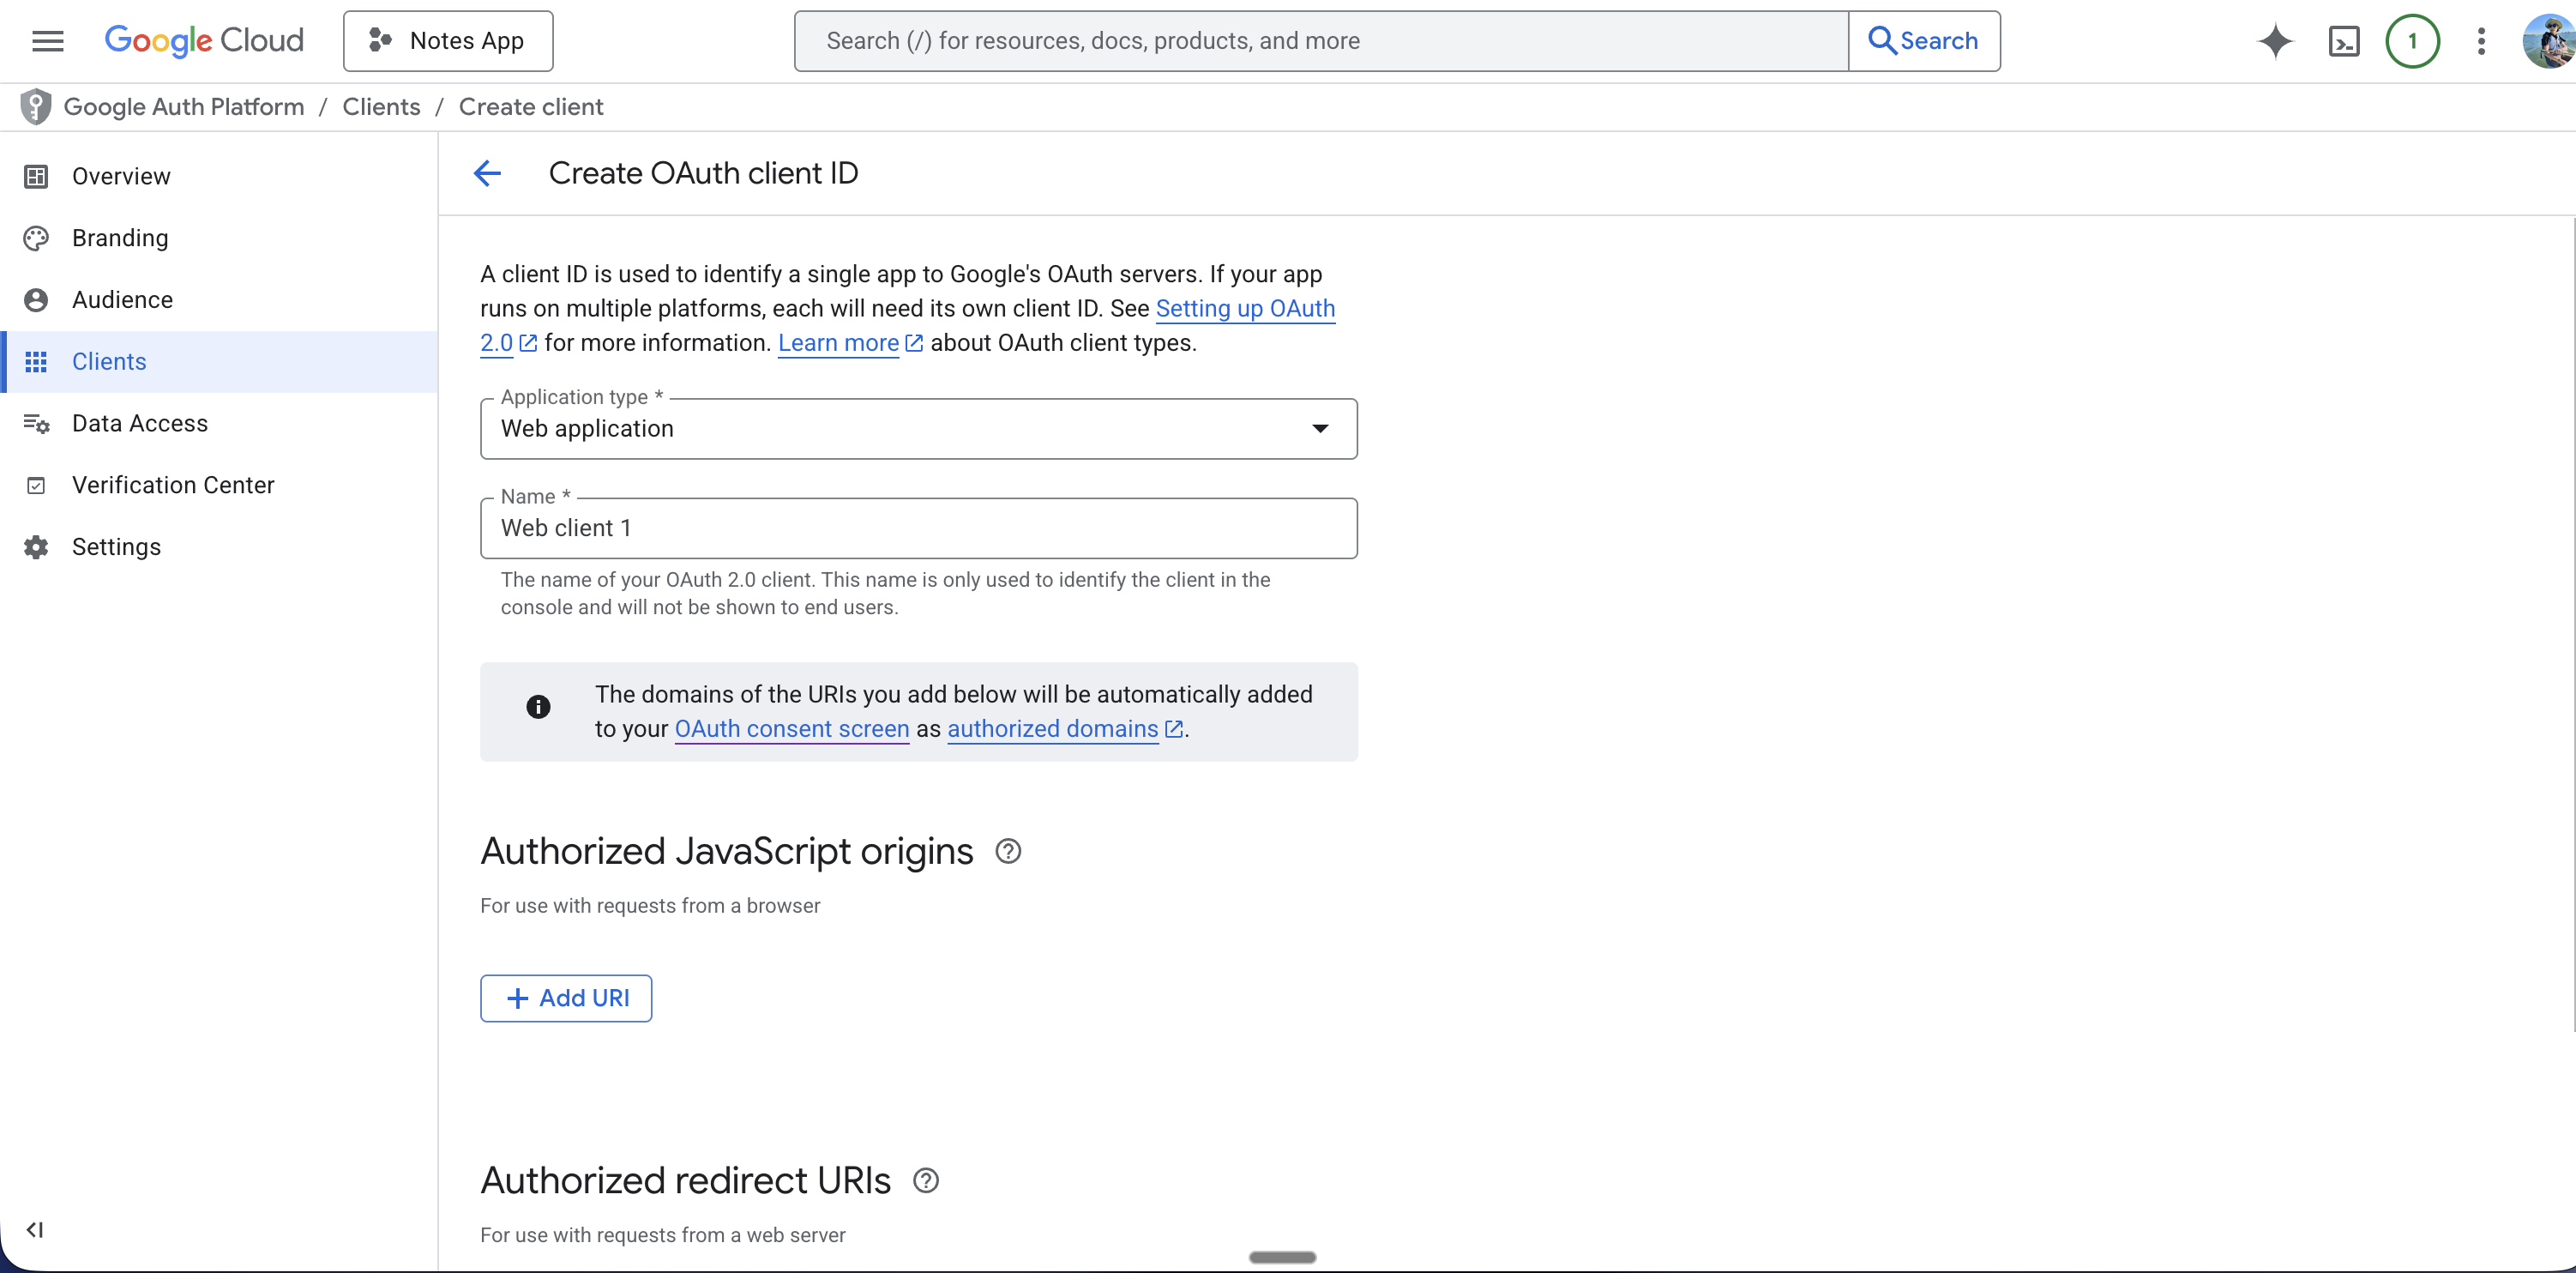
- For Application type, choose Web application (not iOS or Android — Better Auth uses the web flow)
- You can name the web application if you want (e.g. “Vibecode Web Client”)
Step 7: Add the Authorized JavaScript origin
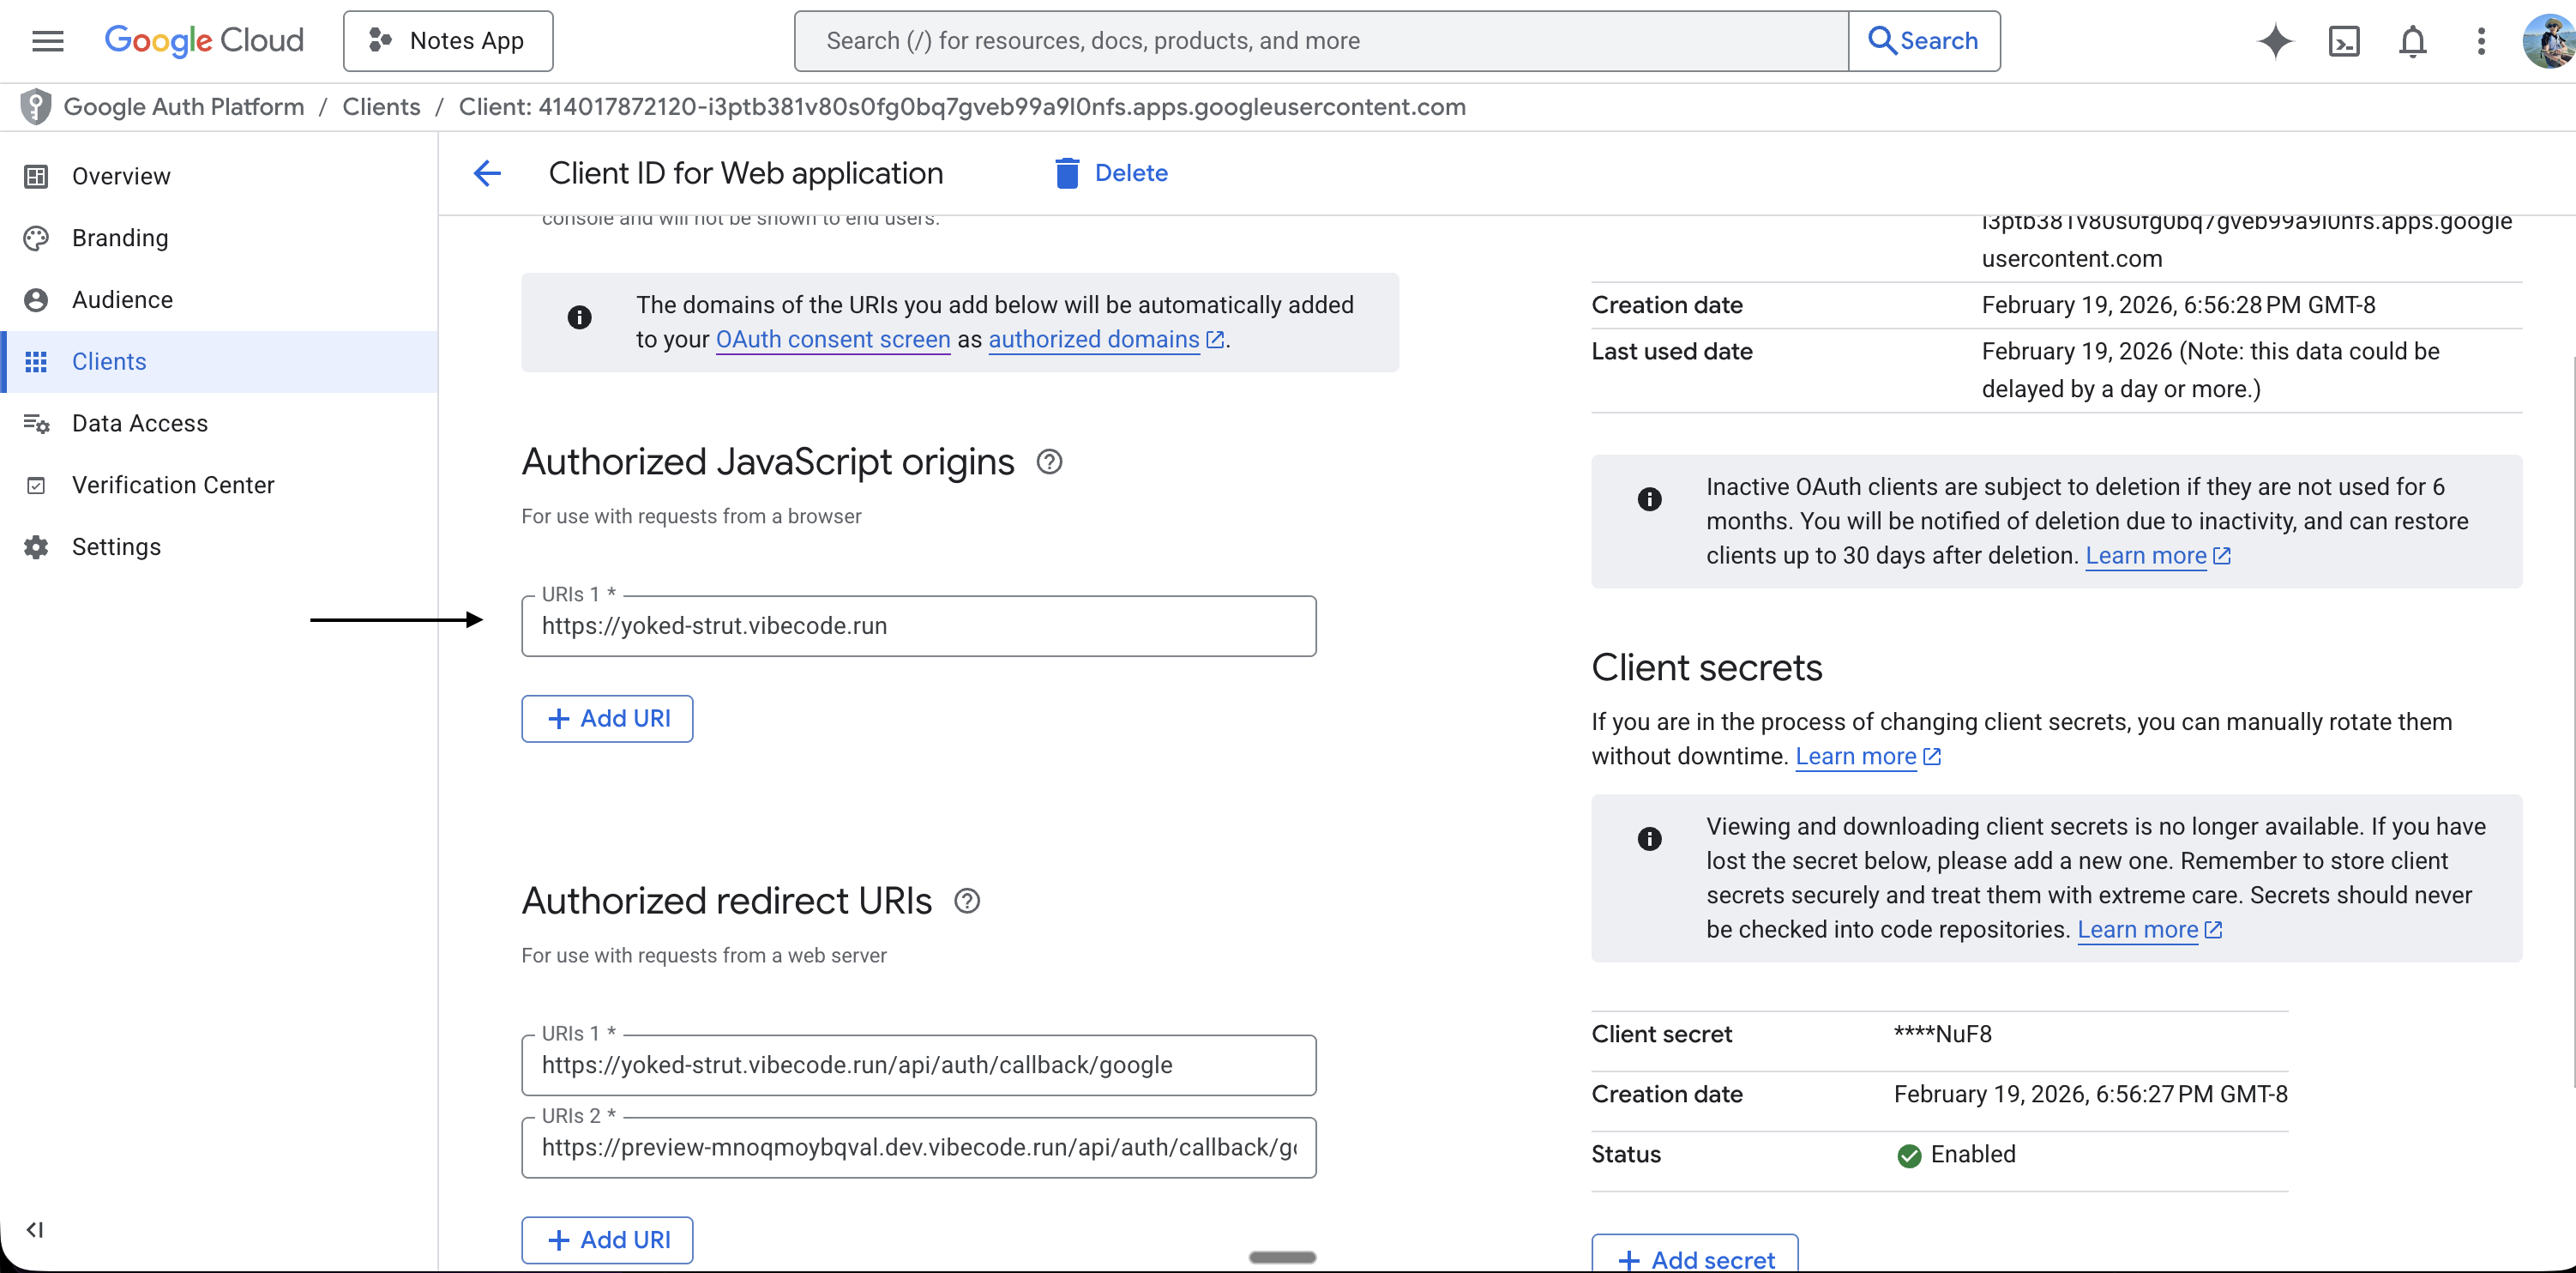
Google requires an Authorized JavaScript origin in addition to the redirect URI. If this is missing, Google will returnorigin_mismatch and sign-in will fail.
- In the same OAuth client form, find Authorized JavaScript origins
- Click Add URI
- Paste your backend URL exactly as it appears in Vibecode (from Step 5)
https://your-backend.vibecode.run
Important:
- Do not add
/apior any path - Do not add a trailing slash
- It must exactly match your deployed backend URL
- If you use a preview backend, add that preview domain here as well (e.g.
https://preview-XXXXX.dev.vibecode.run)
Step 8: Add the Authorized Redirect URI
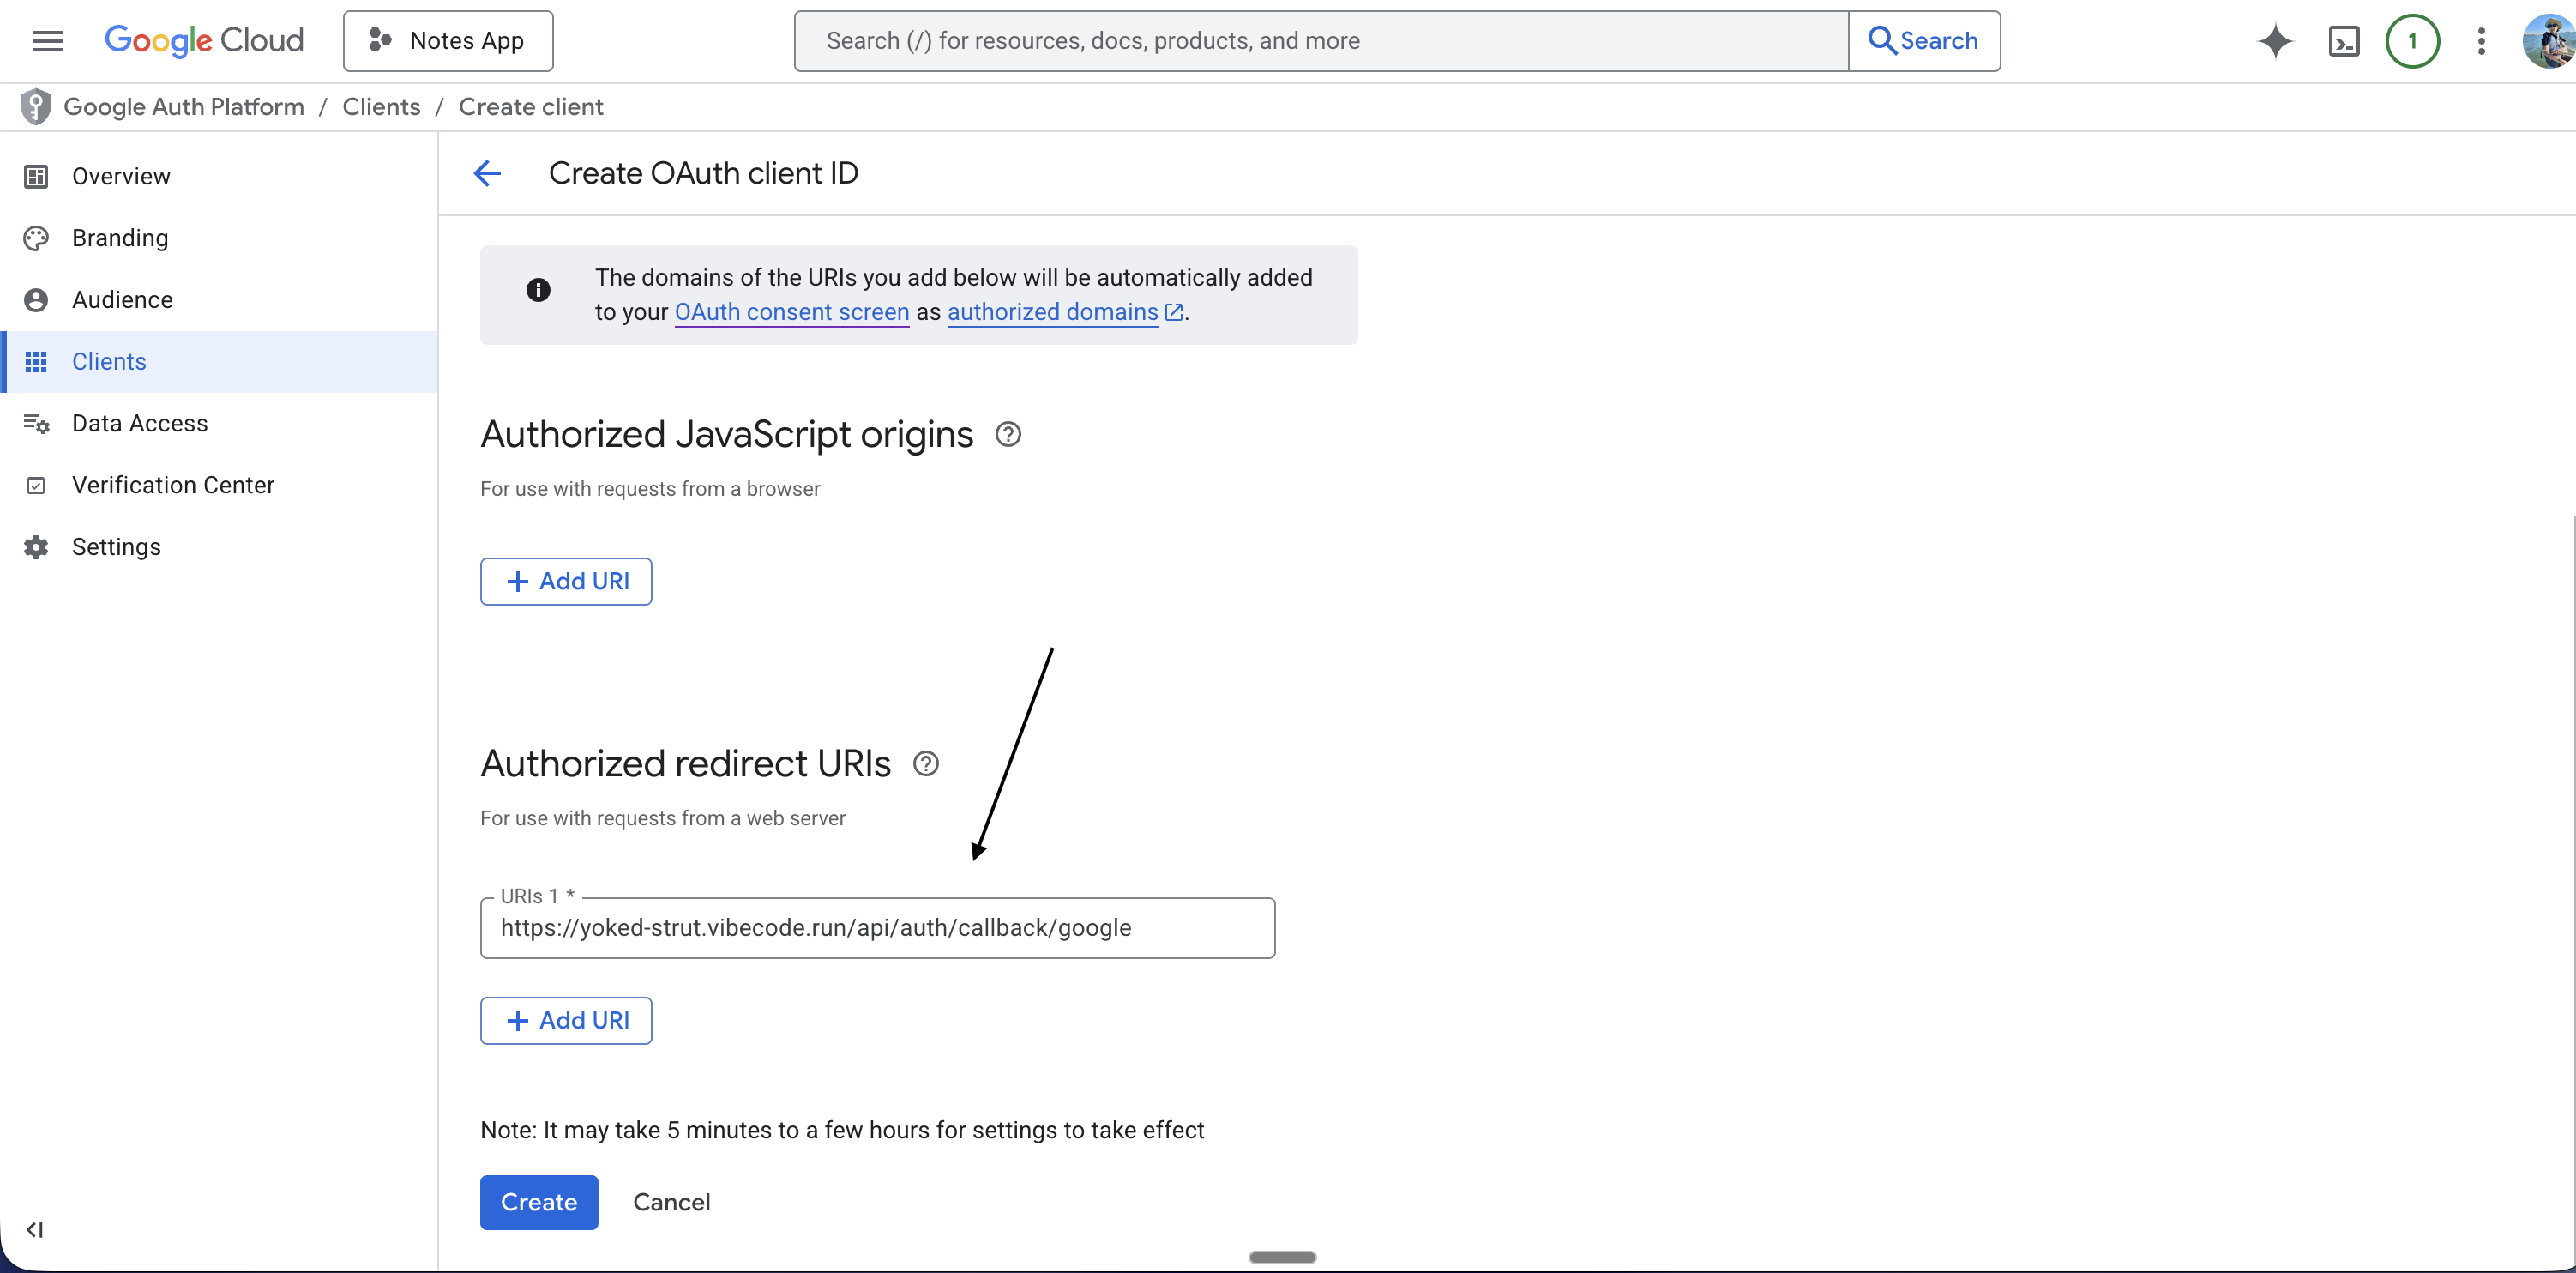
- In the same form, find Authorized redirect URIs
- Click Add URI
- Paste your backend URL from Step 5
- Add exactly this path after the URL:
/api/auth/callback/google
https://your-backend.vibecode.run/api/auth/callback/google (use your actual URL; no trailing slash before the path).
If you want to test inside the Vibecode app (preview)
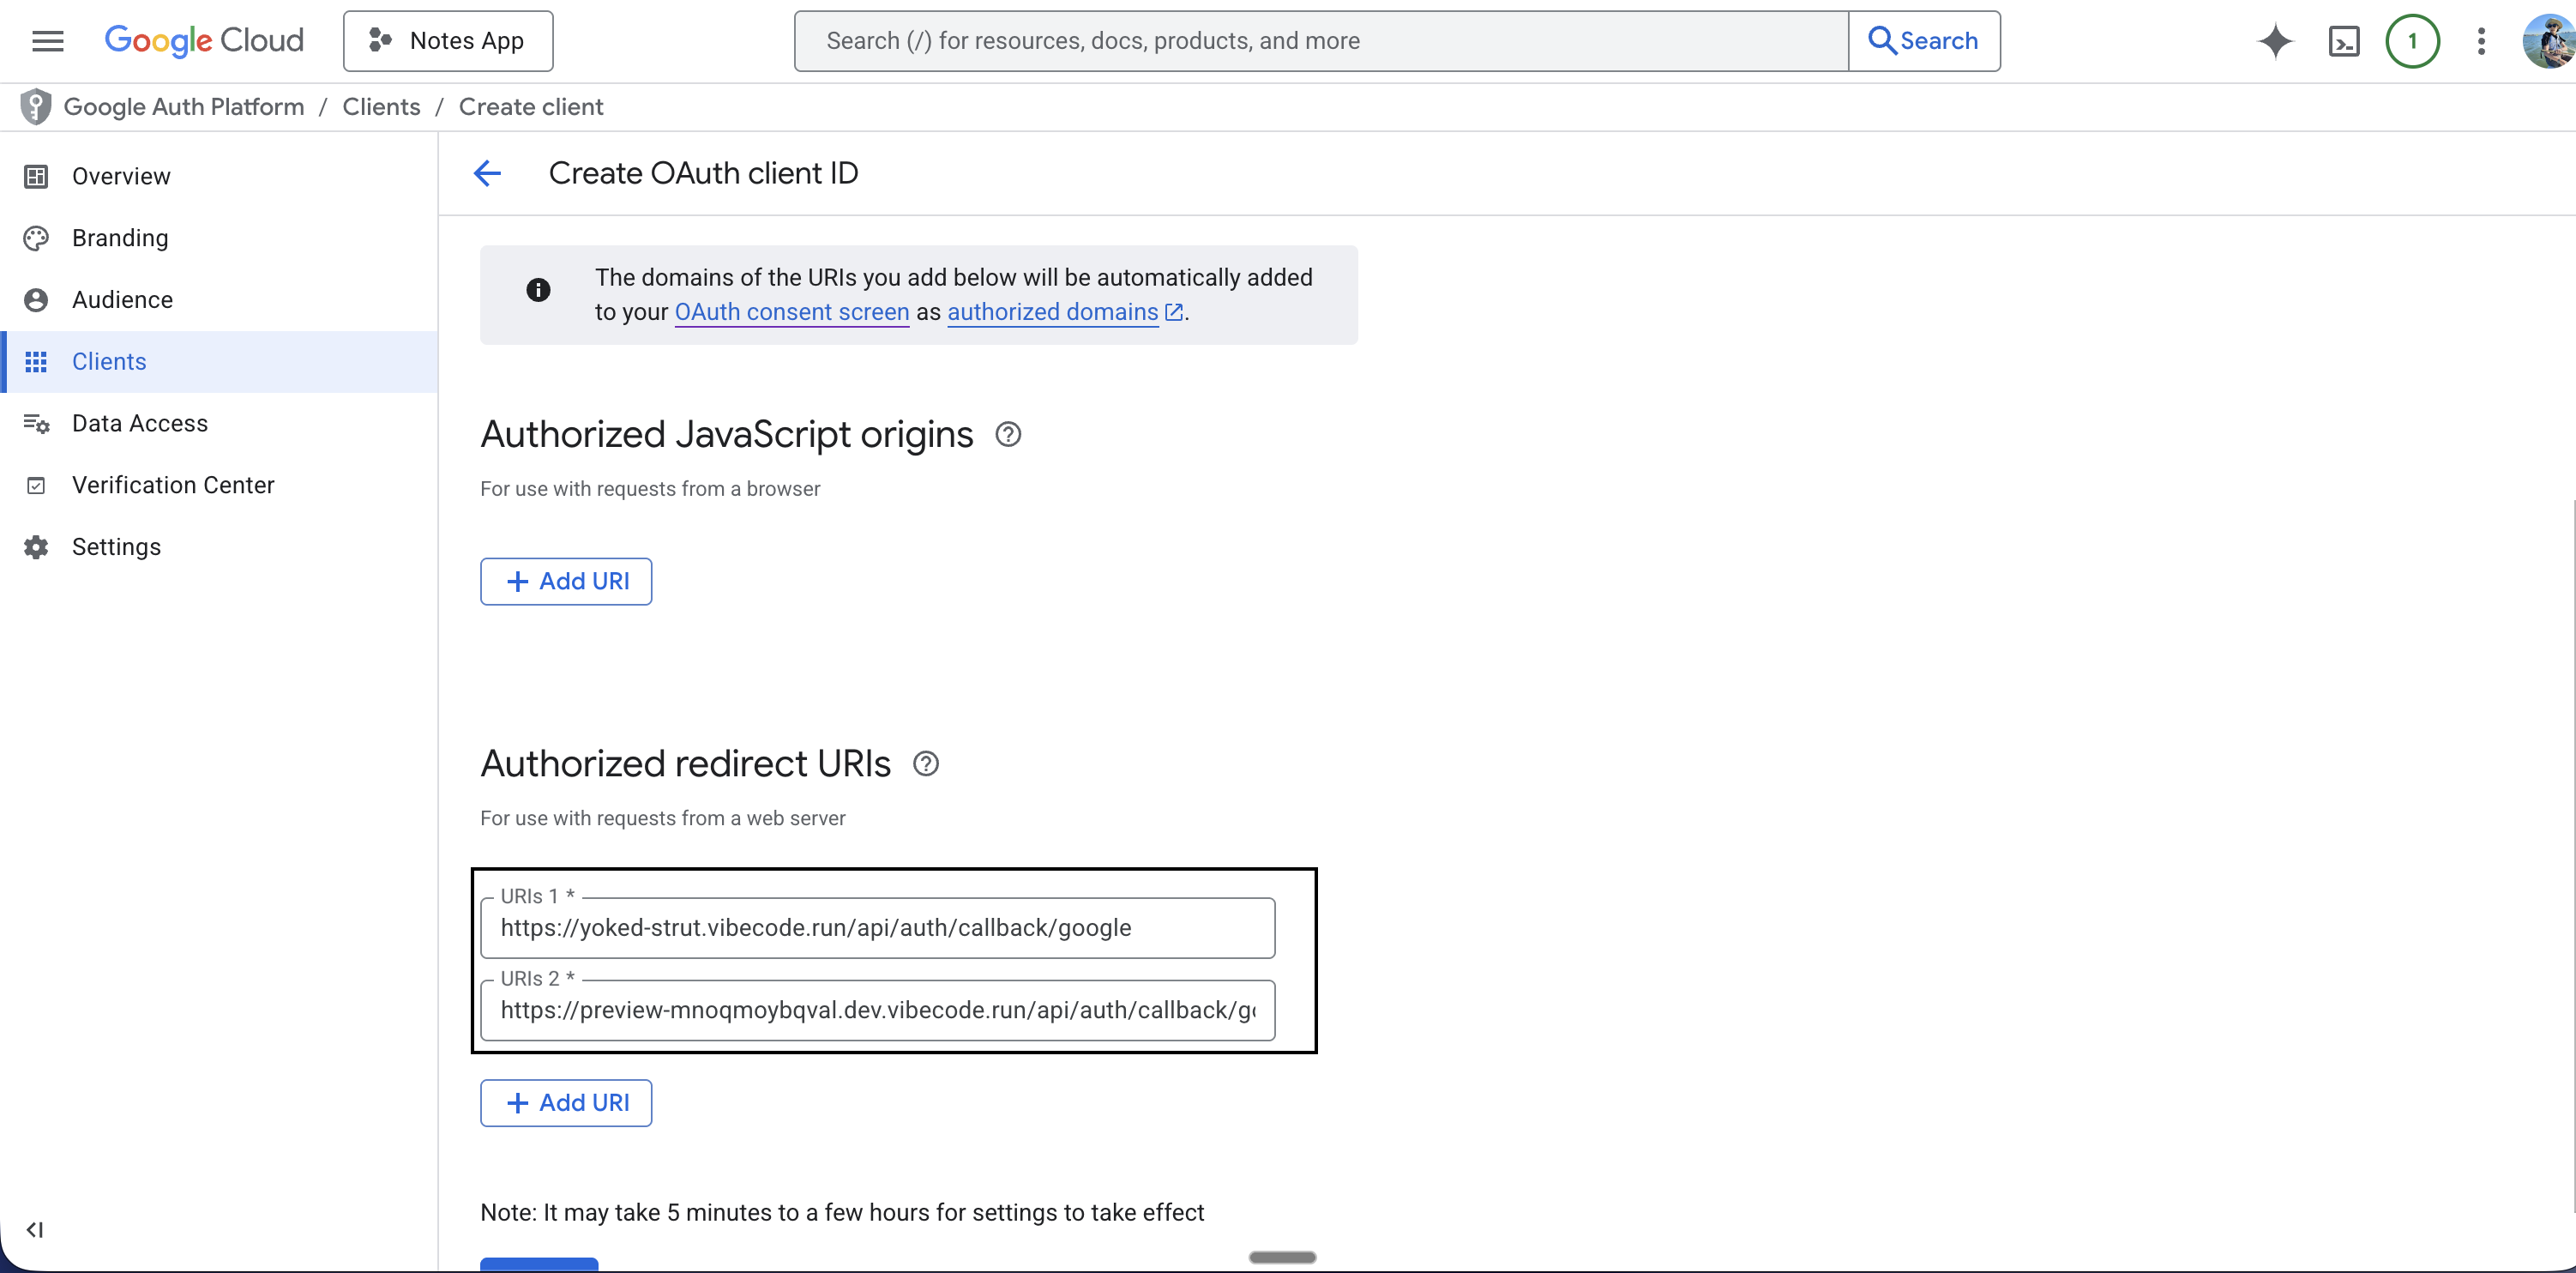
You can add a preview URL so sign-in works when you preview the app in Vibecode.- In Vibecode, ask the agent for the preview URL or find it in the Environment tab (e.g.
https://preview-XXXXX.dev.vibecode.run) - In Google Cloud, in Authorized redirect URIs, click Add URI again and add:
https://YOUR-PREVIEW-URL/api/auth/callback/google
Step 9: Save, Create, and Copy Your Credentials
- Click Save if there is a Save button on the form
- Click Create
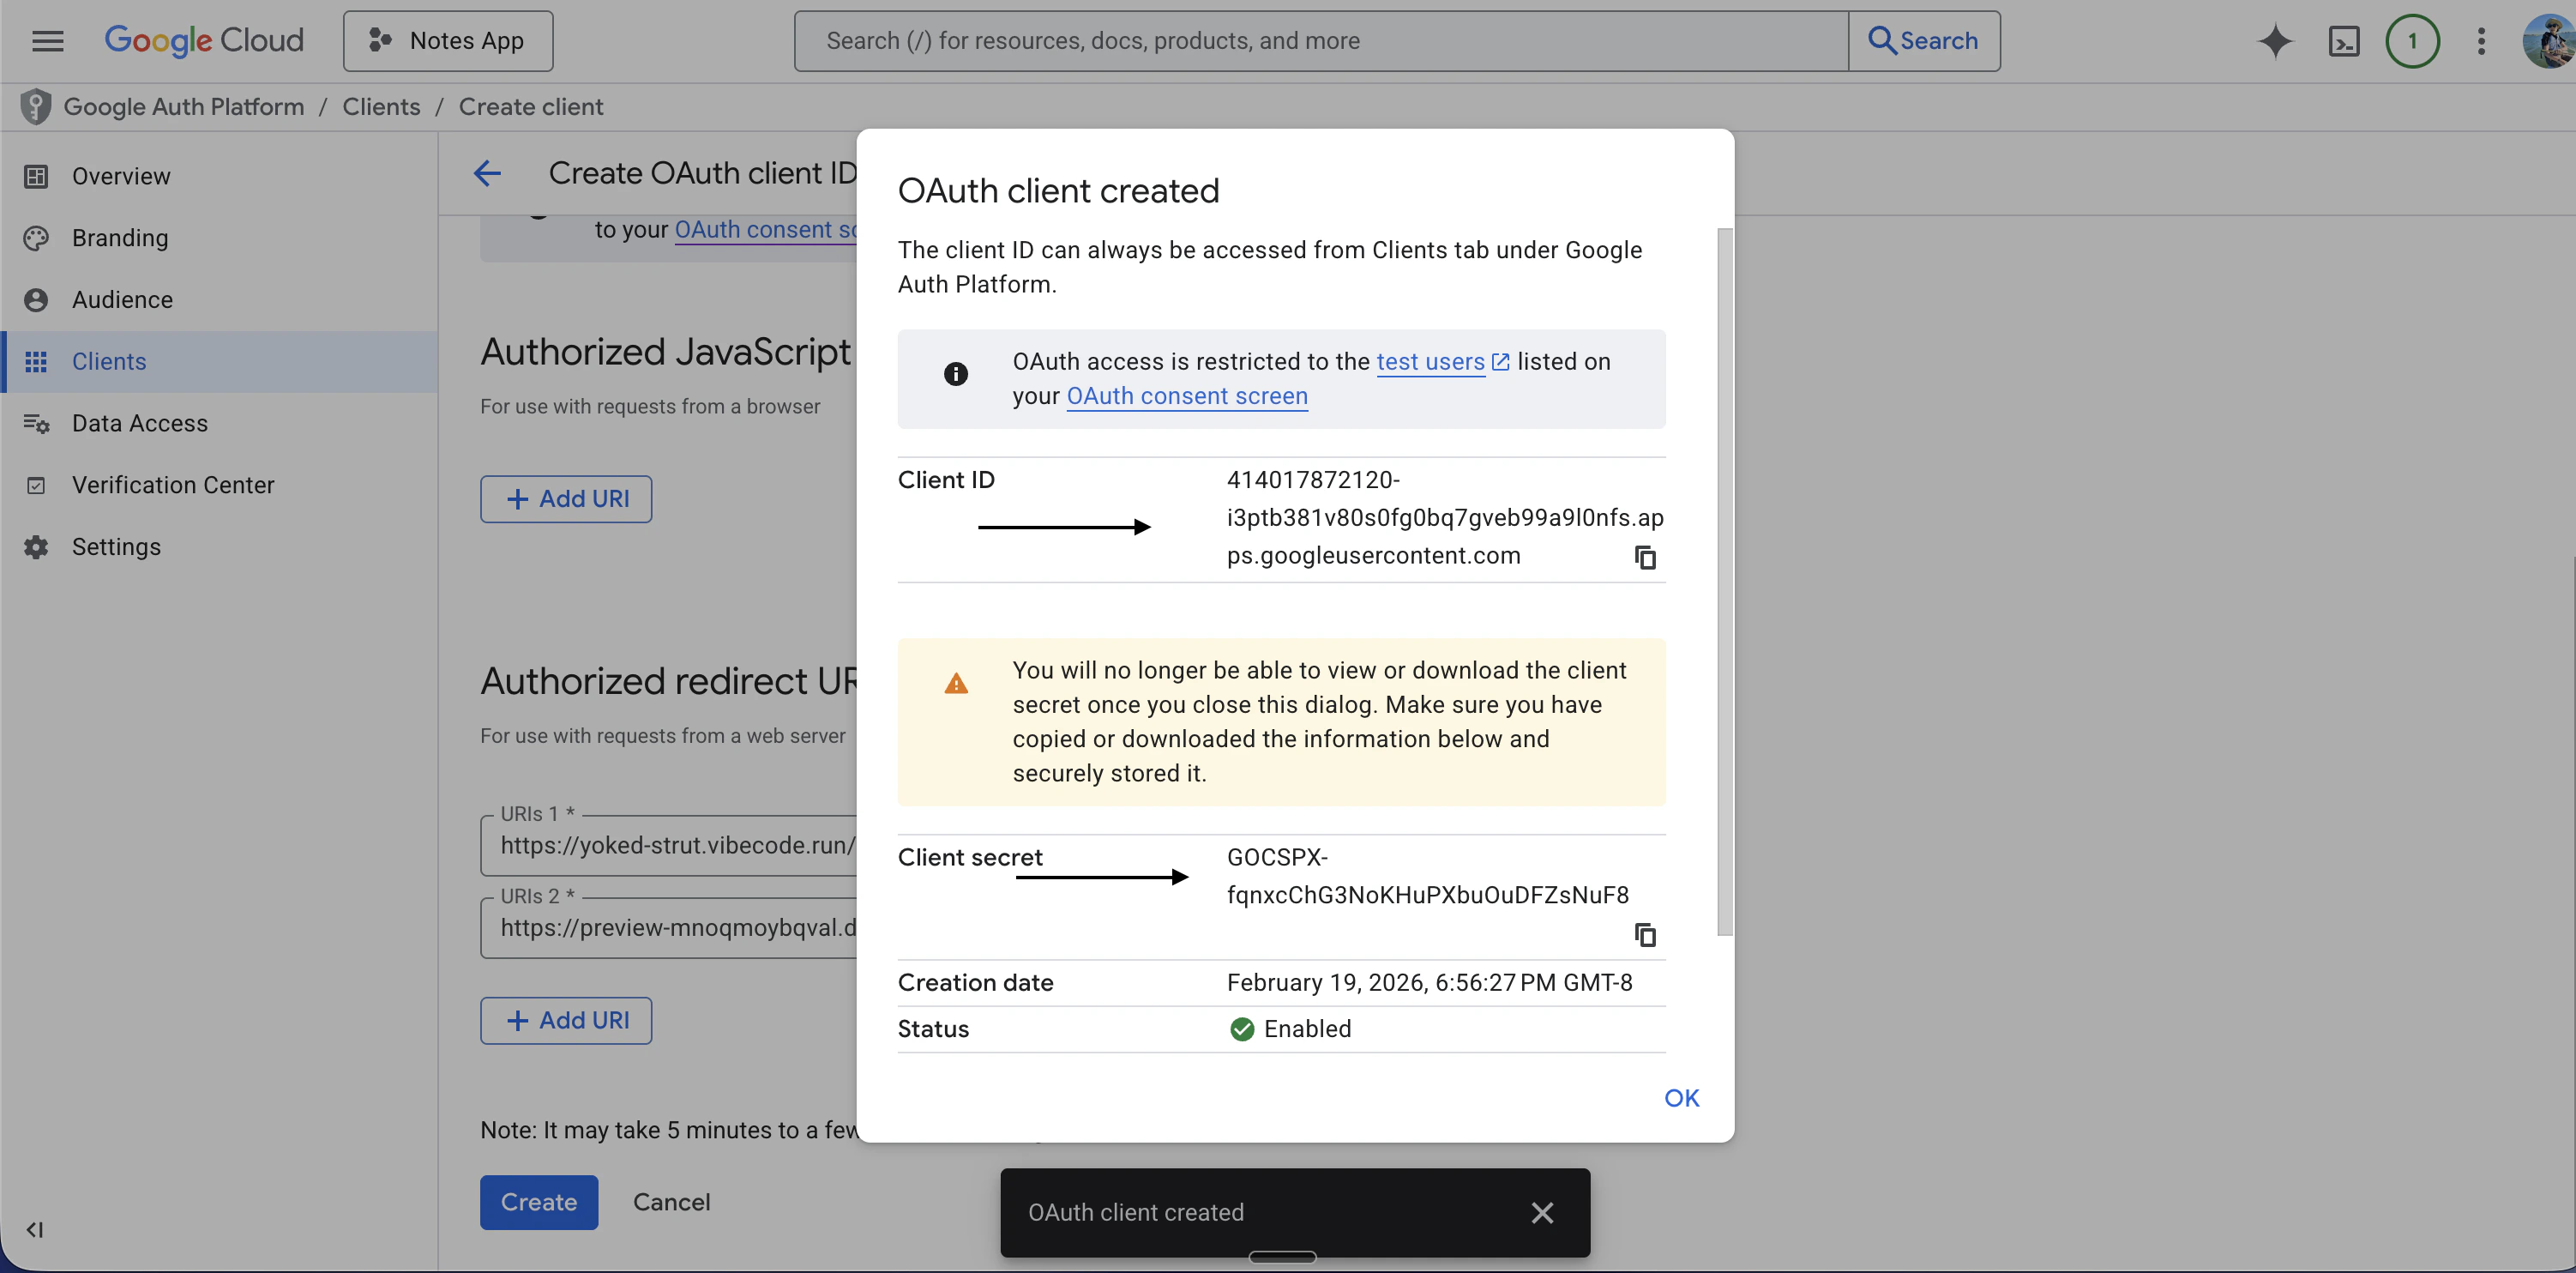
- A pop-up appears: OAuth client created. It shows your Client ID and Client secret
- Copy both values now. You will add them to Vibecode in the next step.
Step 10: Add Environment Variables in Vibecode
- Open the Vibecode app
- Go to the Environment variables tab (or ENV tab)
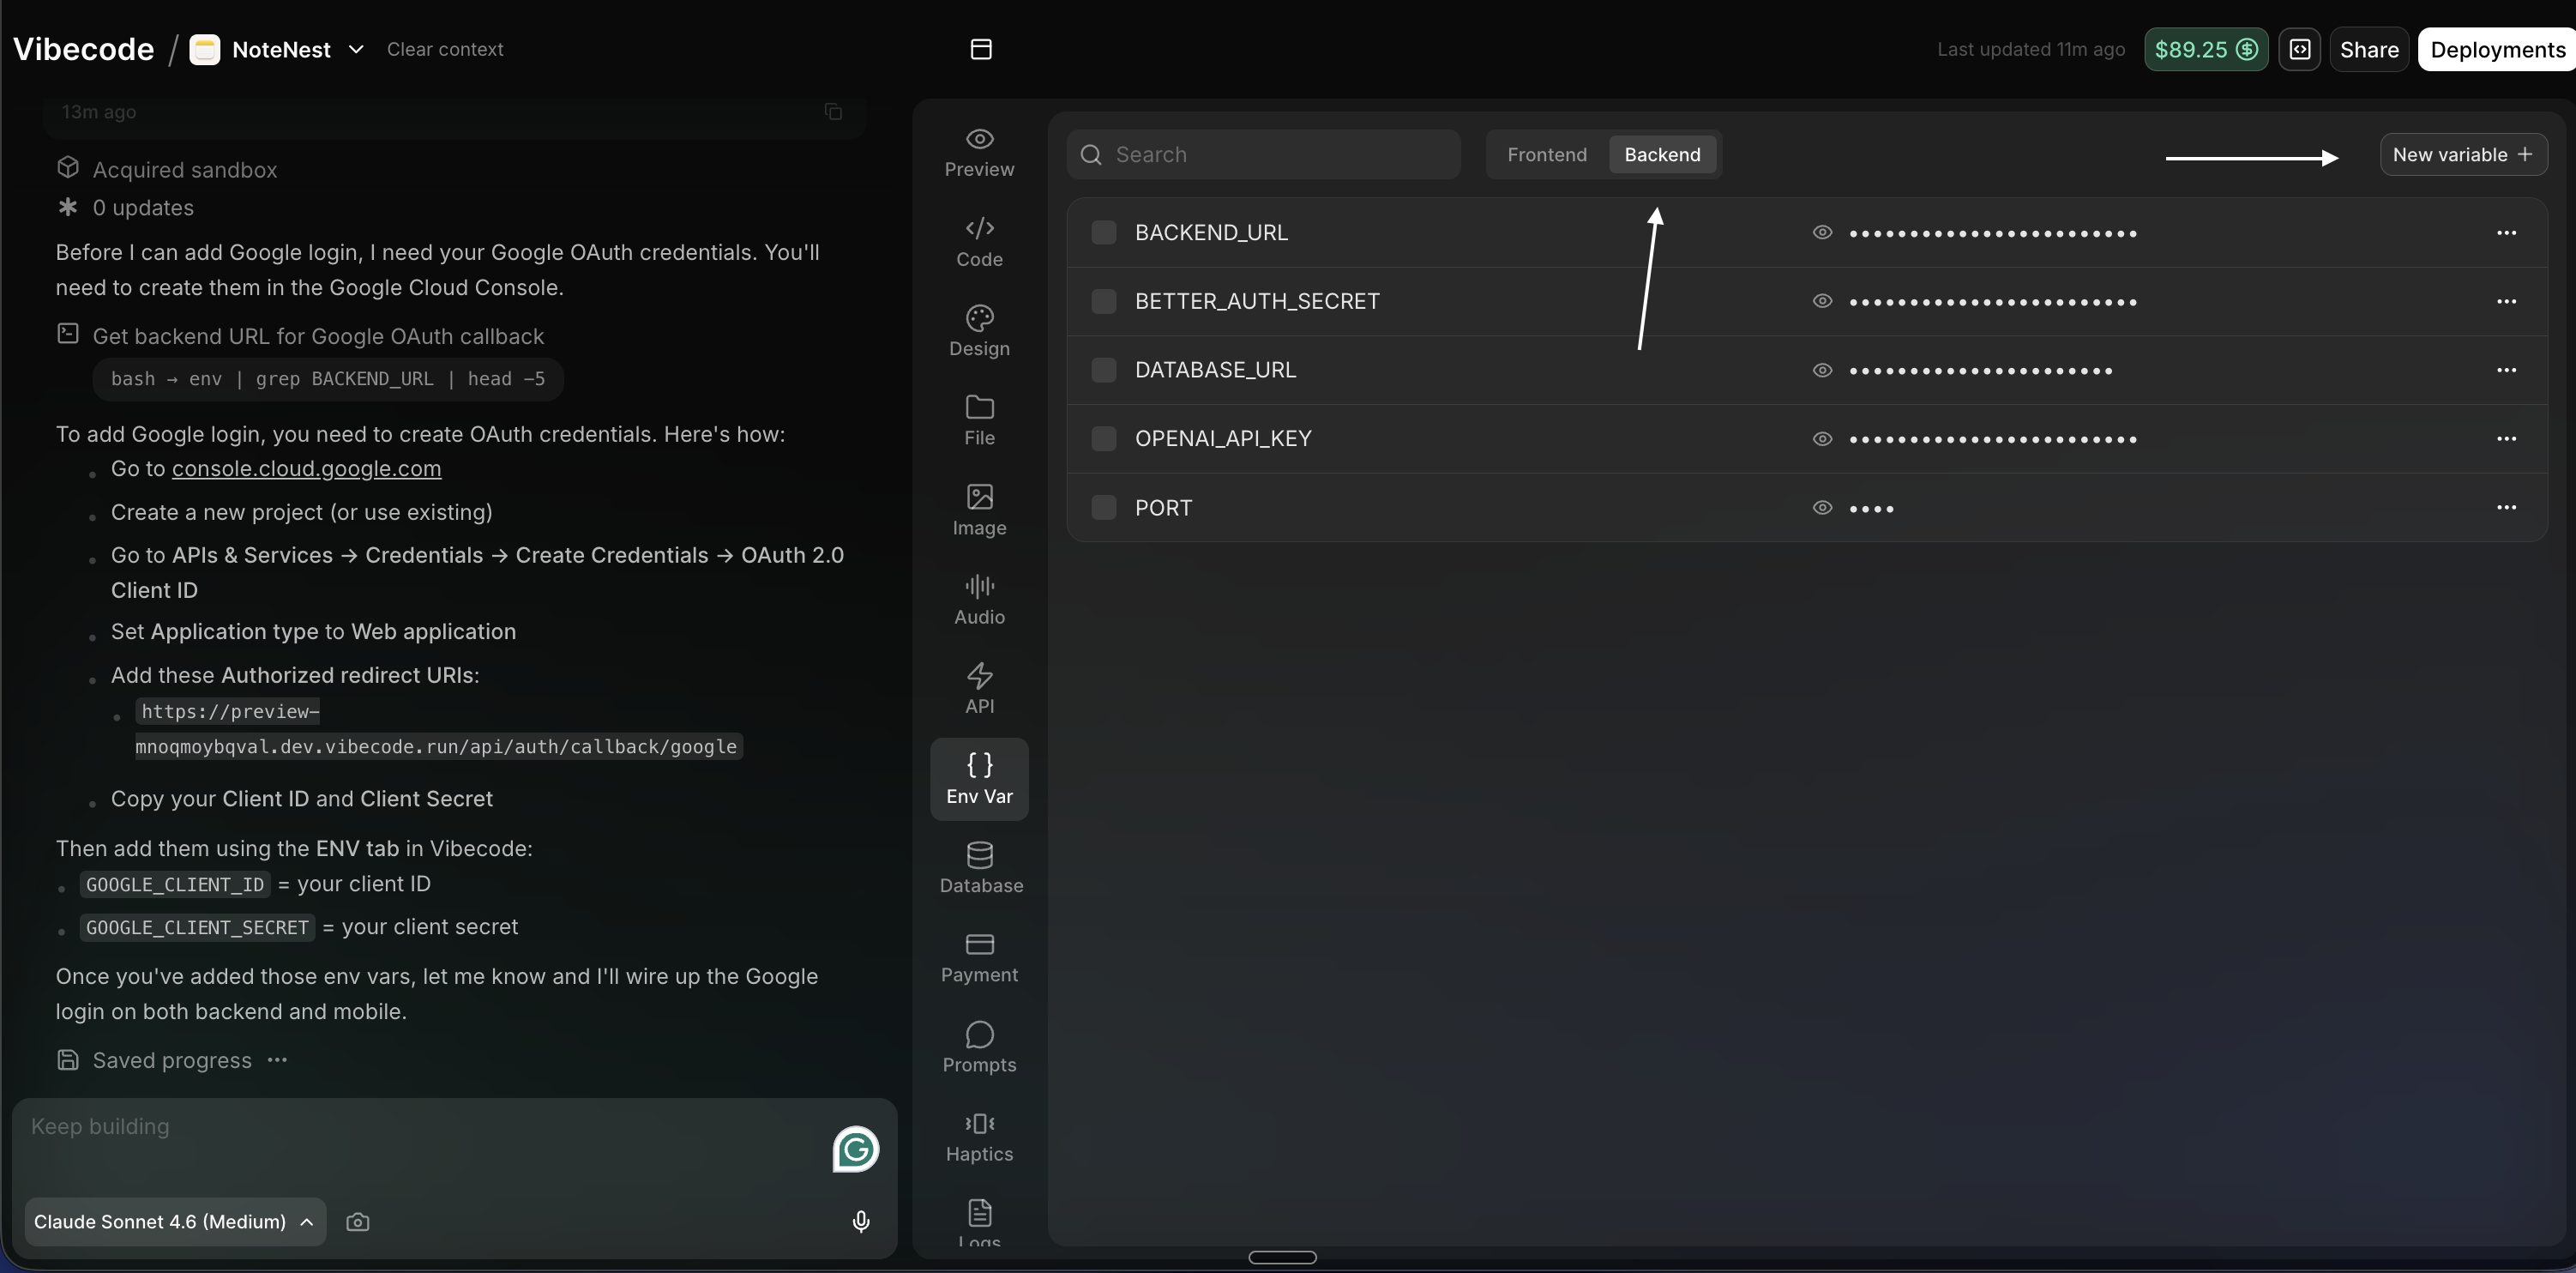
- Click Backend — add both variables in the Backend section, not Frontend
- Click New variable (or Add variable)
- Add two variables:
- Key:
GOOGLE_CLIENT_ID— Value: your Client ID from Step 9 - Key:
GOOGLE_CLIENT_SECRET— Value: your Client secret from Step 9
- Key:
- Save (make sure you save after adding both)
Important: Update the scheme only when you publish your app
The Vibecode scheme (e.g.vibecode) will work when you test inside the Vibecode app. You do not need to change it for that.
As soon as you publish your real app (e.g. to the App Store or Play Store), you need to update the scheme to match your app’s own bundle identifier/scheme. Otherwise, when Google redirects back after sign-in, the deep link may open the wrong app or fail.
When you publish, update the scheme in all of these places so they match exactly:
Google Cloud Console: The redirect URI does not change when you update the scheme. It stays
https://YOUR_BACKEND_URL/api/auth/callback/google. The scheme is only used for the final redirect from your backend back to your native app.