> ## Documentation Index
> Fetch the complete documentation index at: https://www.vibecodeapp.com/docs/llms.txt
> Use this file to discover all available pages before exploring further.
# Connect a Custom Domain
> Use your own domain for your deployed Vibecode web app
Want to use your own domain instead of the default `.vibecode.run` URL? This guide walks you through connecting a custom domain to your deployed Vibecode web app.
## Before You Start
You'll need:
* A **deployed Vibecode web app** (see [Deploying Your Web App](/deploying/guide) if you haven't deployed yet)
* A **domain you own** with access to its DNS settings (e.g. via Cloudflare, GoDaddy, Namecheap, etc.)
## Step 1: Open the Domain Tab
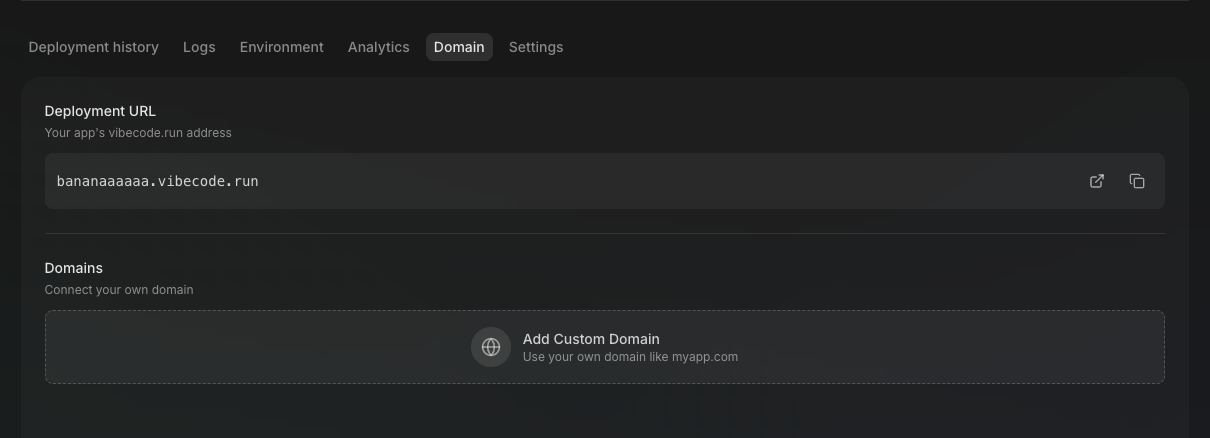
In your deployment dashboard, click the **Domain** tab.
 ## Step 2: Add Your Domain
Click the **Add Custom Domain** button. You'll see a modal with two options.
## Step 2: Add Your Domain
Click the **Add Custom Domain** button. You'll see a modal with two options.
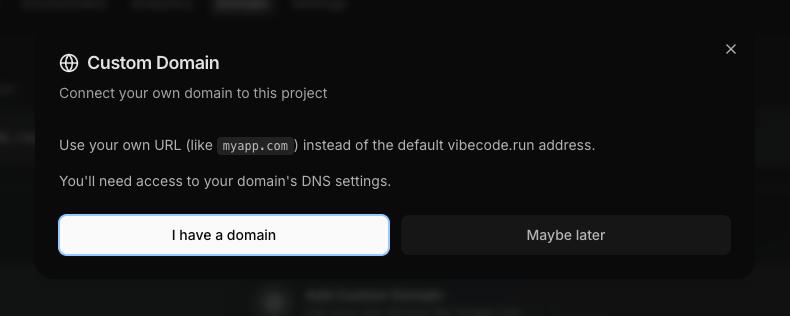 Click **"I have a domain"** to continue.
## Step 3: Enter Your Domain
Type in your domain name, just the domain, with no `http://` or `https://` prefix.
Click **"I have a domain"** to continue.
## Step 3: Enter Your Domain
Type in your domain name, just the domain, with no `http://` or `https://` prefix.
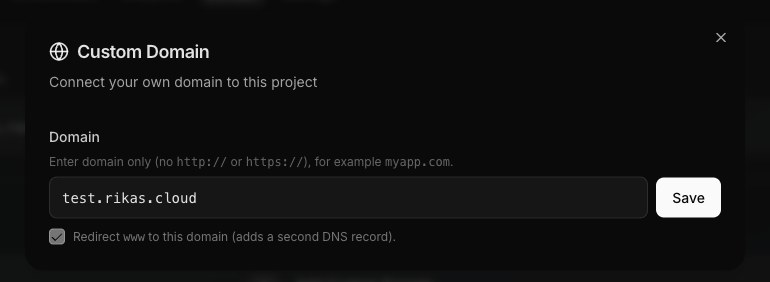 * Enter your domain (e.g. `example.com`)
* Optionally check **"Redirect www to this domain"** if you want `www.example.com` to redirect to your apex domain
* Click **Save**
## Step 4: Configure DNS Records
After saving, Vibecode shows you the DNS records you need to add at your domain provider. The exact records depend on whether you're connecting an **apex domain** or a **subdomain**.
* Enter your domain (e.g. `example.com`)
* Optionally check **"Redirect www to this domain"** if you want `www.example.com` to redirect to your apex domain
* Click **Save**
## Step 4: Configure DNS Records
After saving, Vibecode shows you the DNS records you need to add at your domain provider. The exact records depend on whether you're connecting an **apex domain** or a **subdomain**.
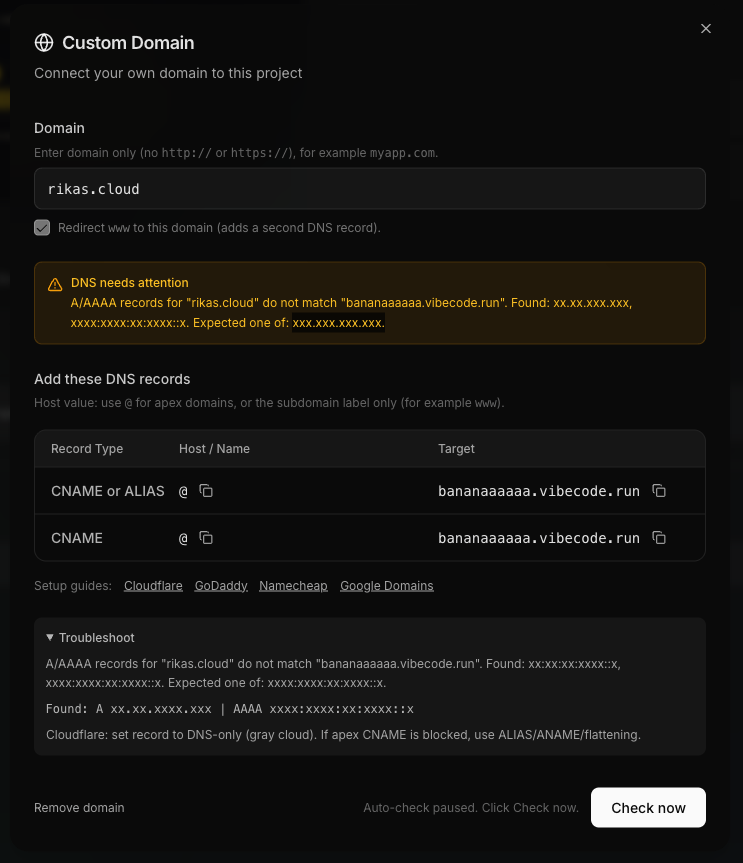 | Type | Name | Target |
| -------------- | ----- | ----------------------------- |
| CNAME or ALIAS | `@` | `.vibecode.run` |
| CNAME | `www` | `.vibecode.run` |
| Type | Name | Target |
| -------------- | ----- | ----------------------------- |
| CNAME or ALIAS | `@` | `.vibecode.run` |
| CNAME | `www` | `.vibecode.run` |
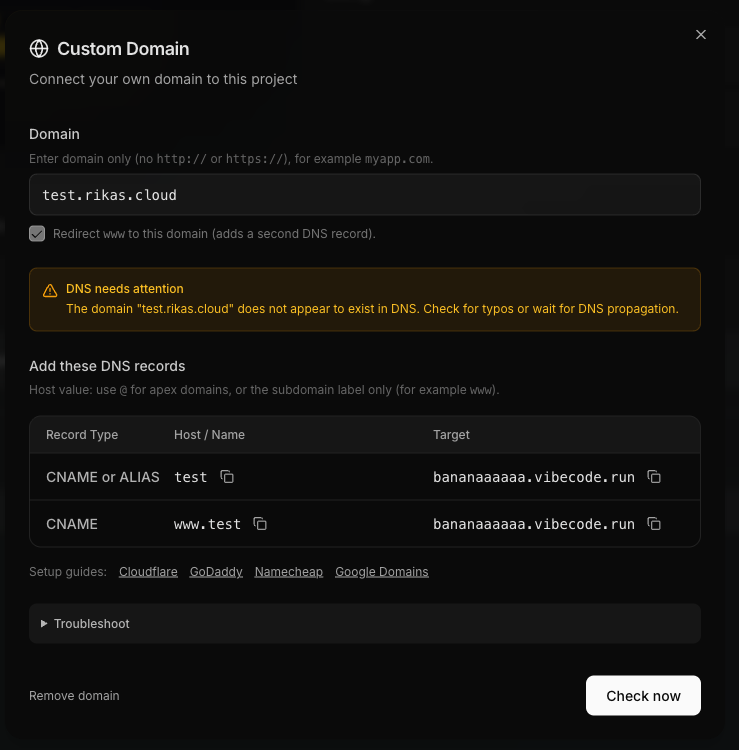 | Type | Name | Target |
| ----- | --------- | ----------------------------- |
| CNAME | `app` | `.vibecode.run` |
| CNAME | `www.app` | `.vibecode.run` |
The `www` record only appears if you enabled the www redirect in the previous step.
Some DNS providers don't support CNAME records on the apex domain (`@`). In that case, use an **ALIAS** or **ANAME** record instead.
## Step 5: Add Records at Your DNS Provider
Go to your DNS provider's dashboard and add the records from the previous step. Here are direct links to guides for popular providers:
Create DNS records on Cloudflare
Add a CNAME record on GoDaddy
Create a CNAME record on Namecheap
Manage DNS records on Google Domains
Manage CNAME records on Hostinger
## Step 6: Verify Your Domain
Once you've added the DNS records, go back to the Domain tab in Vibecode and click **Check now**.
DNS changes can take a while to propagate. If verification fails, wait a bit and try again.
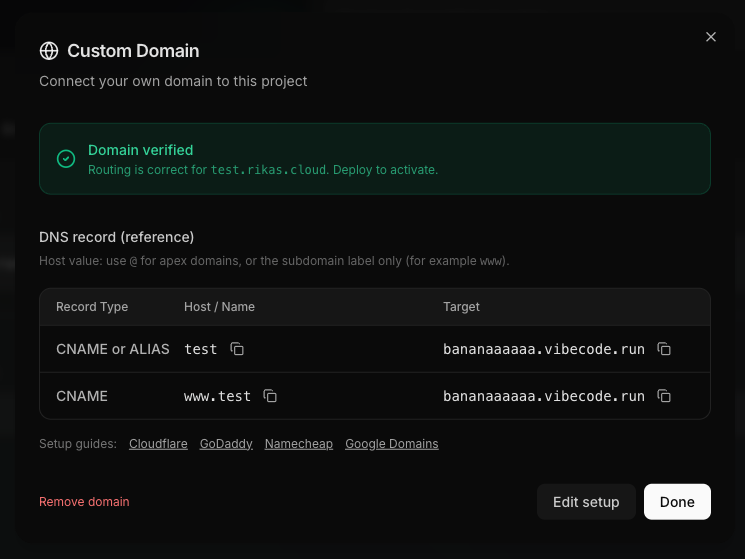
Once verified, you'll see a confirmation banner showing the domain is routed correctly. Click **Done** to finish, then deploy to activate your custom domain.
| Type | Name | Target |
| ----- | --------- | ----------------------------- |
| CNAME | `app` | `.vibecode.run` |
| CNAME | `www.app` | `.vibecode.run` |
The `www` record only appears if you enabled the www redirect in the previous step.
Some DNS providers don't support CNAME records on the apex domain (`@`). In that case, use an **ALIAS** or **ANAME** record instead.
## Step 5: Add Records at Your DNS Provider
Go to your DNS provider's dashboard and add the records from the previous step. Here are direct links to guides for popular providers:
Create DNS records on Cloudflare
Add a CNAME record on GoDaddy
Create a CNAME record on Namecheap
Manage DNS records on Google Domains
Manage CNAME records on Hostinger
## Step 6: Verify Your Domain
Once you've added the DNS records, go back to the Domain tab in Vibecode and click **Check now**.
DNS changes can take a while to propagate. If verification fails, wait a bit and try again.
Once verified, you'll see a confirmation banner showing the domain is routed correctly. Click **Done** to finish, then deploy to activate your custom domain.
 ## Troubleshooting
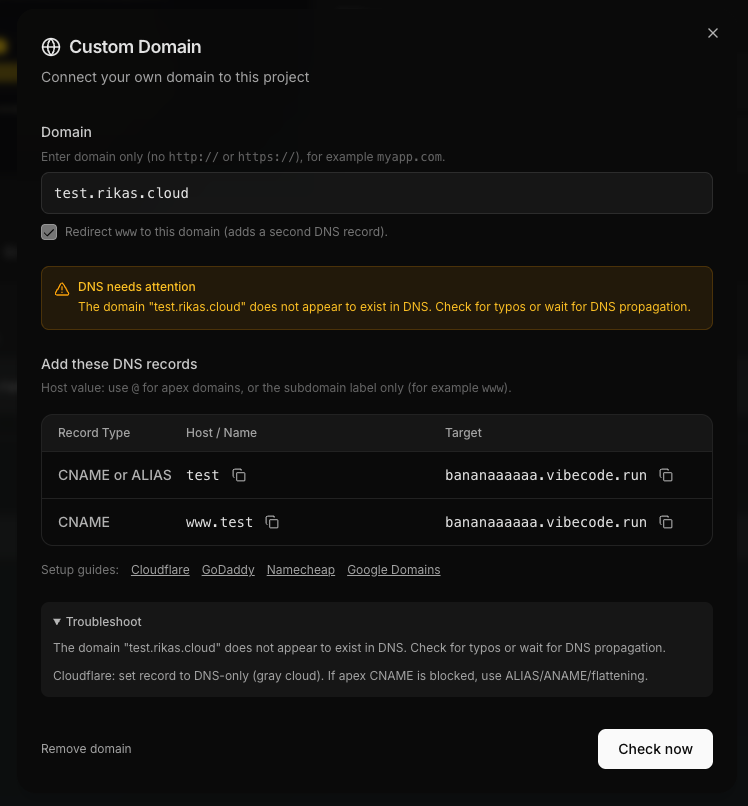 If you're using Cloudflare, make sure the DNS record is set to **DNS-only mode** rather than **Proxied**.
If you already have A or AAAA records pointing your domain somewhere else, they can conflict with the CNAME record. Remove the old records first.
DNS changes do not take effect instantly. Wait a bit and try the verification again.
You can click **Remove domain** in the Domain tab to disconnect your custom domain and start over.
Still stuck? Reach out via live support chat in the app, or join our [Discord community](https://discord.gg/qXyWYYX5Ts) for help.
If you're using Cloudflare, make sure the DNS record is set to **DNS-only mode** rather than **Proxied**.
If you already have A or AAAA records pointing your domain somewhere else, they can conflict with the CNAME record. Remove the old records first.
DNS changes do not take effect instantly. Wait a bit and try the verification again.
You can click **Remove domain** in the Domain tab to disconnect your custom domain and start over.
Still stuck? Reach out via live support chat in the app, or join our [Discord community](https://discord.gg/qXyWYYX5Ts) for help.