How to make money from a mobile app without coding: validate free, then publish and charge
VibeCode Team
Author

You’ve got an idea and maybe a Figma mock. But the moment you try to ship, you’re told to hire an agency or wait months for a contractor. Weeks pass, invoices pile up, and you still don’t have something people can use.
Worse, most folks won’t install a brand-new app just to “try it.” No install means no feedback, no proof they’d pay, and no momentum. That’s how good ideas quietly die on the whiteboard.
Here’s the no-BS path that actually ships: use VibeCode to turn a plain-English prompt into a working app on the Free plan, share an App Clip so anyone can try it instantly with no install, collect what they want and what they’d pay for, then upgrade to Pro to publish and monetize on the App Store.
How to make money from a mobile app without coding on the Free plan
Build a real app from a prompt in minutes
- Create a VibeCode account.
- Type your idea in plain English. Example: “recipe notebook with photo upload and favorites.”
- Generate your app. VibeCode acts like an AI app architect, producing a real React Native scaffold with navigation, state, and UI, so you can focus on product, not boilerplate.
- Use it immediately on your phone. Iterate by tweaking your prompt and regenerating.
What this solves:
- No setup rabbit holes: structure, routing, and state are handled.
- Fast loops: you can try ideas the same day.
- Mobile-first flow: build and test right from your phone.
Share an App Clip to validate before you spend a dollar
- Share the App Clip link so people can try it without installing.
- Post it on X.
- Send it to friends and family.

- Ask for specifics and write them down:
- Which features they want next.
- What they might pay for and why.
- Any friction in the first 60 seconds.
- Keep the loop tight: update your prompt, regenerate, and share again. You’re collecting signal, not polishing.
Publish to the App Store on Pro and turn validation into revenue
App Setup
- Open the VibeCode App Store flow.
- Enter your app name.
- Upload your app logo.
- Confirm the bundle identifier if shown.
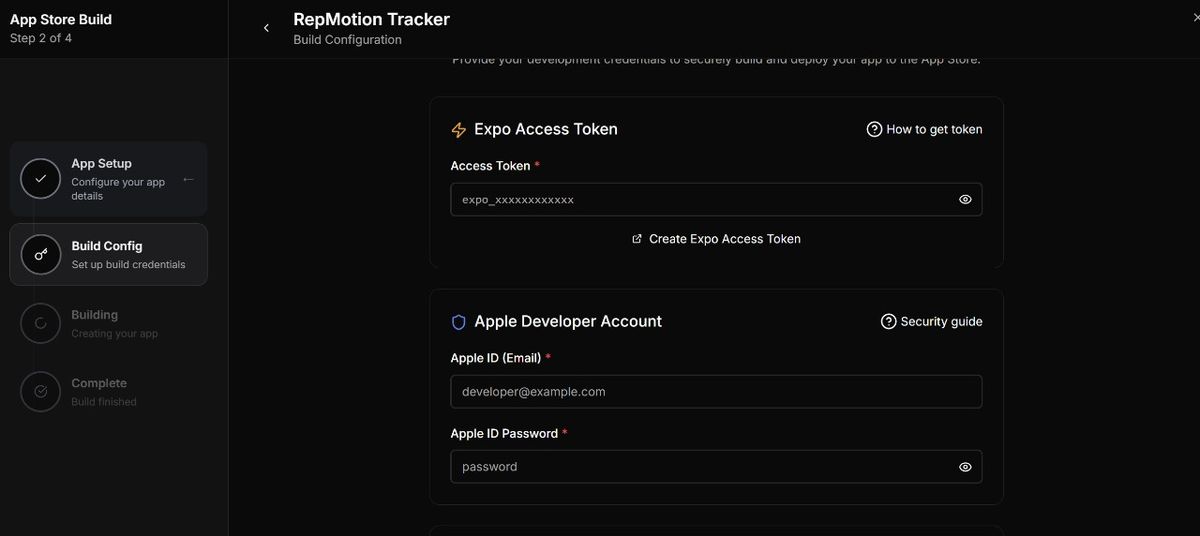
Build Config
- Go to expo.dev.
- Account Settings → Access Tokens → Create Token → copy.
- Paste the token into VibeCode.
- Apple Developer Account:
- Enter your Apple ID email and password.
- Approve the Apple 2FA prompt and enter the code.
- Optional: add your Apple Team ID if required for your org.
Build, submit, monetize
- Hit build. VibeCode creates your build.
- Complete: submit to the App Store.
- After approval, configure monetization based on your model:
- Subscriptions for ongoing value like sync, backups, or pro features.
- One-time purchase or IAPs for premium features.
- Result: you launch and monetize without hiring developers.
Quick tip: during App Clip testing, track the exact phrases people use when they ask for features or say they’d pay. Let that language shape your paywall copy and pricing, not a guessy meeting.
Summary and next step
- Build on VibeCode Free from a plain-English prompt.
- Share the App Clip to validate what users want and will pay for.
- Upgrade to Pro, run the App Store flow, and enable monetization once you see interest.
Ready to ship without touching code? Create your VibeCode account, type your idea, share the App Clip today, then upgrade to Pro and publish when the signals are there.